
This page contains the description of the following commands
\c,
\C,
\cal,
\calc,
\cap,
\Cap,
\caption,
\caps,
\@car,
\catcode,
\cdot,
\@cdr,
\@cclv,
\@cclvi,
\cdots,
\cellattribute,
\centerdot,
\centering,
\centerline,
\cfoot,
\cgloss@gll,
\cgloss@glll,
\ChangeElementName,
\chapter,
\chaptermark,
\char,
\chardef,
\chead,
\check,
\chi,
\choose,
\circ,
\circeq,
\circle,
\circlearrowleft,
\circlearrowright,
\circledS,
\circledast,
\circledcirc,
\circleddash,
\citation,
\cite,
\cite@one,
\citepunct,
\cite@simple,
\cite@type,
\cite@@type,
\cititem,
\cleaders,
\cleardoublepage,
\clearpage,
\cline,
\closecurve,
\closein,
\closeout,
\clubpenalties,
\clubpenalty,
\clubsuit,
\colon,
\color,
\colorbox,
\columnwidth,
\columnsep,
\columnseprule,
\complement,
\cong,
\@cons,
\coprod,
\copy,
\copyright,
\cos,
\cosh,
\cot,
\coth,
\count,
\count@,
\countdef,
\cr,
\crcr,
\csc,
\csname,
\cup,
\Cup,
\curlyeqprec,
\curlyeqsucc,
\curlyvee,
\curlywedge,
\currentgrouplevel,
\currentgrouptype,
\currentifbranch,
\currentiflevel,
\currentiftype,
\curvearrowleft,
\curvearrowright,
\curve,
and environments
cases,
catperso,
center,
comment.
The \c command generates a cedilla accent. The translation of
\c C \c c \c{\'C} \c{\'c} \c D \c d \c E \c e \c{\u E} \c{\u e} \\
\c H \c h \c G \c g \c K \c k \c L \c l \c N \c n \c R \c r
\c S \c s \c T \c t
is
Ç ç Ḉ ḉ Ḑ ḑ Ȩ ȩ Ḝ ḝ
Ḩ ḩ Ģ ģ Ķ ķ Ļ ļ Ņ ņ
Ŗ ŗ Ş ş Ţ ţ
Preview
HTML characters Ç ç Ḉ ḉ Ḑ ḑ Ȩ ȩ Ḝ ḝ Ḩ ḩ Ģ ģ Ķ ķ Ļ ļ Ņ ņ Ŗ ŗ Ş ş Ţ ţ
The \C command generates a double grave accent. Example
\C A \C a \C E \C e \C I \C i \C O \C o \C R \C r \C U \C u
The translation is
Ȁ ȁ Ȅ ȅ Ȉ ȉ
Ȍ ȍ Ȑ ȑ Ȕ ȕ
Preview 
HTML characters Ȁ ȁ Ȅ ȅ Ȉ ȉ Ȍ ȍ Ȑ ȑ Ȕ ȕ
This is a math font command (declaration). Upper case letters are converted to calligraphic style. Example ${\cal ABCDE FGHIJ KLMNO PQRST UVWXYZ}$. This translates into
<formula type='inline'> <math xmlns='http://www.w3.org/1998/Math/MathML'> <mrow> <mi>𝒜</mi><mi>ℬ</mi><mi>𝒞</mi><mi>𝒟</mi><mi>ℰ</mi> <mi>ℱ</mi><mi>𝒢</mi><mi>ℋ</mi><mi>ℐ</mi><mi>𝒥</mi> <mi>𝒦</mi><mi>ℒ</mi><mi>ℳ</mi><mi>𝒩</mi><mi>𝒪</mi> <mi>𝒫</mi><mi>𝒬</mi><mi>ℛ</mi><mi>𝒮</mi><mi>𝒯</mi> <mi>𝒰</mi><mi>𝒱</mi><mi>𝒲</mi><mi>𝒳</mi><mi>𝒴</mi><mi>𝒵</mi> </mrow> </math> </formula>
Preview  .
(See also here)
.
(See also here)
You should not use the \calc command. On the other hand, if you load the calc package, then commands like \setcounter, \addtocounter, \setlength and \addtolength add a \calc token in front. This allows infix calculations. Example:
\newcounter{Ac}
\setcounter{Ac}{(1+2)*(3+4)-20}\theAc=1
\addtocounter{Ac}{(1*2)+(3*-4)+(34/7)}\theAc=-5
Here is an extract of the log file for the code above. It shows the expansion of \setcounter. The calc function computes the quantity indicated in the line calc argument XX, the result is indicated in the line calc res YY. This result is put in the value, or added to it.
[334] \newcounter{Ac}
{\newcounter}
{\countdef \c@Ac=1552}
[335] \setcounter{Ac}{(1+2)*(3+4)-20}\theAc=1
\setcounter->\calc  {\global \c@Ac }
{\calc }
{calc modifying integer at position 1552}
{calc argument: (1+2)*(3+4)-20}
+scanint for \calc ->1
{calc primitive =1}
{calc +-}
+scanint for \calc ->2
{calc primitive =2}
{calc primitive =3}
{calc */}
+scanint for \calc ->3
{calc primitive =3}
{calc +-}
+scanint for \calc ->4
{calc primitive =4}
{calc primitive =7}
{calc +-}
+scanint for \calc ->20
{calc primitive =20}
{calc res 1}
...
[336] \addtocounter{Ac}{(1*2)+(3*-4)+(34/7)}\theAc=-5
\addtocounter->\calc  {\global \advance \c@Ac }
{\calc }
{calc modifying integer at position 1552}
{calc argument: (1*2)+(3*-4)+(34/7)}
...
{calc res -6}
It is possible to multiply or divide a dimension by an integer. In order to multiply by a real number, you must use the \real{...} construct, where you give the digits, or the \ratio{num}{den} construct, where you give the ratios of two dimensions. Example
\newlength{\Bc}
\setlength{\Bc}{(1cm+2cm)*(3+4)-200mm} \the\Bc=28.4526pt
\setlength\Bc{\the\Bc*\ratio{25.4pt}{722.7pt}} \the\Bc=0.99985pt
\Bc=1in \setlength\Bc{\the\Bc * 100 / 7227} \the\Bc=0.99998pt
\Bc=1in \setlength\Bc{\the\Bc * \real{ 0.01383700013837}} \the\Bc=1.00018pt
\Bc=1cm \setlength\Bc{\the\Bc / \real{28.452755}} \the\Bc=0.99985pt
\Bc=1cm \setlength\Bc{\the\Bc * \ratio{254pt}{7227pt}} \the\Bc=0.99985pt
\Bc=1in \setlength\Bc{\the\Bc / \ratio{7227pt}{100pt}} \the\Bc=1.00018pt
\Bc=1IN \setlength\Bc{\the\Bc / \ratio{7227PT}{100pT}} \the\Bc=1.00018pt
This example shows how to compute the quotient and remainder of two numbers.
\newcounter{hours}\newcounter{minutes}
\newcommand{\printtime}{%
   \setcounter{hours}{\time/60}%
   \setcounter{minutes}{\time-(\value{hours}*60)}
   \thehours h \theminutes min}
The time is \printtime.
The \cap command is valid only in math mode. It generates
a binary operator (looks like a cap, used for set intersection):
<mo>∩</mo>
(Unicode U+2229, ∩)
that renders like
 . See description of the
\pm command.
. See description of the
\pm command.
The \Cap command is valid only in math mode. It generates a binary operator <mo>⋒</mo>. (Unicode U+22D2, ⋒).
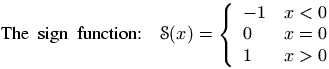
The cases environment produces an array, with two left aligned columns, and a brace on the right. Example
\[\text{The sign function: \ }
\mathcal{S}(x) = \begin{cases}
-1&x<0 \\
0&x=0 \\
1&x>0
\end{cases}
\]
The translation is
<formula type='display'>
<math mode='display' xmlns='http://www.w3.org/1998/Math/MathML'>
<mrow>
<mrow>
<mtext>The</mtext>
<mspace width='4.pt'/>
<mtext>sign</mtext>
<mspace width='4.pt'/>
<mtext>function:</mtext>
<mspace width='4.pt'/>
<mspace width='4.pt'/>
</mrow>
<mi>𝒮</mi><mo>(</mo><mi>x</mi><mo>)</mo><mo>=</mo>
<mfenced separators='' open='{' close='.'>
<mtable>
<mtr>
<mtd columnalign='left'><mrow><mo>-</mo><mn>1</mn></mrow></mtd>
<mtd columnalign='left'><mrow><mi>x</mi><mo><</mo><mn>0</mn></mrow></mtd>
</mtr>
<mtr>
<mtd columnalign='left'><mn>0</mn></mtd>
<mtd columnalign='left'><mrow><mi>x</mi><mo>=</mo><mn>0</mn></mrow></mtd>
</mtr>
<mtr>
<mtd columnalign='left'><mn>1</mn></mtd>
<mtd columnalign='left'><mrow><mi>x</mi><mo>></mo><mn>0</mn></mrow></mtd>
</mtr>
</mtable>
</mfenced>
</mrow>
</math>
</formula>
Inside a figure or table environment you can use \caption for a caption. Only one caption is allowed. See these environments for examples.
Command from the soul package, that takes an argument and behaves like \textit. For an example, see \ul.
There are different ways to manipulate lists of tokens; some of them use Lisp names, like those described here. The \@nil command is undefined, it is used as end-of-list marker. The \@nnil command is a macro without argument whose expansion is \@nil; it is in general used in comparisons. Both commands \@car and \@cdr read a token list terminated by \@nil, they return the first token, or the remaining ones.
In Lisp, cons(A,B) produces a list whose car is A and whose cdr is B; in other words, it adds a list element A in front of a list B. In TeX most functions add material at the end of the list, for instance \addto@hook; this is a command that takes as first argument a reference to a token list register, it appends the second argument to the end of the list. The command \g@addto@macro behaves the same, but the first argument is the name of a command without argument. The g in the command name means that the command is globally modified. The command \@cons behaves in a similar fashion, but the result is fully expanded, moreover, the \@elt token is added at the end of the initial list. For instance \@addtoreset{foo}{bar} constructs the token \cl@bar and calls \@cons with {foo} (with the braces) as second argument. In some cases (for instance when you say \stepcounter) the command \cl@bar is evaluated, with some value of \@elt (for instance, as a macro that takes one argument, a counter name and resets it).
\def\test#1{\def\res{#1}\ifx\foo\res\else \ERROR\fi}

\edef\foo{\@car 123\@nil} \test{1}
\edef\foo{\@car {1}23\@nil} \test{1}
\edef\foo{\@car {123}{456}{7}\@nil} \test{123}
\edef\foo{\@carcube1234567\@nil}\test{123}
\edef\foo{\@cdr 123\@nil} \test{23}
\edef\foo{\@cdr {134}{x}\@nil}   \test{x}
\edef\foo{\@cdr {134}{{x}}\@nil} \test{{x}}
\let\foo\@nnil \test{\@nil}
\toks@={abc\foo}\addto@hook\toks@{x\bar}
\expandafter\def\expandafter\foo\expandafter{\the\toks@} \test{abc\foo x\bar}
\g@addto@macro\foo{y\gee} \test{abc\foo x\bar y\gee}
\def\xx{456}
\def\foo{123}\@cons\foo{\xx78}\test{123\@elt45678}
When you say \catcode13 12, you change the category code of the character number 13 to the value 12. See scanint for details of how numbers are read. The first integer must be a valid character code (between 0 and 255 in TeX, up to 65535 in Tralics), and the second a valid category code (between 0 and 15). See documentation on catcodes for how to use them. In a construction like \catcode`\A=\catcode`\a, the first number is `\A, it is followed by an optional equals sign, and the second number is \catcode`\a: this is the value of the category code of the letter a.
The catperso environment takes one argument (a title), and the content is put in a <catperso> element. This content should be a list of \pers commands. See \pers for an example.
If you say \count\@cclv=\@cclvi, this puts 256 into the count register number 255. Do not use these constants in any other context.
The \cdot command is valid only in math mode. It generates a binary operator (centered dot): <mo>·</mo>. (Unicode U+B7, ·) See description of the \pm command.
The \cdots command is valid only in math mode. It generates a miscellaneous symbol (three centered dots in a row): <mo>⋯</mo>. (Unicode U+22EF, ⋯) See description of the \ldots command.
If you say \cellattribute{columnalign}{left}, this adds the attribute pair columnalign='left' to the current cell. The command can be used only in math mode; you should not use this command outside a table (or a construction like the align environment that produces a table). For an example of use, see \mathattribute.
The effect of \begin{center} ... \end{center} is more or less the same as {\centering ...}. See below.
The \cdot command is valid only in math mode. It generates a centered dot: <mo>⋅</mo>. (Unicode U+22C5, ⋅) See description of the \pm command.
The \centering command has two effects. It defines locally some variable to a non-zero value (one, in fact). If this variable is set, every paragraph will have a rend attribute (here rend='center'). The commands \par, \indent and \noindent will behave in the same fashion (indentation is incompatible with centering). The variable is also set by the \raggedleft or \raggedright commands (in these cases, indentation makes sense). Moreover, if the current paragraph has no rend attribute, one will be added.
Instead of using the
\centering, \raggedleft or \raggedright
commands, you can use the center, flushright or
flushleft environments. You can also use two
environments quote and quotation, that are not
associated to a command. These environments start a new paragraph.
Note that flushright
is the equivalent of raggedleft
.
Example.
{\centering a \indent a1 \noindent a2 \\ a3\par a4} \par
{\raggedleft b \indent b1 \noindent b2 \\ b3\par b4} \par
{\raggedright c \indent c1 \noindent c2 \\ c3\par c4} \par
{\centering\raggedright d \indent d1 \noindent d2 \\ d3\par d4} \par
{f\centering\raggedright e \indent e1 \noindent e2 \\ e3\par e4} \par
\begin{center}A \indent A1 \noindent A2 \\ A3 \par A4\end{center}
\begin{flushright}B \indent B1 \noindent B2 \\ B3 \par B4\end{flushright}
\begin{flushleft}C \indent C1 \noindent C2 \\ C3\par C4\end{flushleft}
\begin{center}\begin{flushleft}D \indent D1 \noindent D2 \\ D3\par D4\end{flushleft}\end{center}
F\begin{center}\begin{flushleft} E \indent E1 \noindent E2 \\ E3 \par E4\end{flushleft}\end{center}
\begin{quote}I \indent I1 \noindent I2 \\ I3 \par I4\end{quote}
\begin{quotation}J \indent J1 \noindent J2 \\ J3 \par J4\end{quotation}
The translation is the following. There are two lines with \centering\raggedright. In the first case, the command is seen in vertical mode (outside paragraph), so that the letter d will be in a new paragraph, a flushed-left one. In the second case, the command appears in vertical mode, so that f\centering will center the f (and the e that follows). The e1 is flushed-left since \\ start a new paragraph. On the other hand, D and E are flushed left, because the environment insert an implicit \par (both letters are seen in vertical mode).
The XML result is shown here.
The names in the example above are not hard coded. If the configuration file contains the following lines,
  att_rend = "Rend"
  att_centering = "Center"
  att_flush_left = "FlushLeft"
  att_flush_right = "FlushRight"
  att_quote = "Quote"
  att_quotation = "Quotation"
  att_noindent = "Noindent"
then the translation will be as shown here.
Implemented as a no-op in Tralics for compatibility reasons before version 2.11.3. After that, the three commands \centerline, \leftline and \rightline are ignored inside a table or figure, they start a new paragraph otherwise. These three commands, as well as \llap and \rlap produce a line element, with an attribute depending on the command. Example:
\centerline{A\it B}\leftline{C\it D}\rightline{E\it F}\rlap{G\it H}\llap{I\it J}
Translation
<p>
<line rend='center'>A<font-italic-shape>B</font-italic-shape></line>
<line rend='left'>C<font-italic-shape>D</font-italic-shape></line>
<line rend='right'>E<font-italic-shape>F</font-italic-shape></line>
<line rend='rlap'>G<font-italic-shape>H</font-italic-shape></line>
<line rend='llap'>I<font-italic-shape>J</font-italic-shape></line></p>
The \cfoot command is valid only if the fancyvrb package is loaded. It takes an optional argument A, and a required argument B (the default value of A is B). The effect is to define the middle part of the page footer to A for even pages, to B for odd pages. For more information, see documentation of \fancyhf.
These are the internal commands used by the cgloss4e package.
The default translation of \pagereref{here} has the form <ref target='uid2' rend='page'/> You can change it to <Ref target='uid2' rend='Page'/> by either adding a declaration in the configuration file (the first three lines shown here produce the same effect):
xml_ref_name="Ref"
xml_ref="Ref"
elt_ref="Ref"
att_page="Page"
or by adding a declaration in the source file, as shown here. There is no prefix such as 'elt or 'att'. The starred version changes the attribute name, the unstarred one changes the element name.
\ChangeElementName{ref}{Ref}
\ChangeElementName*{page}{Page}
There are are items in the configuration file that do not start with one of those prefixes; the value cannot be changed in the TeX file. In some cases, setting a value in the configuration file is equivalent to specifying an argument to the Tralics program, in this case the behavior is explained in Options of the tralics command, otherwise follow links.
The \chapter command is used to divide a text in smaller parts. It increments the chapter counter and resets the dependent counters. See the description of the \part command.
The \chaptermark command takes one argument, and does nothing. It is called in LaTeX, by the \chapter command, with as argument the name of the chapter. (In Tralics, the sectioning commands like \chapter do not call \xxxmark). Its purpose is to define page marks. See \markright for explanations on \markmark and \markboth and the mark system.
In the report class, page headings use either \leftmark and \rightmark (for even and odd numbered pages) or \rightmark (single-side case). The \ps@headings command redefines the mark command as follows.
% two-sided code
\renewcommand\chaptermark[1]{%
  \markright {\MakeUppercase{%
     \ifnum \c@secnumdepth >\m@ne
         \@chapapp\ \thechapter. \ %
     \fi
     #1}}}
% single-sided case
\renewcommand\chaptermark[1]{%
  \markboth {\MakeUppercase{%
    \ifnum \c@secnumdepth >\m@ne
        \@chapapp\ \thechapter. \ %
    \fi
    #1}}{}}%
The \char command is a TeX primitive that reads an integer that should be a valid letter. In TeX, numbers should be in the range 0-255. See scanint for details. In Tralics, a 27bit integer is allowed. Characters less than 32 or greater than 255 are printed using a &# notation; the three characters < > and & are printed symbolically, the null character is not printed; otherwise the character is printed as-is.
In the following example, the current language is French, and the last line shows what Tralics does with normal characters. There is also a line indicating the result in verbatim mode.
{\language=1
\char60\ \char0\ \char 10\ \char233\ \char 300\
\char126\ \char45- \char39' \char96` \char60< \char62>
\char59\char58\char33\char63\char171\char 187\char38
\verb@~--''``<<>>;:!?«»&@
~--''``<<>>;:!?«»\&}
The XML result is the following:
< 
 é Ĭ ~ -- '' `` << >> ;:!?«»& <hi rend='it'>~-​-​'​'​ `​`​<​<​>​ >​;:!?«»&</hi> – »« « » ; : ! ?« »&
Note the following. Using the \char command disable ligatures (double and triple dash into en-dash or em-dash, quotes into guillemets in French). The same is done in verbatim mode. However, in verbatim mode a special ​ character entity is added (depending on the command line options), to make sure that the ligatures will not appear later (for instance, if TeX rereads the XML).
If you say \chardef\foo124, then you can use \foo instead of \char124. See scanint for how numbers are read. For instance, after the declaration \chardef\#=`\#, you can use \# when you want to typeset a sharp sign. In TeX, characters have 8bits, Tralics allows 27bit characters. (The translation of \char67108864 is �, whether or not this is valid XML.)
After \chardef\active=13, you can say \catcode`\A=\active when you want the letter A to become active. (the \active command is defined in this way in LaTeX and Tralics). But outside this context, \active is a character (German opening comma in the T1 font encoding).
Finally, the \newbox command uses \chardef for defining the reference.
The \chead command is valid only if the fancyvrb package is loaded. It takes an optional argument A, and a required argument B (the default value of A is B). The effect is to define the middle part of the page header to A for even pages, to B for odd pages. For more information, see documentation of \fancyhf.
The \check command puts a check accent over a kernel. It works only in math mode (in text mode, you should use the \v command). See also the \acute command.
The \chi command is valid only in math mode. It generates
a Greek letter:
<mi>χ</mi>
(Unicode U+3C7, χ)
that renders like
 . See description of the
\alpha command.
. See description of the
\alpha command.
This is a Plain TeX command, defined as \atopwithdelims(). Instead of a\choose b, you should use the LaTeX construction \binom{a}{b}. See description of the \atopwithdelims and \binom commands.
The \circ command is valid only in math mode. It generates
a binary operator (small circle):
<mo>∘</mo>
(Unicode U+2218, ∘)
that renders like
 . See description of the
\pm command.
. See description of the
\pm command.
The \circeq command is valid only in math mode. It generates <mo>≗</mo> (Unicode U+2257, ≗).
You can say \circle{diam} or \circle*{diam} in a picture environment. The result is a (hollow) circle or a disk (filled circle), whose center is the reference point, and whose diameter is the argument. Examples are given elsewhere.
The \circlearrowleft command is valid only in math mode. It generates <mo>⥀</mo> (Unicode U+2940, ⥀).
The \circlearrowright command is valid only in math mode. It generates <mo>⥁</mo> (Unicode U+2941, ⥁).
The \circledS command is valid only in math mode. It generates <mo>Ⓢ</mo> (Unicode U+24C8, Ⓢ).
The \circledast command is valid only in math mode. It generates <mo>⊛</mo> (Unicode U+229B, ⊛).
The \circeq command is valid only in math mode. It generates <mo>⊚</mo> (Unicode U+229A, ⊚).
The \circleddash command is valid only in math mode. It generates <mo>⊝</mo> (Unicode U+229D, ⊝).
The \citation command is used by Tralics to start a bibliographic reference. In general, the command is created by Tralics from a bib file. Let's consider this reference to the MathML Web page.
@Misc{mathml2,
  author =  {David Carlisle and
             Patrick Ion and
             Robert Miner and
             Nico Poppelier},
  title = 	 {Mathematical Markup Language (MathML) Version 2.0},
  howpublished = {http://www.w3.org/TR/MathML2/},
  year = 	 {2001},
}
It will be translated by Tralics into this piece of LaTeX code.
\citation{CIMP01}{cite:mathml2}{bid4}{year}{misc}
\bauthors{\bpers[David]{D.}{}{Carlisle}{}
  \bpers[Patrick]{P.}{}{Ion}{}\bpers[Robert]{R.}{}{Miner}{}
   \bpers[Nico]{N.}{}{Poppelier}{}}
\cititem{btitle}{Mathematical Markup Language (MathML) Version 2.0}
\cititem{bhowpublished}{http://www.w3.org/TR/MathML2/}
\cititem{byear}{2001}
\endcitation
The \citation command takes 5 parameters. The first argument is the printed key. This is computed by Tralics as the initials of the authors, plus two digits of the year (in some cases, it can be a number, from one to N). The next argument is the cite key (note that \cite{foo} wants a citation with cite:foo). The next argument is a unique ID (Tralics uses bid plus an integer). Then comes a string that is used for the Raweb (`year' is the default, but it can be `foot' or `refer'). The last argument is a string (Tralics uses the bibtex type of the entry). After this fifth argument, there can be an optional argument that is ignored. The translation of \citation is a <cit> element with all the arguments as attributes. Here is the translation of the previous entry.
<citation from='year' key='CIMP01' id='bid4' userid='cite:mathml2' type='misc'>
<bauteurs><bpers prenom='D.'  nom='Carlisle' prenomcomplet='David'/>
  <bpers prenom='P.' nom='Ion'  prenomcomplet='Patrick'/>
  <bpers prenom='R.' nom='Miner' prenomcomplet='Robert'/>
  <bpers prenom='N.' nom='Poppelier'  prenomcomplet='Nico'/>
  </bauteurs>
<btitle>Mathematical Markup Language (MathML) Version 2.0</btitle>
<bhowpublished>http://www.w3.org/TR/MathML2/</bhowpublished>
<byear>2001</byear>
</citation>
The \cite command takes as argument a list of bibliographic references and generates a <cit> element for each reference. The value of the element is a <ref> element, whose target attribute is computed when Tralics translates the \citation command associated to it (see \citation); this mechanism has been generalised in version 2.5, see \cite@one.
The \natcite command produces a single <Cit> element, containing one <ref> per citation. For instance \natcite[foo][bar][gee]{ref1,ref2} translates to
<Cit type='foo'>(bar <ref target='bid0'/>;<ref target='bid1'/>, gee)</Cit>
The parentheses, commas, semi-colons etc are customized via the natbib package.
The \cite command can take an optional argument, which is added to the first <cit> element. No \cite command can appear in the bibliography. Example:
\cite{toto,titi} \cite[text]{toto,titi}
\cite{mathml2}\cite[foo]{mathml2}
This is the resulting XML.
<cit><ref target='bid0'/></cit><cit><ref target='bid1'/></cit>
<cit><ref target='bid0'>text</ref></cit><cit><ref target='bid1'/></cit>
<cit><ref target='bid2'/></cit><cit><ref target='bid2'>foo</ref></cit>
The resulting preview could be:
 .
Here the value of the optional argument
has disappeared, the red color means that you can click on it (of course,
you cannot click on the image).
.
Here the value of the optional argument
has disappeared, the red color means that you can click on it (of course,
you cannot click on the image).
The exact mechanism is the following. The \cite command has two optional arguments, type and text, if only one argument is given, it is the text. If the type is `year' or `refer', it is replaced by an empty value. The \footcite command is equivalent to \cite, but the type is `foot', there is one optional argument, the text. The required argument of both the commands is a list of references. A token list is constructed as follows: \footcitepre is inserted in the case of \footcite. For each X in the reference list, \cite@one{type}{X}{text} is added to the result; the `text' is reset to empty after the first use. A separator is added between two references; it is \footcitesep for \footcite, and \citepunct otherwise. In the example shown above, we assume that the expansion of this separator is empty. Once the list is constructed, it will be expanded.
This command is used as separator for citations. Its default value is comma-space.
The \cite@one{X}{Y}{Z} command is an
internal command for citations. There are three arguments: type, ref and text.
The translation is a single <cit> element.
The value of the element is a <ref> element, whose
target attribute points to an element
created by the \citation command, according to the type and ref
arguments (see also 2.8.3 Bibliography and the raweb).
Its value is the translation of the text argument.
In the case where the type is foot
, then rend='foot'
is added to the attribute list of the <cit> element.
Translation of \cite@simple{Knuth} is <ref target='xx'/>.
If \cite@@type is defined, it should be a command without arguments, whose translation is only text; this text is added by \cite@one to the attribute list of the current element, with name 'type'. [What follows applies to version before 2.12.1] In the file natbib.plt v1.0, we defined \def\cite@type#1#2{{\def \cite@@type {#1} \cite{#2}}}, and \def\citeyear{\cite@type{year}}. Thus, \citeyear is like \cite, but it takes no optional argument. Each <cit> element has the attribute type='year'.
The \cititem command takes two arguments, the first is a character string, that should be a valid XML element name, the second argument is the content of this element; for usage, see \citation. The translation of \cititem{foo}{bar} is <foo>bar</foo>. The command is allowed only in bibtex mode (say, inside a citation environment). However, if \cititem-foo is defined (and not \relax), this command is called with argument bar, and can be used, whatever the context.
The \cleaders commands reads a box and names it `cleaders'. See \xleaders for details.
The \cleardoublepage command did nothing in Tralics until version 2.11.3. It translates now to <cleardoublepage/>, since there is no page (neither single nor double) to clear.
The \clearpage command did nothing in Tralics until version 2.11.3. It translates now to <clearpage/>.
The \cline command takes one argument that is formed of two integers A and B separated by a dash, with 0< A<=B for instance, \cline{6-6}, but you can also say \count0=1 \count1=3 \cline{\count0 -\count1}. The effect is to put an horizontal rule between rows A and B in a table. The idea is to add, to some cells of the current current row, a bottom-border='true' attribute; the spans of each being taken into account. If this fails, then a new row is added; it contains an empty cells that spans over A-1 columns, followed by a cell that spans over B+1 columns, with a bottom-border='true' attribute. See description of the \\ command for an example. See also the page on arrays.
The \closecurve command is defined by the curves package. See \arc.
You say \closein N, where N is a valid input channel number (between 0 and 15, see scanint for details). This closes input channel number N. See \openin for an example.
You say \closeout N, where N is a valid output channel number (between 0 and 15, see scanint for details). This closes output channel number N. See \openout for details.
This is an extension defined by ε-TeX. See \widowpenalties for syntax and usage.
When you say \clubpenalty=100, then TeX will use 100 as penalty for a lonely line at the bottom of a page, when it computes optimal page breaks. Unused by Tralics. (See scanint for details of argument scanning).
The \clubsuit command is valid only in math mode.
It generates a miscellaneous symbol (looks like a club suit):
<mo>♣</mo>
(Unicode U+2663, ♣)
that renders like
 .
See description of the
\ldots command.
.
See description of the
\ldots command.
The \colon command is valid only in math mode. It generates <mo lspace='0pt'>:</mo>. This is a colon that has no space on the left.
Colors are implemented in Tralics since version 2.13.4. The idea is to define a color pool, and use references to it. The set of used colors will be included at the start of the XML document, see example below. The color package predefines basic colors (black, white, red, green, blue, cyan, magenta, yellow), and if the option dvipsnames is given, more colors (like Red, WildStrawberry) are defined in the named model. In the example that follows, colors 77, 79, and 80 are anonymous, while color 78 is user defined. We show here the pool used in the example that follows.
<colorpool><color id='colid3' value='1,0,0' model='rgb' name='red'/>
<color id='colid4' value='0,1,0' model='rgb' name='green'/>
<color id='colid10' value='0,0,1,0' model='cmyk' name='Yellow'/>
<color id='colid24' value='0,1,1,0' model='cmyk' name='Red'/>
<color id='colid27' value='0,0.96,0.39,0' model='cmyk' name='WildStrawberry'/>
<color id='colid51' value='1,1,0,0' model='cmyk' name='Blue'/>
<color id='colid77' value='.1,.2,.3' model='rgb'/>
<color id='colid78' value='.1,.2,.3' model='rgb' name='mygreen'/>
<color id='colid79' value='0,1,1,1' model='cmyk'/>
<color id='colid80' value='.1,.2,.3,.4' model='cmyk'/>
</colorpool>
The interpretation of \textcolor{red}{text} is the same as {\color{red}text}. These two commands accept either a declared color (like red, Yellow or mygreen) or a color model and a value as in \color[rgb]{.1,.2,.3}. For simplicity \color[named]{Yellow} is the same as \color{Yellow} (in LaTeX, this equivalence is provided only if the package option usenames is given). The effect of \color{red} is to select the color `colid3' as current color. The \normalcolor command selects the normal color. Tralics implements colors like fonts: whenever a new paragraph is started, it may contain one or more <hi> elements with the current color or font. Example.
{\color{red} textA \par textB {\it textC} textD}out
{\color{Red} textD \color {Blue} textE \color[rgb]{.1,.2,.3} textF}out
{\color[named]{Yellow} textG {\normalcolor this} and that}
\colorbox{red}{textH etc\textcolor{myred}{redtext}etc\textcolor{mygreen}{greentext}}
Translation
<p><hi color='colid3'>textA</hi></p>
<p><hi color='colid3'>textB </hi><hi rend='it'><hi
    color='colid3'>textC</hi></hi><hi color='colid3'> textD</hi>out
<hi color='colid24'> textD </hi><hi color='colid51'> textE </hi><hi
    color='colid77'> textF</hi>out
<hi color='colid10'> textG </hi>this<hi color='colid10'> and that</hi>
<mbox color='colid3'>textH etc<hi color='colid27'>redtext</hi>etc<hi
  color='colid78'>greentext</hi></mbox>
The command \definecolor takes 3 arguments, a color name, a model and a value. If the model is named, the value should be the name of a color declared in the named model like Yellow. In fact, in the example below, myred is a synonym for WildStrawberry, and Tralics does not check that the color exists (an error will be signaled later, when the color is used). The \pagecolor takes the same arguments as \color, translation is a <pagecolor> element with a color attribute.
\definecolor{myred}{named}{WildStrawberry}
\definecolor{mygreen}{rgb}{.1,.2,.3}
\pagecolor{green}\pagecolor[rgb]{0,1,0}
\colorbox{red}{textH etc\textcolor{myred}{redtext}etc%
 \textcolor{mygreen}{greentext}}
\colorbox[cmyk]{0,1,1,1}{textI}
\fcolorbox{red}{green}{textJ}
\fcolorbox[cmyk]{0,1,1,1}{.1,.2,.3,.4}{textK}
Translation
<pagecolor color='colid4'/><pagecolor color='colid4'/>
<mbox color='colid3'>textH etc<hi color='colid27'>redtext</hi>etc
     <hi color='colid78'>greentext</hi></mbox>
<mbox color='colid79'>textI</mbox>
<mbox color2='colid4' color='colid3'>textJ</mbox>
<mbox color2='colid80' color='colid79'>textK</mbox>
These two commands behave like \mbox, they produce a <mbox> element, but take an additional argument (the color) or two arguments (in the case of \fcolorbox, it is the color and the frame color). An additional optional argument specifies the color model, see example above.
These three dimensions are used by LaTeX in two column mode; they give respectively the width of each column, the distance between these columns, and the width of the rule between them (if zero, there is no rule between columns). Setting these values has currently no effect in Tralics. Before version 2.13.4, the width of the image in \includegraphics[width=.1\columnwidth]{xx} was 15mm, regardless of the columnwidth.
Every line between \begin{comment} and \end{comment} is ignored, the content can be anything, but the final line should contain only \end{comment}. For an example, see the description of the latexonly environment.
The \complement command is valid only in math mode. It generates <mo>∁</mo>. (Unicode U+2201, ∁).
The \cong command is valid only in math mode.
It generates a relation symbol (\sim over =):
<mo>≅</mo>
(Unicode U+2245, ≅)
that renders like
 .
See description of the \le command.
.
See description of the \le command.
The \coprod command is valid only in math mode.
Its translation is
a variable-sized symbol (is an inverted \prod):
<mo>∐</mo>
(Unicode U+2210, ∐)
that renders like
 .
For an example see the
\sum command.
.
For an example see the
\sum command.
The \copy command reads an integer N (a small number between 0 and 255, or 1023 in current Tralics , see scanint for details), and returns a copy of the content of the box number N. See \box.
The \copyright command translates into a copyright character ©, (Unicode U+A9). This command is equivalent to \textcopyright. It can be used in math mode (translation is a <mi> element. For more info see the latin supplement characters.
The \cos command is valid only in math mode. Its translation is a math operator of the same name: <mo form='prefix'>cos</mo>. For an example see the \log command.
The \cosh command is valid only in math mode. Its translation is a math operator of the same name: <mo form='prefix'>cosh</mo>. For an example see the \log command.
The \cot command is valid only in math mode. Its translation is a math operator of the same name: <mo form='prefix'>cot</mo>. For an example see the \log command.
The \coth command is valid only in math mode. Its translation is a math operator of the same name: <mo form='prefix'>coth</mo> For an example see the \log command.
When you say \count13 12, you change the value of the count register number 13 to the value 12. See scanint for details of how numbers are read. The first integer must be a valid register number (between 0 and 255, or 1023 in Tralics), and the second a 32bit signed integer. The previous example can also be written as \count`\^^M=\catcode'53 . Note that ^^M is newline character, `\^^M is 13, and '53 is the ASCII code of the + character.
The \count@ command is an alias for the counter number 255 (see \countdef below). It can be used as a scratch counter. (note that \newcount never allocates this register).
When you say \countdef\foo=13, you make \foo an alias for \count13. See scanint for details of how the number 13 is read; it has to be a valid register number (between 0 and 255, or 1023 in Tralics). The two commands \newcount and \newcounter use \countdef for defining the command associated to the counter.
You can put the prefix \global before \countdef.
To a counter named foo is attached a command that references one of the 256 (1024 in Tralics) count registers, it is \c@foo. This name is constructed via \csname. In the example that follows, a counter named foo is allocated by \newcounter, modified by \setcounter, and referenced by \the\value. Note how the counter is named here!
\def\letterF{f}\def\letterO{o}
\def\double#1{#1#1}
\newcounter{foo}
\setcounter{foo}{10}
\the\value{\letterF\double\letterO}
If you say \value{\BAR}, you will get an error of the form Invalid command in counter name. The following token is invalid \BAR. In the current version, error signaling has changed a little bit: an error (Undefined command \BAR) will be signaled; since the expansion of the argument is empty, there will be a second error Unknown counter `'. If you replace \BAR by \bar, you will see Invalid token \bar found in counter name. This error aborts evaluation of the \value command, so that an Extra \endcsname error will be signaled later on. If you say \makeatletter\def\c@foo{12}, then foo is an invalid counter, and Tralics refuses any operations on it (in LaTeX, saying \the\value{foo} results in an error message of the form: You can't use `the character 1' after \the., in Tralics, the expansion of \value{foo} is empty, and the argument of \the is what remains on the current line, it could be the end-of-line character).
You should not use \cr, neither \crcr, but rather \\. This token marks the end of a row in a table.
In Tralics, if you say \\ in a table, a special marker is inserted in the current token list, it represents the \\, after that, the \endtemplate token is added, and then the v-part of the current template. In general the v-part of the template is empty; if it is is not, after evaluation, Tralics sees the \endtemplate that terminates the current cell, then the token that terminates the row. This special token is called \cr. If you say \\[1mm], as in the example below, then the glue is read and converted into a character string (for instance 2.84526pt), it will become an attribute of the row; in this case, the special token is \cr withargs and its argument is a pointer into the hash table. (note: if you really want to understand this, read the TeXbook first; it describes the \cr, \crcr and \endtemplate commands, as well as the u-part and v-part of a template)
Example
\begin{tabular}{cc}
a&b\\[1mm]
a&b
\end{tabular}
This is the commented content of the transcript file.
[34] \begin{tabular}{cc} % first line of input
{\begin}
{\begin tabular}
+stack: level + 2 for environment entered on line 34
{\tabular}
{\let \par \@empty} % locally redefine \par to do nothing
{changing \par=\par}
{into \par=macro:->}
{Push tabular 1}
% this shows interpretation of the preamble
array preamble at start: cc
array preamble parse: c c 12
[35] a&b\\[1mm]% another line of input
{Push row 2}
{Push cell 3}
+stack: level + 3 for cell entered on line 35
Character sequence: a.
% next line is printed because of the &
{alignment tab character}
{Text:a}
% evaluate special token
{\endtemplate}
{Pop 3: document_v tabular_v row_a cell_a}
+stack: level - 3 for cell from line 35
{Push cell 3}
+stack: level + 3 for celll entered on line 35
Character sequence: b.
{\\}% this is a row delimiter
{Text:b}
+scanint for \\->1
+scandimen for \\->2.84526pt
{scanglue 2.84526pt\relax }
{\cr withargs}% this is \\[?]
+scanint for \cr withargs->25743 % hash table  location of the string
{Pop 3: document_v tabular_v row_a cell_a}
+stack: level - 3 for celll from line 35
{Pop 2: document_v tabular_v row_a}
[37] a&b% another line of input
{Push row 2}
{Push cell 3}
+stack: level + 3 for celll entered on line 36
Character sequence: a.
% next line is printed because of the &
{alignment tab character}
{Text:a}
% evaluate special token
{\endtemplate}
{Pop 3: document_v tabular_v row_a cell_a}
+stack: level - 3 for cell from line 36
{Push cell 3}
+stack: level + 3 for cell entered on line 36
Character sequence: b .
[37] \end{tabular}% another line of input
{\end}
{Text:b
}
{\end tabular}
{\cr}% implicit \\
{Pop 3: document_v tabular_v row_a cell_a}
+stack: level - 3 for cell from line 36
{Pop 2: document_v tabular_v row_a}
{\end}% \end{tabular} is read again
{\end tabular}
{\endtabular}
{Pop 1: document_v tabular_v}
{Push p 1} % feature:
{\endenv}
+stack: restoring \par=\par. % restor \par
+stack: ending environment tabular; resuming document.
+stack: level - 2 for environment from line 34
The \csc command is valid only in math mode. Its translation is a math operator of the same name <mo form='prefix'>csc</mo>. For an example see the \log command.
The \csname primitive is a command that can create dynamically another command. For instance \csname foo\endcsname is the same as \foo. Note however, that, if the command created by \csname does not exists, it will be defined as equivalent to \relax. Note that \end{csname} can be used to finish an environment named csname, but this is a bad idea: the \end command uses \csname in order to create the \endcsname token. See also \endcsname command. In order to find the \endcsname token, everything is expanded (but not evaluated). As a result, you cannot use \char but you can use 16 bits character like ^^^^1234, or expansible commands like \string or even \csname.
\def\test#1{\csname f#1#1\endcsname}
\def\foo{bar}
\def\foobar{\def\result{ok}}
\csname foo\test o\endcsname
\testeq\result{ok}%This checks that \result contains `ok'
In the above example, you can see that commands inside \csname are expanded. In fact, the \test command takes one argument, the letter o, and calls recursively \csname. This yields \foo, that is expanded to bar, so that the outer \csname sees foobar. This command is executed, and defines \result.
Similar example
\def\double#1{#1#1}
\let\startmacro\csname
\let\endmacro\endcsname
\def\foo{bar}
\def\foobar{ok}
\startmacro foo\startmacro f\double o\endmacro\endmacro
We show here the trace printed on the transcript file
{\csname}
{\csname}
\double #1->#1#1
#1<-o
{\csname->\foo}
\foo ->bar
{\csname->\foobar}
\foobar ->ok
Next example. You cannot use a command named \foo1, because
the character 1 has the wrong catcode, so that \def\foo1{} defines
a command named \foo that has to be followed by the character 1.
On the other hand, catcodes are irrelevant in \csname. Hence
the example shows how to define and use commands named foo1
and foo2
.
{\makeatletter
%\def\@namedef#1{\expandafter\def\csname #1\endcsname}% defined in kernel
%\def\@nameuse#1{\csname #1\endcsname}% defined in kernel
\@namedef{foo1}{2}
\@namedef{foo2}{3}
\@nameuse{foo1}\@nameuse{foo2}}
This is just an example that shows that \csname can be used while scanning a number, and numbers have to be scanned in order to expand the \csname.
{\makeatletter \@namedef{1.0pt}{2}
\dimen0=1pt
\ifnum123=1\csname\the\dimen0\endcsname3\relax \else\errmessage{bad}\fi}
In Tralics, \begin{foo} calls a variant of \csname, as well as the following commands (error recovery may differ): \setboolean, \newboolean, \provideboolean, \newcounter, \setcounter, \addtocounter.
We now give an example that contains a double \number and a double \endcsname (code written by David Kastrup)
\def\recur#1{\csname rn#1\recur}
\def\rn#1{}
\def\rnm#1{\endcsname{#1}#1}
\def\replicate#1{\csname rn\expandafter\recur
  \romannumeral\number\number#1 000\endcsname\endcsname}
Assume that \dimen0 holds 4sp, and you say \replicate{\dimen0}{\P}. The expansion of \romanumeral is mmmm. Thus, it is as if you has said \csname rn\recur mmmm\endcsname \endcsname{\P}. As long as there is an m, the \recur command expands, calls \csname, and evaluates to itself. After some expansions, we get something like \csname rn\csname rnm\csname rnm\csname rnm\csname rnm\csname rn\endcsname \recur \endcsname {\P}; in reality, all six \csname tokens are under evaluation, the three tokens \endcsname \recur \endcsname are to be read again, the characters {\P} are still in the input stream.
The token under consideration is now \endcsname, the last \csname expands to \rn that reads the \recur, and this terminates the recursion. The next token to be expanded is \endcsname. Its effect is to finish a \csname, generating a \rnm, that duplicates the \P and inserts a \endcsname token, etc. After a while, we will get \endcsname followed by five \P. The csname to be ended is \nm, it reads the first \P. Thus: the result is \P\P\P\P.
Note: if {\P} were replaced by {{\Q}}, the argument of \rn or \rnm is {\Q}, replication produces {{\Q}}{\Q}, and we get {{\Q}}{\Q}{\Q}{\Q}{\Q} before removing the first token list. Here is the log file for this example.
\replicate#1->\csname rn\expandafter \recur \romannumeral
    \number \number #1 000\endcsname \endcsname
#1<-\dimen 0
{\csname}
{\expandafter \recur \romannumeral}
+scanint for \dimen->0
+scanint for \number->4
+scanint for \number->4000
+scanint for \romannumeral->4000
\recur#1->\csname rn#1\recur
#1<-m
{\csname}
\recur#1->\csname rn#1\recur
#1<-m
{\csname}
\recur#1->\csname rn#1\recur
#1<-m
{\csname}
\recur#1->\csname rn#1\recur
#1<-m
{\csname}
\recur#1->\csname rn#1\recur
#1<-\endcsname
{\csname}
{\csname->\rn}
\rn#1->
#1<-\recur
{\csname->\rnm}
\rnm#1->\endcsname {#1}#1
#1<-\P
{\csname->\rnm}
\rnm#1->\endcsname {#1}#1
#1<-\P
{\csname->\rnm}
\rnm#1->\endcsname {#1}#1
#1<-\P
{\csname->\rnm}
\rnm#1->\endcsname {#1}#1
#1<-\P
{\csname->\rn}
\rn#1->
#1<-\P
{\textparagraph}
{\textparagraph}
{\textparagraph}
{\textparagraph}
The \cup command is valid only in math mode. It generates
a binary operator (used for set union)
<mo>∪</mo>
(Unicode U+222A, ∪).
that renders like
 . See description of the
\pm command.
. See description of the
\pm command.
The \Cup command is valid only in math mode. It generates <mo>⋓</mo>. (Unicode U+22D3, ⋓).
The \curlyeqprec command is valid only in math mode. It generates <mo>⋞</mo>. (Unicode U+22DE, ⋞).
The \curlyeqsucc command is valid only in math mode. It generates <mo>⋟</mo>. (Unicode U+22DF, ⋟).
The \curlyvee command is valid only in math mode. It generates <mo>⋎</mo>. (Unicode U+22CE, ⋎).
The \curlywedge command is valid only in math mode. It generates <mo>⋏</mo>. (Unicode U+22CF, ⋏).
The variable \currentgrouplevel holds the current group level (number of unclosed braces). See \showgroups for details.
The variable \currentgrouptype holds a number representing the type of the current group. See \showgroups for how to interpret this number.
In order to debug conditionals, the variables \currentiflevel, \currentifbranch and also \currentiftype can be consulted. The level is the number of currently active conditionals, the branch is 1 if the `then branch' is taken, -1 if the `else branch' is taken, 0 otherwise (condition not yet evaluated, or out of condition). The type is given in the following table (in the case of \unless, the opposite of this number is returned).
| 1 | \if | 8 | \ifmmode | 15 | \iftrue |
| 2 | \ifcat | 9 | \ifinner | 16 | \iffalse |
| 3 | \ifnum | 10 | \ifvoid | 17 | \ifcase |
| 4 | \ifdim | 11 | \ifhbox | 18 | \ifdefined |
| 5 | \ifodd | 12 | \ifvbox | 19 | \ifcsname |
| 6 | \ifvmode | 13 | \ifx | 20 | \iffontchar |
| 7 | \ifhmode | 14 | \ifeof |
Example.
\def\showif{%
\typeout{type \the\currentiftype,
level \the\currentiflevel,
branch \the\currentifbranch.}}
\count3=0

\unless\iffalse
\showif
\iffalse\showif\else\showif
\ifnum\count3=\currentifbranch
\showif \fi\fi\fi
The following is printed on the terminal.
type -16, level 1, branch 1.
type 16, level 2, branch -1.
type 3, level 3, branch 1.
The \curve command is defined by the curves package. See \arc.
The \curvearrowleft command is valid only in math mode. It generates <mo>⤺</mo>. (Unicode U+293A, ⤺).
The \curvearrowright command is valid only in math mode. It generates <mo>⤻</mo>. (Unicode U+293B, ⤻).
back to home page
© INRIA 2003-2005, 2006, 2008
Last modified $Date: 2015/12/02 13:02:27 $