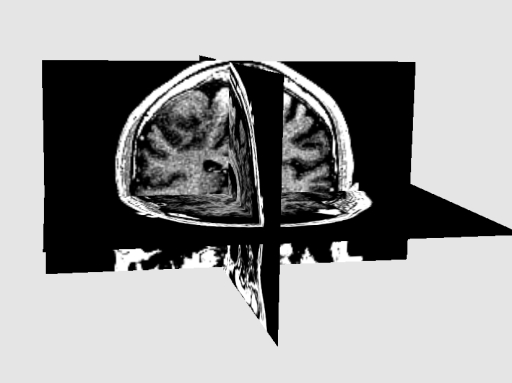
On the lower-right part of the main window is shown a 3-dimentional representation of the volume. You can choose some options in the display panel (Fig. 3.5). You can manipulate the volume in different ways:
![]() Use the ``center view'' button (or press ``r'') to center the volume in the 3D
view.
Use the ``center view'' button (or press ``r'') to center the volume in the 3D
view.
![]() You also can display the 3D view in full screen by pressing the ``full screen''
button. When the 3D view is in full screen, you can use the ``snap shot'' button to easily
save a .jpg picture of the current screen.
You also can display the 3D view in full screen by pressing the ``full screen''
button. When the 3D view is in full screen, you can use the ``snap shot'' button to easily
save a .jpg picture of the current screen.


|
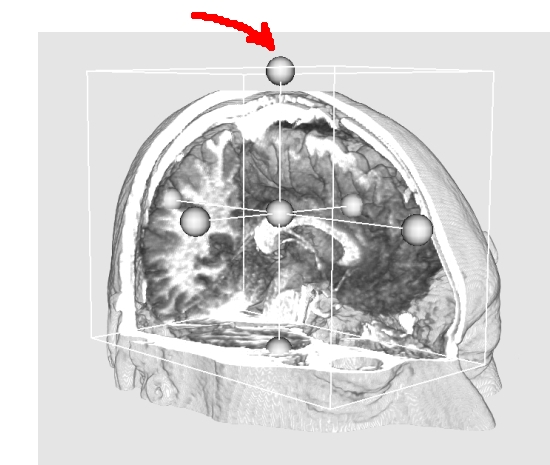
As you can see on the display options (Fig. 3.5, left), you can choose between
displaying an image with Multi-Planar Reconstruction (MPR) (Fig. 3.7, right) or with Volume Rendering (VR)
(Fig. 3.7, right). When VR mode is chosen, you have the possibility to take
out a part of the volume in order to visualize inside it. This can be done with the ``cropping
box''. Use the control points around the box (red arrow in Fig. 3.7, right)
to resize it and crop the volume (left-click on them). The control point in the center of
the box allows you to translate it. When you have finished cropping the volume, you can
make the box disappear in the Display panel (Fig. 3.5 left, Image
Settings
Crp. Box). The orientation cube and the 3D axes help to recognize the
current orientation of the image.
Keyboard and mouse on 3D screen:
In the 3D view, several optional features are available :
- Shift+left-click translates the volume.
- Ctrl+left-click rotates the volume around the axis perpendicular to the screen.
- Press ``j'' activates ``joystick'' mode (continuous movement mode).
- Press ``t'' disables the ``joystick'' mode.
- Shift+left-click on the cropping box translates it.
- Right-click on the cropping box makes it grow or shrink.
- Press ``r'' to center the image.
- If you cannot access the cropping box : Click on ``Crp. Box'' on the Display panel,
then press the ``center view'' button. If you still don't see it, it may be inside the volume. Then
uncheck ``Show/Hide Volume'' on the Display panel to see it, and translate it outside the
volume.
- If the cropping box doesn't seem to work properly, it might be because it has been flipped over. Use
successively the control points of the box to flip it back to normal.
Arbitrary plane selection:
This new feature allows you to select and view an arbitrary plane of the displayed
image. Simply press ``p'' in the 3D view to activate this
mode. A plane widget and an orientation arrow will appear in the view. Left-click on the
this plane to control it. A pop up window will automatically appear showing the
selected plane. This window acts like a usual 2D view with a window-level interaction. you
can control the orientation of the plane by left-clicking on the orientation arrow (in the
3D view). The arrow should highlight in red. By middle-clicking on the plane you can
translate the plane. The plane should hilglight in green. Control spheres allow you to
modify the size of the plane. You can close the window when not needed and disable the
plane selection mode by pressing once again ``p''.