


There is a number of ways to alter the translation of your TeX document. One solution consists in using a ult file: this is a TeX file that Tralics loads automatically before the main source. The file has the same name as the main source, with a different extension, and is in the same directory.
All other configuration files are searched in a list of directories (default being confdir). There are four such types: file with extensions clt and plt are TeX files, that contains code associated to classes and packages (the u in ult stands for user, the other letters are for LaTeX and Tralics).
The file .tralics_rc is known as the default configuration file, its use is considered obsolete. Configuration files of this kind consist in a sequence of subfiles, and a rule for choosing a Type, that is, either a subfile or an external file, for instance ra2007.tcf. The suffix tcf stands for Tralics configuration file, there structure and use is explained here. The default value for the Type is the current document class. In the description of command line arguments below, some options are marked `Raweb only´, this means that they are meaningful only when the Type (after removal of trailing digits) is ra.
The tcf file defines the DOCTYPE: this is the second line of the XML output; if the doctype is foo+bar.dtd, this means that the dtd file is bar.dtd and the root element is <foo>. The DOCTYPE can also be given as a command line argument or in the TeX source using a special syntax.
The tcf file may contain a sequence of assignments. Some of them control the attributes of the root element, but in general they alter the name of XML elements and attributes. These names can also be given as command line argument, or in the TeX source.
The tcf file may contain some TeX code. In fact, the file ra.tcf contains code that ought to be in ra.clt, and exists only for historical reasons.
Finally, a tcf file can contain a TitlePage block: this is a description of how commands like \maketitle can be translated using meta-data (title, author, keywords, etc) defined earlier.
If you call Tralics without arguments, you will see something like
This is tralics 2.11.7, a LaTeX to XML translator, running on macarthur
Copyright INRIA/MIAOU/APICS 2002-2008, Jos\'e Grimm
Licensed under the CeCILL Free Software Licensing Agreement
Say tralics --help to get some help
In any case, the first three lines are printed. The version number may vary; we shall describe here the behavior of version 2.12 (released in April 2008). Command line arguments are read and interpreted from left to right. If an argument does not start with a hyphen, it is the name of the source file (only one input file is accepted); otherwise it is called an option. Some option names are shown with a hyphen, it is optional (in fact, dashes and underscores are ignored in option names), so that `-help´ and `--help´ are synonyms. Some options take no argument, for instance -version (whose effect is to print the version number and quit); others, for instance -input-file, take an argument. The argument is the character string that follows, preceded by an optional equals sign. Example
tralics -foo = bar gee     #1
tralics -foo= bar gee
tralics -foo =bar gee
tralics -foo=bar gee       #4
tralics -foo = "bar gee"   #5
tralics -foo = bar\ gee
tralics -foo  bar\ gee
tralics -foo = " bar gee"  #8
tralics -foo = \ bar\ gee
tralics -foo  \ bar\ gee
tralics "-foo = bar gee"   #11
tralics -foo\ =\ bar\ gee\
We assume here that a command line interpreter (usually called a shell) reads the line you type, converts it in character strings, finds the executable program associated to the first string, and calls it with all these strings as arguments. There are five arguments on the first line (the first argument is the name of the program, it is currently ignored). We assume here that spaces can be inserted into an argument by either enclosing the string in quotes, or by escaping the space with a backslash, and that characters after a sharp sign are ignored. Assume that -foo is a Tralics option that takes a value; then the previous line are interpreted as follows.
The first three examples are similar but for spaces around the equals sign. Cases 1 and 4 are equivalent, the argument of -foo is bar, and there is a second option gee. In case 2, the argument of -foo is empty, and there are two options bar, gee. In case 3, the optional equals sign is omitted, hence the argument is =bar, and there is a second option. Thus you should either put no space or two spaces surrounding the equals sign.
Remaining examples show what happens if you put spaces in the argument. In cases 5, 6 and 7, the argument is bar-space-gee. In cases 8, 9, 10 it is space-bar-space-gee. Lines 11 and 12 are the same, except for the trailing space. Since Tralics removes spaces before and after the equals sign, the argument is bar-space-gee (plus space in the last case).
Here is the list of all options, in alphabetic order.
check (Raweb only) can be used to check the document for the Raweb semantics. No translation is started. In 2007, we removed the preprocessor and its checks, and this option becomes an error it can only be used if the year of the document (that matches the document class) is 2006 at most. Option is ignored in 2008.
confdir=prefix specifies an alternate location for configuration files (with extension tcf, ult, plt, and clt). If you specify A, B, and C, in this order, then Tralics checks C, B, A, D in this order (where D is a default value).
config=SomeFile: configuration file is SomeFile. You can use `config-file´ instead of `config´.
default-class=MyClass. Assume that you compile a file that has \documentclass{foo}; in this case, Tralics tries to read the file foo.clt. No error is signaled if the file cannot be opened. If this option is used, then MyClass.clt is loaded if it exists; the command \CurrentClass will hold the name of the document class (here foo), so that MyClass.clt knows how it was called.
dir=path (Raweb only); path will be the “raweb dir”, the directory containing lots of stuff for the Raweb mode. In particular, it contains a subdirectory confdir(note: ➳) with the configuration file. If this option is not used, the value of the shell variable TRALICSDIR will be used instead. Is obsolete in 2008, option confdir should be instead.
distinguish-refer-in-rabib=x sets a special flag. The value can be yes, no, true, false, otherwise it is ignored. Default is yes. The flag indicates whether, for the Raweb, the refer bibliography database should be considered a normal file, or a subfile of the year database.
doc-type=A-B This specifies the DOCTYPE of the resulting XML document. Here A is the name of the root element, B is the DTD file, these two names are separated by a space, a dash, a comma or a plus sign.
entnames=yes/no applies to some commands like \alpha that translate as `α´ or `α´ (before version 2.9, it applied also to text commands like the eurosign, that are now represented internally as a Unicode character). Default is yes: the XML resulting document contains a name rather than a number.
etex enables ϵ-TeX extensions. This is the default. Option noetex disables these extensions.
external-prog=pgm (Raweb only) tells Tralics to use pgm instead of `rahandler.pl´ as interpreter for the Raweb actions defined by the xmlXXX switches.
hack-notitle (Raweb only). Tralics may replace \section{} (sectioning command with empty argument) by \section{Introduction} (same command with a dummy name). This is implied in raweb mode until 2006. The option was withdrawn in 2007: using it has no effect on the translation. You should never use a sectioning command with an empty argument.
find-words asks for printing on the file words the list of all words of the XML tree.
help prints the list of all options.
input-dir=dir specifies where source files are to be found. This is a colon separated list of directories. Current directory is defined by an empty slot, or a single dot; it will be added to the end of the list, unless present.
input-file=foo specifies the source to be foo (extension .tex is added if needed).
interactivemath: special mode, where no input file is required, expressions are read from the terminal. The translation of every math expression is printed on the terminal. The value of \jobname will be `texput´ (so that the XML result is in texput.xml, the transcript file is texput.log).
latin1: source files are assumed to be latin1 encoded, unless the first line of a file contains `utf8-encoded´ (if `utf8´ and `latin1´ are given, the last option wins, if none is given latin1 is assumed).
leftquote=num specifies translation of the left quote (or backquote) to be character number num; see below under rightquote.
log-file = myfile. This tells Tralics to put all messages and warnings in myfile (extension .log added if not given). The file can be in the directory specified by the output-dir option.
math-variant: By default, or if you say `no-math-variant´, a math character in a font, for instance $\mathcal A$ translates into <mi>𝒜</mi> or <mi>𝒜</mi>, a character from Unicode plane one. Using this option changes the translation to be an ASCII character with a math variant property, hence $\mathfrak B$ gives <mi mathvariant=´fraktur´> B</mi>.
no-bib-year-error (Raweb only): no error is signaled for a bibliography reference with missing or wrong year.
no-bib-year-modify (Raweb only): no special hacks are applied if an entry is wrongly marked `refer´ (otherwise, the entry is moved to another category)
no-mathml sets the \@nomathml counter to minus one; default is zero.
no-math-variant is the converse of `mathvariant´ described above.
no-trivialmath sets the \notrivialmath counter to 0 (default is 1), thus even trivial math formulas such as $0$ are translated as a <formula> element.
no-undef-mac: no error is signaled when you use an undefined command like \foo. Instead, the command is automatically defined to be \foo.
no-straight-quotes: the apostrophe translates into character U+B4, as \textasciiacute. However, the normal value is used in verbatim mode, when reading a file name, in an URL, or in a construct like \char.
no-xml-error inhibits insertion of <error> elements in the XML tree. By default, an error element containing (at least the current line number) is added to the tree, for every error.
no-zerowidth-elt controls what should be inserted in a verbatim string in order to inhibit ligatures when converting XML to Pdf. For this purpose the zero-width space character, namely ​, is used. This character appears sometimes as a normal-width space in a HTML file. For this reason, an element <zws/> is used; it can be replaced by a style sheet according to its destination: a special marker for Pdf, nothing for HTML. The default translation is an element, but using the flag changes it to a character.
no-zerowidth-space inhibits insertion of a special marker in a case like \verb+--+.
oe8, oe1, oe8a, or oe1a specify the output encoding (used in the XML file), one of UTF8 or latin1. If the letter a is given, then all non-7 bits characters are printed as character references. Thus, the only difference between option oe8a and oe1a is the XML header line. Default encoding is oe1.
output-dir = mydir specifies the directory in which output files are to be stored (this concerns the main XML file, the transcript file, and other files).
output-file = myfile tells Tralics to put the result in myfile (extension .xml added if not given). In the case of the Raweb, this option is ignored.
param = foo=bar: `foo="bar"´ is virtually added at the end of the configuration file. The equals sign can be replaced by a space.
ps (Raweb only): Tralics creates a file `foo.tex´ from the file `foo2006.tex´, calls LaTeX, then dvips in order to produce a PostScript file. The document class of the new file is `raweb.cls´ instead of `raweb2006.cls´. This option exists for compatibility, and may be withdrawn. This is the only case where no XML file is created.
ra-debug (Raweb only): parsing of the Raweb source continues after the first error.
rightquote=num defines the translation of the right quote (or apostrophe). The problem is the following: the default translation of the left and right quote are often wrong; but you cannot make these characters active, because the scanner assumes that they are of category 12. The behaviour is the following: in verbatim mode, (as well as in URLs) these characters behave normally; if doubled translation is U+201C and U+201D. Otherwise you can change the translation. If you say -leftquote=2018 and -rightquote=2019 then characters U+2018 and U+2019 are used. Only base16 digits are allowed; the value should be a number between 1 and (otherwise default value is used).
shell-escape makes \write18{rm \jobname.tex} remove the file you are translating.
silent make the program silent (less lines are printed on the terminal).
te8, te1, te8a, or te1a specify the encoding used in transcript files. In the case of te8 or te8a, characters are printed using UTF-8 format; in the case of te1 or te1a, characters are printed using latin1 encoding. Characters are printed using the ^^^^abcd notation in case: the value if greater than 255, and one of -te8a, -te1a is given, or the character is not in proper range (32-126 plus 160-155) and te1 is given, the character is smaller then 32. Note: horizontal tabulation, line-feed and carriage-return do not use the hat-hat notation. Default value is the output encoding (option oe8, etc.).
tpa-status=flag controls what is to be translated if the configuration file specifies a titlepage (see for instance the `titlepage.html´ document on the Web). If the value is `all´, then the whole document is translated; if the value is `title´, only the titlepage is translated; if the value is `config´, action depends on the configuration file. Otherwise, translation stops in case of an error, continues otherwise. Only the first character of the value is tested. Capital letters are allowed.
trivialmath=N sets the \notrivialmath counter to N (default is 1). Thus trivial math formulas such as $\alpha$ are translated as non-math.
type=mytype specifies the configuration file to use. If you say `tralics -type ra hello´, this will read the ra.tcf file, and you will enter Raweb mode, and this is wrong because the name of the file contains no year. If you say `tralics -type article miaou2003´, you are not in Raweb mode, the preprocessor is not called, and 157 strange errors are signaled because of different reasons. If you say `tralics -type ra miaou2007´, the compilation will fail because ra.tcf was designed for year 2006 and ra2007.tcf should be used instead. If you say `tralics -type ra2007 miaou2003´, compilation fails because the tcf file contains an instruction declaring \declaretopics to be ignored, and this declaration is declared illegal by the raweb checker.
use-quotes has as effect to convert double quotes into a pair of single quotes, either left quotes, or right quotes, that in turn can be replaced by other characters (for instance French guillemets).
utf8: sources files are assumed to be UTF-8 encoded, unless the first line of a file contains `iso-8859-1´.
v and verbose make the program rather verbose (it prints a lot of lines in the transcript file). The equivalent of the command \tracingall is executed.
V or verbose-doc: the program is rather verbose (see option v above), but only when \begin{document} is seen. The equivalent of the command \tracingall is then executed.
xml, xmlfo, xmlhtml, xmllint, xmltex, xmlall (Raweb only). These options are incompatible with `check´ and `ps´. They ask Tralics to produce an XML file, and maybe more (a HTML file in the case xmlhtml, a FO file in the case xmlfo, a postscript file in the case xmltex) and check the validity of the translation against the Raweb DTD (case xmllint).
year=nb (Raweb only) specifies the default year (year 2005 starts at May, 1st, because people start writing the Raweb2004 in September 2004, and everything should be finished by March 2005).
Example. Assume that we have a file, named xii.tex, containing
\let~\catcode~`76~`A13~`F1~`j00~`P2jdefA71F~`7113jdefPALLF
PA''FwPA;;FPAZZFLaLPA//71F71iPAHHFLPAzzFenPASSFthP;A$$FevP
A@@FfPARR717273F737271P;ADDFRgniPAWW71FPATTFvePA**FstRsamP
AGGFRruoPAqq71.72.F717271PAYY7172F727171PA??Fi*LmPA&&71jfi
Fjfi71PAVVFjbigskipRPWGAUU71727374 75,76Fjpar71727375Djifx
:76jelse&U76jfiPLAKK7172F71l7271PAXX71FVLnOSeL71SLRyadR@oL
RrhC?yLRurtKFeLPFovPgaTLtReRomL;PABB71 72,73:Fjif.73.jelse
B73:jfiXF71PU71 72,73:PWs;AMM71F71diPAJJFRdriPAQQFRsreLPAI
I71Fo71dPA!!FRgiePBt'el@ lTLqdrYmu.Q.,Ke;vz vzLqpip.Q.,tz;
;Lql.IrsZ.eap,qn.i. i.eLlMaesLdRcna,;!;h htLqm.MRasZ.ilk,%
s$;z zLqs'.ansZ.Ymi,/sx ;LYegseZRyal,@i;@ TLRlogdLrDsW,@;G
LcYlaDLbJsW,SWXJW ree @rzchLhzsW,;WERcesInW qt.'oL.Rtrul;e
doTsW,Wk;Rri@stW aHAHHFndZPpqar.tridgeLinZpe.LtYer.W,:jbye
If you call Tralics, with the option `find-words´, you can see that the XML file contains once drumming and drummers, twice piping and pipers, 3 times leaping and lords, 4 times dancing and ladies, 5 times milking and maids, 6 times swimming and swans, 7 times laying and geese, 8 times rings and gold, 9 times calling and birds, 10 times hens and french, 11 times doves, turtle and `and´, 12 times tree, pear, in, partridge, me, to, gave, love, true, my, christmas, of, day, the, on. There are 45 words with a single letter. The words: twelve, eleven, ten, nine, eight, seven, six, five, four, three, two, appear x times, where is the value of the word. The words first, second, third, fourth, fifth, sixth, seventh, eighth, ninth, tenth, eleventh, twelfth appear once. Amazing isn´t it? The file was written by D. Carlisle, it is available on the CTAN. This is not really a LaTeX file, so that some features cannot be applied (for instance, there is no at-begin-document hook). The \bye command was implemented in Tralics for this example to compile without error.
A configuration file is a way to alter the translation, using a special syntax. It contains some rules that define a Type and some tcf blocks, where a tcf block is identical to the content of a tcf file, and a Type is the name of a tcf file (tcf stands for Tralics configuration file). The Type can be given as a command line argument, or in the main source, provided that the following magic line appears near the beginning of the document (the tcf file name is between quotes):
% Tralics configuration file 'test0.tcf'
A tcf file may contain some blocks: for instance, a TitlePage block, described later, or a Command block, that contains LaTeX commands inserted at the start of the document; it contains also assignments of various types. In particular, it contains the Document Type used in the XML output. As already mentioned, the Document Type information can be given as a command line argument; it may also be given in the main source file, if a magic like the following appears near the start of the document (the DTD is classes.dtd, with <book> as root element):
% Tralics DOCTYPE = book classes.dtd
We explain here the default configuration file (that has little use anymore), the old default configuration file (in use before 2006), the tcf file for the Raweb, a tcf and plt file for Research Reports (we will show how the same document can be compiled in two different ways).
We give here the content of the standard configuration file. As you can see, there are lots of comments. There is one assignment, this is a rule that says that the Type to use is the document class of the input file. There is a block that says that if this Type is report, book, article, minimal, and if no tcf file is found for this Type, then std.tcf should be used instead; this block says also that torture1 and torture2 are aliases for torture (used only for debugging). Finally, there is a block defining std.tcf: it says that the Doctype to use is classes.dtd, and the root element is <std>.
Lines 2 and 3 were modified: we added the letter `x´ after the dollar sign, for otherwise RCS would replace the identification of the original file by the identification of the LaTeX file.
# This is a configuration file for tralics.
# $xId: tralics_rc,v 2.24 2006/07/24 08:23:17 grimm Exp $
## tralics ident rc=standard $xRevision: 2.24 $

# Copyright Inria. Jos\'e Grimm. Apics. 2004/2005 2006
# This file is part of Tralics.

% Some comments: comments start with % or #

% this means: take the documentclass value as type name
Type = \documentclass

## First type defined is the default. Since version 2.8,  there is only
## one type.

BeginType std#      standard latex classes
  DocType = std classes.dtd
End

BeginAlias
  torture torture1 torture2
  std report book article minimal
End
Comments: If no configuration file is found, default rules apply. In particular, the default Type is the document class, and if no tcf file is found, the DocType to use is unknown from unknown.dtd, unless it is a standard LaTeX class, case where std from classes.dtd is used. This means that the standard configuration file has become useless.
We shall describe here the old configuration file, used before the notion of tcf files was invented.
Lines starting with a sharp sign or percent sign are comment lines (ignored). Some lines start with `Begin´, and others with `End´. To each Begin, there should be an associated End. Blocks can be nested. Characters after `End´ are ignored, so that you can say `BeginFoo´ followed by `EndBar´, although it is not recommended. All other lines should be comment lines, empty, or indented.
Note the `x´ after the dollar sign; it does not appear in the source file, (see comment in the previous subsection). The third line is a bit special: when Tralics loads the file, it prints the revision number on the terminal.
1 # This is a configuration file for tralics.
2 # $xId: tralics_rc,v 2.15 2005/08/02 09:22:56 grimm Exp $
3 ## tralics ident rc=standard $xRevision: 2.15 $
This is the Copyright notice. In the current version, the semantics of the RA is in the ra.tcf file (described later).
4 # Copyright Inria. José Grimm. Apics. 2004/2005
5 # This file is part of Tralics.
6 # (See the file COPYING in the Tralics main directory)
7 # If you modify this file, by changing the semantics of type RA,
8 # please remove the `standard' on the `tralics ident' line above,
9 # or replace it by `non-standard'.
10
11 % Some comments: comments start with % or #
A configuration file is split into main sections, one for each type. We start with the RA, or raweb.
12 ## configuration for the RA (Inria's Activity Report)
13 ## First type defined is the default
14
15 BeginType RA     % Case RA
16   DocType = raweb raweb3.dtd
17   DocAttrib = year \specialyear
18   DocAttrib = creator \tralics
This comment explains how to parametrize some element or attribute names that were built-in in a previous version of Tralics. We shall see later how Language can be used (default value is `language´), the same for lang_en and lang_fr that have `english´ and `french´ as default value. Translation of a \caption produces an element <caption>, whose name will be changed to <head> by the post-processor of figures (it will be left unchanged if the caption is not in a figure or a table). The variable xml_caption_name can be used to change the first name, and xml_scaption_name can be used to change the second name. The title of a `topics´ (defined by \declaretopics) is in a <t_title> element, the name can be changed by xml_topic_title. A reference to a topic uses the num attribute; this attribute name can be changed by att_topic_num. The identification of an Inria Team is in <accueil>, this can be changed via xml_accueil_name. It is formed of a long name in <projetdeveloppe> and a short name in <projet>, the name of these elements can be changed via xml_project_name or the `expanded´ version. The section with the composition of the team is <composition>, its name can be changed by xml_composition_ra_name .
19   #(new)
20 #  Language = "xml:lang"
21 #  lang_en =  "en"
22 #  xml_scaption_name= "caption"
23 # xml_topic_title=""
24 #  xml_project_name = "title"
25 #  xml_expanded_project_name = "longtitle"
26 #  xml_accueil_name = "identification"
27 #  xml_composition_ra_name = "team"
28 #  att_topic_num = "id"
Processing of the Raweb needs converting the XML output of Tralics into XSL/Format, HTML, etc., via some external commands like `xsltproc´, `latex´, etc. Originally, Tralics was in charge of these commands, and the configuration file explains how to call these tools. These lines are not needed anymore.
29   makefo="xsltproc --catalogs -o %A.fo %B %C";
30   makehtml = "xsltproc --catalogs  %B %C";
31   call_lint = "xmllint --catalogs --valid  --noout %C"
32   makepdf = "pdflatex -interaction=nonstopmode %w"
33   %makedvi = "latex -interaction=nonstopmode %w"
34   % makedvi et dvips pour marie-pierre
35   %dvitops = "dvips %w.dvi -o %w.ps"
36   %makedvi = "latex -interaction=nonstopmode %w"
37   generatedvi = "latex -interaction=nonstopmode %t"
38   % old latex: "latex \\nonstopmode\\input{%t}"
39   generateps = "dvips %t.dvi -o %t.ps"
This defines the list of valid Raweb sections, themes and URs (research units). If you change these lines please: a) remove the `standard´ on line 3, or b) make sure that it matches the official list, or c) make sure that this remains a private copy. A star after a section name says that topics are not allowed(note: ➳).
40 #these are new in version 2.0
41   theme_vals = "com cog num sym bio"
42   section_vals = "composition*/presentation*/fondements/domaine/logiciels/"
43   section_vals = "+resultats/contrats*/international*/diffusion*/"
44   ur_vals = "Rocquencourt//Sophia/Sophia Antipolis/Rennes//Lorraine//";
45   ur_vals = "+RhoneAlpes/Rhône-Alpes/Futurs//"
Due to some inertia, people continue using the obsolete environment. We make sure an error is signaled.
46 BeginCommands
47  \newenvironment{body}{\obsoleteEnvBody The body environment is %
48      obsolete since 2003}
49    {End of obsolete environment body}
50  \newenvironment{abstract}{\obsoleteEnvAbstract The abstract %
51     environment is obsolete since 2003}
52   {End of obsolete environment abstract}
53 EndCommands
54
55 End
This is an example of titlepage environment; it will be discussed later. In fact, we shall give below the content of the RR.tcf file, it is identical.
56 ## configuration for the RR (Research Report of Inria)
57 ## not yet complete
58
59 BeginType RR#      Case RR
60 ...
89 EndType
A short definition for standard classes.
90 BeginType std#      standard latex classes
91   DocType = std classes.dtd
92   xml_biblio = "bibliography"
93 End
Some aliases.
94 # (types Article and slides are not defined, hence this is useless)
95
96 BeginAlias
97   Article report
98   slides inriaslides foiltex
99 End
This command has to be outside any block.
100 % this means: take the documentclass value as type name
101 Type = \documentclass
More aliases. Note that toto matches RR (first in list) and report matches std (because `unknown´ is undefined).
105 BeginAlias
106   RR toto# ra2001
107   RA ra toto ra2001x%etc
108   torture torture1 torture2
109   unknown report
110   std report book article minimal
111 End
For fun.
112 ## an empty type
113 BeginType MP
114 EndType
This is used for testing Tralics.
115 BeginType torture
116   DocAttrib = creator \tralics
117   DocType  = ramain raweb.dtd
118   on package loaded calc CALC = "true"
119   on package loaded foo/bar FOO1 = "true"
120   on package loaded *foo/bar FOO2 = "true"
121   on package loaded foo/*bar FOO3 = "true"
122   on package loaded *foo/*bar FOO4 = "true"
123   url_font = "\large "
124   no_footnote_hack = "false"
125   on class loaded calc CALC="true"
126
127   use_font_elt = "true"
128   xml_font_small = "font-small"
A bunch of declarations omitted here. The list of all options is given later, in test.tcf.
154   xml_underline_name = "font-underline"
155
156 BeginCommands
157   % These commands are inserted verbatim in the file
158   \def\recurse{\recurse\recurse}
159 EndCommands
160 EndType
This may be used for typesetting a bibliography, exactly like the Raweb.
161 BeginType rabib     % Case RA
162   DocType = raweb raweb3.dtd
163   DocAttrib = year \specialyear
164   DocAttrib = creator \tralics
165
166 BeginCommands
167   % These commands are inserted verbatim in the file
168   \newcommand\usebib[2]{\bibliography{#1#2,#1_foot#2+foot,#1_refer#2+refer}}
169 EndCommands
170 EndType
This is the tcf file used for the Raweb2006. Read carefully the copyright notice.
1 # This is a configuration file for tralics, for the Raweb
2 # $xId: ra.tcf,v 2.3 2006/07/25 16:29:39 grimm Exp $
3 ## tralics ident rc=standard-ra $xRevision: 2.3 $
4
5
6 # This file is part of Tralics.
7 # Copyright Inria. Jos\'e Grimm. Apics. 2004/2005, 2006
8 # (See the file COPYING in the Tralics main directory)
9 # If you modify this file, by changing the semantics of the RA,
10 # please remove the `standard-ra' on the `tralics ident' line above,
11 # or replace it by `non-standard'.
A tcf file is a like the configuration file, but it applies to a single type of document; for this reason, there is no need to explain how the type is computed (no `Type´ declaration), neither to what type a block applies (there is no `BeginType´ block). These three lines are the same as before. Note that the 2007 DTD is raweb7.dtd.
12   DocType = raweb raweb3.dtd
13   DocAttrib = year \specialyear
14   DocAttrib = creator \tralics
These line are as before, without commented out lines.
15   makefo="xsltproc --catalogs -o %A.fo %B %C";
16   makehtml = "xsltproc --catalogs  %B %C";
17   call_lint = "xmllint --catalogs --valid  --noout %C"
18   makepdf = "pdflatex -interaction=nonstopmode %w"
19   generatedvi = "latex -interaction=nonstopmode %t"
20   generateps = "dvips %t.dvi -o %t.ps"
This values are the same as those shown above.
21   theme_vals = "com cog num sym bio"
22   ur_vals = "Rocquencourt//Sophia/Sophia Antipolis/Rennes//Lorraine//";
23   ur_vals = "+RhoneAlpes/Rh\^one-Alpes/Futurs//"
In 2006, section_vals has the same value as shown above; in 2007 it is replaced by the following lines.
24   fullsection_vals = "/composition/Team/presentation/Overall Objectives/\
25      fondements/Scientific Foundations/domaine/Application Domains/\
26      logiciels/Software/resultats/New Results/\
27      contrats/Contracts and Grants with Industry/\
28      international/Other Grants and Activities/diffusion/Dissemination"
New in 2006 are the two lists affiliation_vals and profession_vals. The syntax is the same as for other lists. The value given here is an example; the real names are in French.
29   affiliation_vals ="Inria//Cnrs//University//ForeignUniversity//"
30   affiliation_vals ="+Public//Other//"
31   profession_vals = "Scientist//Assistant//Technical//PHD//"
32   profession_vals = "+PostDoc//StudentIntern//Other//"
We have the same obsolete environments as before. Moreover, we declare that \keywords is the same as \motscle; this is needed because we removed the \keywords command (for the Raweb, this is an environment, using it as a command will fail in a very strange manner).
33 BeginCommands
34  \let\keywords\motscle
35  \newenvironment{body}{\obsoleteEnvBody The body environment is %
36      obsolete since 2003}
37    {End of obsolete environment body}
38  \newenvironment{abstract}{\obsoleteEnvAbstract The abstract %
39      environment is obsolete since 2003}
40   {End of obsolete environment abstract}
41 EndCommands
This is the command block for the ra2007. The last line does not appear in the file, but is automatically added in Raweb mode; the command uses the values saved by \theme, \UR and its aliases, \project and its alias, \isproject. Some are defined as doing nothing (like \maketitle, \loadbiblio, \declaretopic, \TeamHasHdr). The \module command is redefined: if the last argument is empty, a default value is used instead.
42 BeginCommands
43  \makeatletter
44  \def\declaretopic#1#2{} %% obsolete in 2007
45  \def\TeamHasHdr#1{} %% temporary
46  \def\theme#1{\def\ra@theme{#1}}
47  \def\UR#1{\def\ra@UR{#1}}
48  \def\isproject#1{\def\ra@isproject{#1}}
49  \let\ResearchCenterList\UR
50  \let\ResearchCentreList\UR
51  \def\projet#1#2#3{\def\ra@proj@a{#1}\def\ra@proj@b{#2}\def\ra@proj@c{#3}}
52  \let\project\projet
53  \def\moduleref#1#2#3{\ref{mod:#3}}
54  \let\oldmodule\module %% Compatibility
55  \renewcommand\module[4][]{\oldmodule{#2}{#3}{\@ifbempty{#4}{(Sans Titre)}{#4}}}
56 \let\htmladdnormallinkfoot\@@href@foot
57 \let\htmladdnormallink\@@href
58  \makeatother
59  \let\maketitle\relax
60  \let\loadbiblio\relax
61  \let\keywords\motscle
62 %%% \AtBeginDocument{\rawebstartdocument} %%% pseudo line
63 EndCommands
New in 2008 is the following list. The argument of the catperso environment must be one of XX, YY, ZZ, interpreted as xx, YY and zz. If the declaration is omitted, there is no restriction on the argument. Whether or not there will be such a restriction in the file ra2008.tcf is still undecided.
64 catperso_vals = "XX/xx/YY//ZZ/zz"
We indicate here the content of the RR.tcf file, it defines commands for the title page of a Research Report.
1 ## tralics ident rc=RR.tcf $Revision: 1.29 $
2 ## configuration for the RR (Research Report of Inria)
3
4
5   DocType = rr raweb.dtd
6 BeginTitlePage
7   \makeRR <RRstart> "" "type = 'RR'"
8   alias \makeRT "" "type = 'RT'"
9
10   <UR> -
11   \URSophia ?+<UR>
12   \URRocquencourt ?+<UR>
13   alias \URRocq
14   \Paris ?<UR> <Rocquencourt>
15   \URRhoneAlpes ?+<UR>
16   \URRennes ?+<UR>
17   \URLorraine ?+<UR>
18   \URFuturs ?+<UR>
19
20   \RRtitle q<title> "pas de titre"
21   \RRetitle q<etitle>  "no title"
22   \RRprojet <projet> "pas de projet"
23   \motcle <motcle> "pas de motcle"
24   \keyword <keyword>  "no keywords"
25   \RRresume p<resume> "pas de resume"
26   \RRabstract p<abstract> "no abstract"
27   \RRauthor + <author> <auth> "Pas d'auteurs"
28   \RRdate <date> "\monthyearvalfr"
29   \RRNo <RRnumber> "????"
30
31   \RRtheme <>  +"pas de theme" % CES
32   <Theme> -                    % E
33   \THNum ?+<Theme>             % CE
34   \THCog ?+<Theme>             % CE
35   \THCom ?+<Theme>             % CE
36   \THBio ?+<Theme>             % CE
37   \THSym ?+<Theme>             % CE
38
39 %%  \myself \RRauthor "grimm"  % CCS
40 %%  \cmdp <cmdp> +"nodefault"  % CES
41 %%  \cmda <cmdA> A"\cmdAval"   % CES
42 %%  \cmdb <cmdB> B"\cmdBval"   % CES
43 %%  \cmdc <cmdC> C"\cmdCval"   % CES
44
45 End
46
47 BeginCommands
48   \let\RRstyisuseful\relax
49 End
We indicate here the content of the RR.plt file, it also defines commands for the title page of a Research Report. This is a TeX file, loaded whenever the package `RR´ is used. Note that, if the RR.tcf file is loaded, the line 48 above defined a command that is checked on line 4 below, so that the file is ignored. We shall explain later how these two files can be used.
1 % -*- latex -*-
2 \ProvidesPackage{RR}[2006/10/03 v1.1  Inria RR for Tralics]
3
4 \ifx\RRstyisuseful\relax\endinput\fi
5
6 \newcommand\RRtitle[1]{{\let\\\ \xbox{ftitle}{#1}}}
7 \newcommand\RRetitle[1]{{\let\\\ \xbox{title}{#1}}}
8 \newcommand\RRauthor[1]{\xbox{author}{#1}}
9 \newcommand\RRprojet[1]{\xbox{inria-team}{#1}}
10 \newcommand\RRdate[1]{\xbox{date}{#1}}
11 \newcommand\RRNo[1]{\xbox{rrnumber}{#1}}
12 \newcommand\RRtheme[1]{\xbox{theme}{#1}}
13 \newcommand\keyword[1]{\xbox{keyword}{#1}}
14 \newcommand\motcle[1]{\xbox{motcle}{#1}}
15 \newcommand\THNum{THnum}
16 \newcommand\THCom{THcom}
17 \newcommand\THCog{THcog}
18 \newcommand\THSym{THsym}
19 \newcommand\THBio{THbio}
20 \newcommand\URSophia{\xbox{location}{Sophia Antipolis}}
21 \newcommand\URLorraine{\xbox{location}{Lorraine}}
22 \newcommand\URRennes{\xbox{location}{Rennes}}
23 \newcommand\URRhoneAlpes{\xbox{location}{Rhône-Alpes}}
24 \newcommand\URRocq{\xbox{location}{Rocquencourt}}
25 \newcommand\URFuturs{\xbox{location}{Futurs}}
26 \newcommand\RRresume[1]{\begin{xmlelement*}{resume}#1\end{xmlelement*}}
27 \newcommand\RRabstract[1]{\begin{xmlelement*}{abstract}#1\end{xmlelement*}}
28
29 \let\makeRT\relax
30 \let\makeRR\relax
The Tralics distribution comes with a bunch of test files. There are two directories: the Test directory contains source files, and the Modele directory contains the translation. In particular, the file tpa2.tex explains how to use a tcf file to change the names of most XML elements.
As explained at the start of the Chapter, Tralics first reads all options. Some of them are marked `Raweb only´; this means that they are not used, unless the Type is ra (i.e. you are translating the Raweb, see next section); this section describes how the Type is computed.
Unless Tralics is called with option interactive-math, an input file name is required. The program is aborted if more than one input name is given. It must be the name of a TeX file: an extension tex is added if needed, so that foo and foo.tex are the same. As an exception foo.xml is also equivalent to foo.tex. We consider two examples, the xii.tex shown above, and the following LaTeX file hello1.tex:
\documentclass{article}
\begin{document}
Hello, world!
\end{document}
The standard way to use Tralics is to type `tralics filename´ in a terminal, example:
grimm@macarthur$ tralics hello1
This is tralics 2.12, a LaTeX to XML translator, running on macarthur
...
Output written on hello1.xml (179 bytes).
No error found.
(For more information, see transcript file hello1.log)
grimm@macarthur$ ls hello1*
hello1.log      hello1.tex      hello1.xml
The ls command shows the source, the result of the translation and the transcript file. If the file hello1.ult were present, it would be been read by Tralics, and if the source were a bit more complicated the files hello1.img and hello1_.bbl might have been created. All these files are in the same directory, and this paragraph explains what you can do if input or output files are elsewhere.
Consider now a graphical interface to Tralics, where you drag and drop the TeX source; in such a case there is no shell anymore, hence no current directory; what Tralics gets is an absolute path name (that may be of the form /users/somebody/somewhere). In early versions, such an absolute path was a fatal error. Currently, only Unix-like pathnames are implemented.
Consider now a system, like the Raweb, where the XML file produced by Tralics is converted to another XML file (with a different DTD), and further processed. Thus a great number of files are created, and managing all these becomes uneasy. As the example below shows, you can ask Tralics to put the files it creates in another directory, you can chose the name of the XML output (so that Tralics can create foo-t.xml from foo.tex, and this file can be processed again into foo.xml), and you can also chose the name of the transcript file.
grimm@macarthur$ tralics hello1 -o h2 -logfile=h3 -output_dir=../Test
This is tralics 2.12, a LaTeX to XML translator, running on macarthur
...
Output written on ../Test/h2.xml (179 bytes).
No error found.
(For more information, see transcript file ../Test/h3.log)
The input path is a colon separated list of directories. For instance `../foo/A:/bar/B/::gee:´ contains five elements, two of them being empty. The empty slot represents the current directory, it will be added at the end if omitted. The current directory may also be given as a single dot. A final slash is silently removed. In this example, the path means: search in subdirectory A of the sibling directory foo, then if the subdirectory B of the directory bar that is is at the root, then in the current directory, then in the subdirectory gee of the current directory, then in the current directory again; this rule does not apply if a file starts with a dot or a slash.
A special case is when the main input file name starts with a dot or a slash, for instance /usr/grimm/home/hello or ./Test/hello.tex. In this case, the name is split into pieces. One piece is the entry name, say hello, another one is the directory name (everything before the final slash), and the last part is the extension (here .tex). If no output directory is given on the command line, the directory of the input file is used. In the same fashion
You can also specify the name of the transcript file; By default, this is the entry name. If for instance you use /foo/bar, then input file will be /foo/bar.tex and the transcript file will be /foo/bar.log; you may change the name of the transcript file, so as to get /foo/myfile.log; you may change the directory of the transcript file, so as to get /mydir/bar.log; you may change both.
Consider again the case where the input is /foo/bar. If no input path is given, then Tralics behaves as if the file was bar, and the input path was `foo:´. This has as consequence that, if bar inputs another file, say bar1, it is first searched in the same directory as bar, and then in the current directory. Moreover, if no output directory is specified, files written by bar are put in this directory, thus can be read again. If the user gives an input path, it will be left unchanged, and the input path is not considered for the main path. Example: Directories foo and foo1 contain files bar and bar1; bar inputs bar1, input path contains foo1. If the main file is /foo/bar, it will input /foo1/bar1. If the input path contains both foo and foo1, and the main file is bar, you will get either /foo/bar and /foo/bar1 or /foo1/bar and /foo1/bar1, depending on the order.
There are some options that tell Tralics not to produce an XML file, we shall not explain them. Thus, after parsing all arguments, Tralics reads the complete source (main input file). It opens the transcript file, and print on the terminal a line like Starting translation of file hello1.tex. The transcript file will contain a bit more information, namely
Transcript file of tralics 2.12 for file hello1.tex
Copyright INRIA/MIAOU/APICS 2002-2008, Jos\'e Grimm
Tralics is licensed under the CeCILL Free Software Licensing Agreement
Start compilation: 2008/04/19 18:27:18
OS: Apple, machine macarthur
Starting translation of file hello1.tex.
Using iso-8859-1 encoding (idem transcript).
Left quote is ` right quote is '
Input path (../FO:../Test:)
++ Input encoding is 1 for ../Test/hello1.tex
After that, Tralics reads the configuration file. You can use the -noconfig option, this inhibits reading a configuration file. In this case the transcript file contains
No configuration file.
No type in configuration file
Seen \documentclass article
Potential type is article
Using some default type
dtd is std from classes.dtd (standard mode)
OK with the configuration file, dealing with the TeX file...
The first line says that no configuration file is considered, so that an empty one will be used instead. The TeX source is scanned for a document class. If this is a standard one (book, article, report, minimal, the DTD is std from classes.dtd, otherwise unknown from unknown. Consider now the same file, without the -noconfig option. We get
++ file .tralics_rc does not exist.
++ file ../confdir/.tralics_rc exists.
Configuration file identification: standard $ Revision: 2.24 $
Read configuration file ../confdir/.tralics_rc.
Configuration file has type \documentclass
Seen \documentclass article
Potential type is article
Defined type: std
++ file article.tcf does not exist.
++ file ../confdir/article.tcf does not exist.
Alias torture does not match article
Potential type article aliased to std
Using type std
dtd is std from classes.dtd (standard mode)
There are some lines starting with a double plus sign. Whenever Tralics searches if a file exists, it will print such in line in the transcript file. The first two lines that do not start with a double plus are also printed on the terminal (this is an easy way to check that that right configuration file has been seen). The standard configuration file says that they Type is the document class (here article). This is a true type, provided that it is defined, and the configuration file does not define it. It could be defined in article.tcf. But you can see that there is no such file. As a consequence, the behavior is the same as if no configuration file has been given.
This is what happens if the option config=rabib is given
Trying config file from user specs: rabib.tcf
++ file ../confdir/rabib.tcf exists.
Configuration file identification: rabib.tcf $ Revision: 2.2 $
Read configuration file ../confdir/rabib.tcf.
Using tcf type rabib
dtd is raweb from raweb3.dtd (standard mode)
You can notice that a tcf file is being searched in the confdir directory. If the name starts with a slash or a dot, no extension is added, and the file is not searched in the configuration path. Assume that the source file contains a line of the form
% Tralics configuration file 'test0.tcf'
and you neither specify a configuration file, nor inhibit loading one. Then you will get
Trying config file from source file `test0'
++ file test0.tcf does not exist.
++ file ../confdir/test0.tcf exists.
Read configuration file ../confdir/test0.tcf.
Using tcf type test
catperso_vals: AA -> BB
catperso_vals: CC -> CC
catperso_vals: XX -> xx
dtd is unknown from unknown.dtd (standard mode)
As you can see, tcf extension is added, and the file is searched in the current directory first, then in the configuration path.
You can call Tralics with option type=rabib. This just says that the name of the tcf file should be rabib, instead of the document class; it is thus useless if the name of the tcf file to use has been given as shown above. It can be useful in the case of a plain TeX file, that has no document class. In the example that follows, we say that the type is ra12.
++ file .tralics_rc does not exist.
++ file ../confdir/.tralics_rc exists.
Configuration file identification: standard $ Revision: 2.24 $
Read configuration file ../confdir/.tralics_rc.
Configuration file has type \documentclass
Seen \documentclass article
Potential type is ra12
++ file ra12.tcf does not exist.
++ file ../confdir/ra12.tcf does not exist.
++ file ra.tcf does not exist.
++ file ../confdir/ra.tcf exists.
Configuration file identification: standard-ra $ Revision: 2.3 $
Read tcf file ../confdir/ra.tcf
Using type ra
...
dtd is raweb from raweb3.dtd (mode RAWEB2007)
Note that no file ra12.tcf was found, and ra.tcf was used searched for. As a consequence, the effective type is ra, and Raweb mode is entered; this is an error, since current file is not a ra file. In fact, you will be faced to Fatal error: Input file name must be team name followed by 2007. Note that you can compile a file named foo2006 in Raweb mode, as long as this matches the year option (if used) and the document class is ra2006.
The algorithm is the following.
If you say tralics -noconfig, then no configuration file is read at all.
If you say tralics -configfile=foo, then Tralics will print Trying config file from user specs, and try to use this file.
If you say tralics -configfile=foo.tcf, then Tralics will print the same as above; it will also search the file in the `confdir´ directory.
If the source file contains `% tralics configuration file 'foobar'´, then Tralics will print Trying config file from source file, and try to use this file. In case of failure, and if the name `foobar´ contains no dot, the suffix .tcf is added, and the next rule is applied.
If the source file contains `% tralics configuration file 'foobar.tcf'´, then Tralics will print the same as above; it will also search the file in the `confdir´ directory.
The default configuration file is named .tralics_rc (or tralics_rc on Windows). The current directory is looked at first, then the tralicsdir, finally the home directory.
If you say tralics -dir TOTO, then TOTO/src/.tralics_rc is the second try.
The home directory, or its src subdirectory, is searched next. (Depending on the operating system, this can fail, because there is no standard way of defining the home directory of the user).
If you set the shell variable TRALICSDIR to somedir, or RAWEBDIR to somedir, then somedir/src/.tralics_rc is the last try. If neither variable is set, then some default location will be used.
If a configuration file has been given on the command line, but not found according to rules 2 and 3, then no configuration file will be used.
For rules 4 and 5, only the first hundred lines of the source file are considered, the line must start with a percent character; you can use an upper case T in the string “tralics”; the configuration file name is delimited by single quotes; the line can hold additional characters that are ignored.
If a configuration file has been given in the source file, but not found according to rules 4 and 5, then the default configuration file will be used.
In the case of rules 3 and 5, a tcf file is looked at, say foo.tcf. It is first searched in the current directory, then in all directories specified by the confdir options, then in a default directory. For instance, if you say tralics -confdir=mydir/ (final slash optional), the second try would be mydir/foo.tcf. If this file is not found, a default location, for instance ../confdir/foo.tcf, is tried. If you specify dir1 then dir2, then the order will be: current directory, dir2, dir1, default directory.
In current version, rules 4, 7, 8 and 9 have been removed.
Let´s consider again file hello1, compiled with option type=rabib. The transcript file contains the following lines.
OK with the configuration file, dealing with the TeX file...
There are 4 lines
Starting translation
\notrivialmath=1
{\countdef \count@=\count255}
After that, there is a bunch of lines of the form `countdef x=y´, and in verbose mode, the bootstrap code, as explained later. The meaning of the last line shown here is: all bootstrap lines have been correctly read.
{changing \countref395332=0 into \countref395332=1}
[1] %% Begin bootstrap commands for latex
[2] \@flushglue = 0pt plus 1fil
...
[47] %% End bootstrap commands for latex
++ Input stack empty at end of file
Our configuration file contains a block of TeX code. The transcript file shows them
[19]   % These commands are inserted verbatim in the file
[20] \newcommand\usebib[2]{\bibliography{#1#2,#1_foot#2+foot,#1_refer#2+refer}}
Our configuration file contains also
DocAttrib = variable "va'"lue"
DocAttrib =Foo \World
DocAttrib =A \specialyear
DocAttrib =B  \tralics
DocAttrib =C  \today
The effect is to add an attribute to the main element. The normal syntax is: DocAttrib = foo “bar”. The attribute name must contain only ASCII letters, the value can consist of any character. An apostrophe is replaced by ', double quotes must be given as ", as well as some other special characters. Using a command name instead of a string means that the value of the command should be used. The value \tralics is replaced by a string of the form `Tralics version 2.9´, and \specialyear is replaced by the year as used by the Raweb (the current year, in general). The command \Word is undefined, and an error is signaled.
Before translating the document, the ult file is checked first. Here, the star says that the @ character should be of category letter while loading the file, and the plus sign says that the file should be searched in the same directory as the main file, and not elsewhere. We finish by showing the class file is found.
[1] \InputIfFileExists*+{hello1.ult}{}{}
++ file hello1.ult does not exist.
[1] \documentclass{article}
[2] \begin{document}
++ file article.clt does not exist.
++ file ../confdir/article.clt exists.
Raweb mode is entered if a configuration file is found that says that the type to use is `RA´ or `ra´. The document class should be ra97, ra98, or, for later years, ra1999. The example has ra2003. This must match the name of the input file, which is miaou2003. The document can be translated in one of three versions: first, you may try latex, this gives miaou2003.dvi; then we have a mode in which miaou2003.tex is converted into miaou.tex, and latex can produce miaou.dvi. Finally, Tralics may produce miaou.xml, and this can be compiled into wmiaou.dvi.
Historically, we had a Perl script for the conversion, this was extended to a translator, then re-written in C++. You could edit the script and change it (for instance, if a non-standard name for the LaTeX executable is needed). Since Tralics is nowadays a binary file, you cannot edit it. For this reason the configuration file contains some lines (see old configuration file, lines 29 to 39) that can be modified. These are copied into user_param.pl and, after Tralics has produced a XML file, it calls an external program (defined by the `externalprog´ switch, default being rahandler.pl). If the current year (2003 in the example below) is 2007 or more, simplified ra mode is entered, not postprocessor is called, and no file user_param.pl is created. Here is an example:
1 $::makefo='xsltproc --catalogs -o %A.fo %B %C';
2 $::makehtml='xsltproc --catalogs  %B %C';
3 $::checkxml='xmllint --catalogs --valid  --noout %C';
4 $::makepdf='pdflatex -interaction=nonstopmode %w';
5 $::makedvi='';
6 $::dvitops='';
7 $::generate_dvi='latex -interaction=nonstopmode %t';
8 $::generate_ps='dvips %t.dvi -o %t.ps';
9 $::raweb_dir='/user/grimm/home/cvs/raweb';
10 $::raweb_dir_src='/user/grimm/home/cvs/raweb/src/';
11 $::ra_year='2003';
12 $::no_year='miaou';
13 $::tex_file='miaou';
14 $::todo_fo=0;
15 $::todo_html=0;
16 $::todo_tex=0;
17 $::todo_lint=0;
18 $::todo_ps=0;
19 $::todo_xml=1;
20 1;
Here is an example of a source file, valid in 2003.
1 \documentclass{ra2003}
2 \theme{Num}
3 \isproject{YES} % \isproject{OUI} works also
4 \projet{MIAOU}{Miaou}{Mathématiques et Informatique de
5    l'Automatique et de l'Optimisation pour l'Utilisateur}
6 \def\foo{bar}
7 \UR{\URSophia\URFuturs}
8 \declaretopic{abc}{Topic abc}
9 \declaretopic{def}{Topic def}
10 \begin{document}
11 \maketitle
12 ...
13 \begin{module}{composition}{en-tete}{}
14 \begin{catperso}{Head of project team}
15 \pers{Laurent}{Baratchart}[DR INRIA]
16 \end{catperso}
17 \end{module}
18 \begin{module}{diffusion}{dif-conf}{Conferences and workshops}
19 \begin{glossaire}\glo{A}{B\par C}\glo{A1}{B1\par C1}\end{glossaire}
20 \begin{participants}
21 \pers{Laurent}{Baratchart},
22 \pers{José}{Grimm}
23 \end{participants}
24 \begin{motscle}
25 meromorphic approximation, frequency-domain identification,
26 extremal problems
27 \end{motscle}
28 \end{module}
29 \loadbiblio
30 \end{document}
This is what Tralics prints, for the full miaou2003 document, in verbose mode
This is tralics 2.5 (pl7), a LaTeX to XML translator
Copyright INRIA/MIAOU/APICS 2002-2005, Jos\'e Grimm
Licensed under the CeCILL Free Software Licensing Agreement
Starting xml processing for miaou2003.
Configuration file identification: standard $ Revision: 2.14 $
Read configuration file /user/grimm/home/cvs/tralics/.tralics_rc.
The lines that follow show the assignments from the configuration file. Note that the year in the mode reflects the compilation data, not the year in the source file.
makefo=xsltproc --catalogs -o %A.fo %B %C
makehtml=xsltproc --catalogs  %B %C
makepdf=pdflatex -interaction=nonstopmode %w
generatedvi=latex -interaction=nonstopmode %t
generateps=dvips %t.dvi -o %t.ps
theme_vals=com cog num sym bio
dtd is raweb from raweb3.dtd (mode RAWEB2005)
Following lines are specific to the Raweb. You can see a summary of all the tests done by the program that converts miaou2003.tex to miaou.tex. The statistics (number of environments, keywords, etc) are computed by a preprocessor, that has been removed in 2007.
Ok with the config file, dealing with the TeX file...
Activity report for MIAOU (Miaou)
Mathématiques et Informatique de l'Automatique et de l'Optimisation pour l'Utilisateur
There are 138 environments
Checked 15 keyword env with 60 keywords (52 unique)
Checked 8 catperso and 31 participant(es) envs with 146 \pers
There were 2 topics
Sections (and # of modules): 1(1) 2(1) 3(2) 4(6) 5(5) 6(13) 7(4) 8(5) 9(3).
Whenever a section or a chapter is translated, a line is printed on the terminal. There is a complaint at the end, about a lonely module without title. A title is invented, namely `(Sans Titre)´. A non-trivial task for the post-processor is to remove it (it should not appear on the HTML pages). In 2007, this has become an error.
Translating section composition
Translating section presentation
Translating section fondements
Translating section domaine
Translating section logiciels
Translating section resultats
Translating section contrats
Translating section international
Translating section diffusion
Bib stats: seen 57 entries
Seen 64 bibliographic entries
(SansTitre) Only one module seen in the section
Problem with sans titre 1
There was 1 NoTitle not handled
Tralics prints now statistics.
Used 1756 commands
Math stats : formulas 503, non trivial kernels 299, cells 10227,
   special 1 trivial 149, \mbox 5 large 0 small 118.
List stats: short 0 inc 10 alloc 43456
Buffer realloc 41 string 15750 size 610086; merge 7
Macros created 80 deleted 0
Save stack +1582 -1582
Attribute list search 7539(1494) found 3154 in 5616 elements (1401 after boot)
Number of ref 92, of used labels 36, of defined labels 73, of ext. ref. 19
Modules with 24, without 16, sections with 9, without 15
There were 6 images.
Output written on miaou.xml (250758 bytes).
No error found.
(For more information, see transcript file miaou2003.log)
Here you can see the call to the post-processor.
rahandler.pl v2.12, (C) 2004 INRIA, José Grimm, projet APICS
Postprocessor did nothing
Since 2006, the syntax of the \pers command in a `catperso´ environment has changed. Example:
\begin{catperso}{Category test}
\pers{Jean}{Dupond}{Scientist}{Inria}
\pers{Jean}{Dupont}{Assistant}{Cnrs}[][yes]
\pers{Jean}{Durand}{Technical}{University}[][]
\pers{Jean}{Durant}{PHD}{ForeignUniversity}[with a T]
\pers{Jean}{Dumas}{PostDoc}{Public}[with a S]
\pers{Jean}{Dumat}{StudentIntern}{Other}[bla bla ][no]
\pers{Jean}{Dumont}{ Other }{Other}[bla bla ][no]
\end{catperso}
Here are the commands specific to the Raweb:
The document class should be `ra2003´ (the number must match the suffix of the file name). The document should start with \maketitle (see line 11) and end with \loadbiblio, see line 29. These commands are set to \relax by the translator.
Some commands can be placed before \begin{document}. They will be evaluated in order. Then all commands outside a `module´ environment are executed (modules may be re-ordered)(note: ➳). Strange results can be obtained... so that it is better not to put anything between modules.
You use \project, or \projet, with three arguments. The first argument is the name of the Team. After converting to lower case letters, this must be the name of the file. The second argument can be empty (in this case the name of the Team is used). Any LaTeX command is allowed (remember: this is the official name of the Team). Then comes the long name (see example, lines 4-5).
You use \theme to specify the theme. The argument must be one of those defined by the configuration file. The case is irrelevant. See example, line 2.
You use \isproject, to say whether this is a “Project” or not (an argument that starts with y, Y, o or O is true). See example, line 3. Note that the Miaou team has been dissolved on 12/31/2003, and replaced by Apics, a team that had not the status of “project” until 01-01-2005.
You use \UR for explaining in which UR the team is localized. Line 7 gives an example of a team in `Sophia´ and `Futurs´. The list of valid URs are defined by the configuration file (see example, lines 45, 46). The `UR´ prefix is not in the configuration file. The translator will see a single command, instead of all these four; in the example it is:
\RAstartprojet{num}{1}{Miaou}{Mathématiques et Informatique de l'Automatique
et de l'Optimisation pour l'Utilisateur}{Sophia Antipolis --- Futurs}
You can use \declaretopic(note: ➳). At most ten topics can be declared. The first argument will be replaced by a unique id. For instance, the translator will see the following, instead of lines 8 and 9.
{\declaretopic{1}{Topic abc}\declaretopic{2}{Topic def}}
You can use the module environment. Modules cannot be nested. A module is the equivalent of a \section, so that you cannot use the \section command; you can use \subsection. The first argument of the environment is the section name. It can be empty, meaning the same section as the previous module. The list of valid sections is defined by the configuration file. The first section cannot have more then one module. A module can have an optional argument (before the section name), a topic reference (the translator will see the numeric value)(note: ➳). This is ignored, in the case a star follows the section name in the configuration file(note: ➳). Then comes the module name and the module title. The module name must be unique, and consists only in letters, digits, and dashes. The module title should not be empty (module in the `composition´ section are special; this is an awful hack, because the translator does not know which section is the composition section.) The translator will see
\begin{module}{MIAOU}{1}{en-tete}{module1}{module\textit{title}!}
... \end{module}
Here `MIAOU´ is the name of the team, `1´ the section number, and `module1´ the unique identifier associated to the module.
You can use the `catperso´ environment, only in a module in section one. You can use `participants´ in other sections. These environments contain \pers commands (separated by commas in a `participants´).
You can use \pers only as indicated above. The program checks a lot a things(note: ➳). Between the first name and the last name, there can be an optional argument, a particle. After the last name, there can be an optional argument. For 2006: after the last name is a mandatory argument that must match the `profession_vals´ defined by the configuration file, a second mandatory argument that must match the `affiliation_vals´ defined by the configuration file, an optional argument, a second optional argument that says if the person has a habilitation or equivalent. The example shown above is invalid (official keywords are in French).
You should not use the `abstract´ and `body´ environments.
You can use a glossary (see line 19).
You can use \moduleref for a reference to a module.(note: ➳)
As a consequence, each module has an implicit label; the statistics shown above say that, of the 73 labels defined, only 36 were used; in fact, 40 of them were implicit.
The environments `glossaire´, `moreinfo´, `participants´ and `keywords´ are designed for modules only. The statistics say : Modules with 24, without 16, sections with 9, without 15. You have to interpret this as: there are 24 modules and 9 other sectioning commands (like \subsection) with such an information; there is a total of 40 modules (in accordance with Sections (and # of modules): 1(1) 2(1) 3(2) 4(6) 5(5) 6(13) 7(4) 8(5) 9(3)).
More information is available on the Web page.
The following commands can be used in any document, but they are specific to the Raweb.
\RAstartprojet{a}{b}{c}{d}{e}. The translation is a <accueil> element. You should not use this command, because its translation depends on parameters that are not arguments.
\begin{RAsection}{domaine} ...\end{RAsection}. The translation is a <domaine> element; it can be the target of a \ref, if a \label is used, it can also be the target of a \moduleref, but this is a bad idea, because the section may disappear, if the Raweb is viewed as a sequence of topics. The first argument can be any character sequence. Note: This is automatically generated, it should not appear in a Raweb source, otherwise the result is not conforming to the Raweb DTD.
\begin{module}{MIAOU}{9}{dif-conf}{module28}{Some title} ...\end{module}
The syntax is a bit different from what is in the input source. The translation is
<module id='uid75' html='module28'><head>Some title</head>...
A module can be the target of a \ref, or a \moduleref via its name (in the example `dif-conf´). The name does not appear in the XML result. The value `module28´ is computed by the preprocessor. The first two arguments are ignored.
\begin{participants} ...\end{participants}. The name of the environment can be `participantes´, the final S can be omitted. The translation is an element with the same name. Locally \par is redefined to do nothing. No text is allowed. If you look at the example, the comma at the end of line 21 is necessary, but should not be translated.
\begin{catperso}{title} ...\end{catperso}. This is like `participants´, but it takes an argument. No commas should be given here. The configuration file may impose restrictions on the value of the title.
\declaretopic{a}{b}. The translation is a <topic> element, with attribute num equal to a, containing an element <t_titre> containing the translation of b.
\begin{moreinfo} ...\end{moreinfo}. The translation is a <moreinfo> element. Paragraphs are allowed.
\moduleref[y]{t}{s}{m}. Argument y is optional; only empty values are allowed. Argument t is unused (this must be the name of the team in uppercase letters). If m is empty, this is reference to section s, otherwise to module m.
\pers. There are two variants, \persA and \persB. The \persA command (used outside a `catperso´ environment) takes two arguments, first name and last name, with an optional argument between them (a particle), and an optional argument after the name (info). The particle is merged with the last name (it exists only for historical reasons). If the last name contains a footnote, it is moved to the info argument. After that, we have three arguments. Initial and final spaces are removed. The command \@persA is called on these.
\persB is the variant used, since 2006, in a `catperso´ environment. The syntax is: a required argument, the first name of the person, an optional argument, the particle, a required argument, the last name of the person, a required argument, the professional category of the person, a required argument, the organization of the person, an optional argument, the info field, and an optional argument, the HDR flag. Example \pers {Rose} {Dieng-Kuntz} {Scientist} {Inria} [Chevalier de la légion d´honneur] [yes]. The process is the same as for a normal \persA: The particle is merged with the last name (it exists only for historical reasons). If the last name contains a footnote, it is moved to the info argument. After that, we have six arguments. Initial and final spaces are removed. The function \@persB is called on these.
\@persA{First}{Last}{Info}. Initial and final spaces are removed from the arguments. An optional comma after the \persA command is removed. The result is a <pers> element with two attributes nom and prenom that contain the first and last names, the value of the element being the info argument. The command is only allowed in a `catperso´ or `participants´ environment. For instance
\begin{catperso}{List of Very Important Persons}
\makeatletter
\def\@persA#1#2#3{\xbox{pers}{\xbox{firstname}{#1}%
 \xbox{lastname}{#2}\xbox{info}{#3}}}
\let\pers\persA
\pers{Jean}[de la]{Fontaine}
\pers{Donald}{Knuth}[author of \TeX]
\pers{Leslie}{Lamport}
\end{catperso}
translates as
<catperso><head>List of Very Important Persons</head>
<pers><firstname>Jean</firstname><lastname>de la Fontaine</lastname>
   <info/></pers>
<pers><firstname>Donald</firstname><lastname>Knuth</lastname>
   <info>author of <TeX/></info></pers>
<pers><firstname>Leslie</firstname><lastname>Lamport</lastname>
  <info/></pers>
</catperso>
\@persB. The command takes six arguments, it does all checks required by the Raweb. The command is only allowed in a `catperso´ environment.
You can redefine it. Example
\begin{catperso}{List of Very Important Persons 2}
\makeatletter
\def\@persB#1#2#3#4#5#6{\xbox{pers}{\xbox{firstname}{#1}\xbox{lastname}{#2}%
\xbox{main-interest}{#3}\xbox{nationality}{#4}\xbox{info}{#5}\xbox{hdr}{#6}}}
\pers{Jean}[de la]{Fontaine}{Tales}{French}[][phd]
\pers{Donald}{Knuth}{Math}{American}[ author of \TeX]
\pers{Leslie}{Lamport }{Computer Science}{American}
\end{catperso}
Translation
<catperso><head>List of Very Important Persons 2</head>
<pers><firstname>Jean</firstname><lastname>de la Fontaine</lastname>
   <main-interest>Tales</main-interest>
   <nationality>French</nationality><info/><hdr>phd</hdr></pers>
<pers><firstname>Donald</firstname><lastname>Knuth</lastname>
     <main-interest>Math</main-interest><nationality>American</nationality>
     <info>author of <TeX/></info><hdr/></pers>
<pers><firstname>Leslie</firstname><lastname>Lamport</lastname>
   <main-interest>Computer Science</main-interest>
   <nationality>American</nationality><info/><hdr/>
</pers>
</catperso>
In some cases, TeX or Tralics produce wrong results, incomprehensible error messages, and so on. In these cases, you must use specialized commands to see what happens. Since the internal structure of TeX is not the same as Tralics, the results in the transcript file may be different.
We have explained the command \show: it prints the meaning of a command (useful for a user defined command) and \showthe (this shows the value of a variable, counter, a token list, etc). We have also mentioned that \showbox prints the content of a TeX box or XML element. There is a command \showlists; its effect is to indicate the global context; this is not implemented in Tralics. The typical example is from the TeXbook. Given the test file:
\tracingcommands=1
\hbox{
$
\vbox{
\noindent$$
x\showlists
$$}$}\bye
This is the result of the \showlists command.
### display math mode entered at line 5
\mathord
.\fam1 x
### internal vertical mode entered at line 4
prevdepth ignored
### math mode entered at line 3
### restricted horizontal mode entered at line 2
\glue 3.33333 plus 1.66666 minus 1.11111
spacefactor 1000
### vertical mode entered at line 0
prevdepth ignored
This example does not compile in Tralics: you cannot put a \vbox in a math formula. You cannot put a display math formula in a formula.
TeX provides 9 commands of the form \tracingXXXX described earlier. Each variable defines an integer (in general, positive means verbose). There is a command \tracingall that turns everything on. In Tralics, it sets \tracingmacros, \tracingoutput, \tracingcommands and \tracingrestores to 1. Only these variables are useful in Tralics (the command \tracingmath is new in version 2.11, it controls the math printing). For instance, \tracingonline controls whether or not anything is printed on the terminal; for Tralics, debugging information is only printed on the transcript file. Variables like \tracingparagraphs and \tracingpages show line-break and page-break calculations, performed by TeX but not by Tralics. The command \tracingoutput shows boxes when they are shipped out (in Tralics, the whole XML tree is printed at the end; if the command is positive, lines are printed, whenever used by the scanner), \tracinglostchars indicates all characters not found in the fonts (Tralics never looks at font properties).
The command \tracingstats indicates that TeX should gather all statistical information available; in Tralics, statistics are always computed; if you call it with the `silent´ switch, statistics are not printed on the terminal. Note that the `verbose´ switch calls \tracingall.
There are three remaining commands: \tracingmacros is used whenever a user command is expanded, \tracingrestores whenever things are popped from the save stack, and finally, \tracingcommands for all other commands. Let´s start with the example given on page 2.1. This is what you see if \tracingoutput is positive:
[4] \def\foo#1{\xbar#1}
[5] \def\xbar#1{{\itshape #1}}
[6] \foo{12}
It shows the input. This is what you see if \tracingmacros is positive:
\foo #1->\xbar #1
#1<-12
\xbar #1->{\itshape #1}
#1<-1
This is what you see if \tracingrestores is positive:
+stack: level + 2 for brace
{Push p 1}
{font restore }
+stack: level - 2 for brace
This is now what you see if \tracingcommands is positive: As you can see, some commands produce more than one line in the transcript file. For instance, a line is printed for \def when the command is seen, another one when the whole definition is read.
{\def}
{\def \foo #1->\xbar #1}
{\def}
{\def \xbar #1->{\itshape #1}}
{begin-group character {}
{\itshape}
{font change \itshape}
Character sequence: 1.
{end-group character }}
{Text:1}
Character sequence: 2 .
{Text:2
}
This is the start of the trace on page 2.2:
[61] \begin{x}a b c \end{x}
{\begin}
{\begin x}
+stack: level + 3 for environment
What you can see is that \begin produces three lines, the second line holds the name of the environment; the last line explains that the stack pointer was changed from 2 to 3; the system remembers that the change comes from an environment, so a closing brace of a \endgroup command is illegal. Later on, the trace says:
Character sequence: ZbAY c .
{\end}
{Text:ZbAY c }
{\end x}
\endx ->by\end {y}ay
In TeX, instead of the first line, you would have seen:
{the letter Z}
{blank space  }
{the letter c}
{blank space  }
Tralics shows all characters it translates; it puts them on a single line. The character sequence is printed on the transcript file, because the command \end wants to be logged. After that, we have a line that contains `Text´ in braces. The text is added to the current XML element; a line is printed whenever the buffer is flushed. The buffer is flushed here because it might be used by the internal routine that scans the argument of \end. The transcript file contains also:
Character sequence: ay.
{\endgroup (for env)}
{Text:ay}
+stack: ending environment x; resuming document.
+stack: level - 3 for environment
Character sequence:  .
Normally, each line of the form `level +3´, is followed by a line `level -3´, after that the current level is 2. The last line contains Character sequence, followed by a colon, a space, some characters, a period. Instead of `some characters´, you see only a space, it could be any character token with the category code of a space. In our case, it is the new line character that marks the end of the line. If the example is followed by an empty line, you will see:
[62]
{\par}
{Text:
}
What you see here is: open brace, Text, colon, some text, close brace. Here `some text´ is the space above, shown as a new line character. What the \par command does is: a) flush the buffer, so that the text is printed, b) remove space at end of paragraph, c) terminate the element and unwind the XML stack. The next line shows this `pop´. The integer 1 is the number of elements on the stack after the pop; you see the content of the stack, just before it is popped, in case the topstack is wrong. After the underscore, there is a suffix that indicates the mode (here p_v means that vertical mode will be entered after the pop).
{Pop 1: document_v p_v}
This is an example from page 2.3:
\E ->\expandafter
{\expandafter \E \E}
\E ->\expandafter
\E ->\expandafter
{\expandafter \expandafter \def}
{\expandafter \def \toto}
\toto ->\titi !
{\def}
{\def \titi !->7}
This shows that \expandafter\foo\bar shows all three tokens. This can be interesting if these tokens come from the expansion of other tokens. For instance, in a case like this
\def\y{yy}
\def\foo{\textit\y}
\expandafter\expandafter\foo
it is interesting to know that \y is expanded before \textit.
The next one is from page 2.6.
[346] \skip\count0=2pt plus \parindent \relax
{\skip}
+scanint for \count->0
+scanint for \skip->1
+scanint for \skip->2
+scandimen for \skip->2.0pt
+scandimen for \skip->3.0pt
{scanglue 2.0pt plus 3.0pt}
{\relax}
In TeX, there is a big recursive function that converts characters into integers, dimensions and glue. The interesting point is the following: We have two commands \skip and \relax. The purpose of \relax is to stop scanning the glue, because an optional `minus´ term. You will not see \parindent nor \count. The TeX output, in this case, consists of two lines. Tralics offers 6 more lines. The last line holds the glue that is effectively read and put in the register. There are three calls to the internal function `scanint´, the first is the number of the count register, the second is the number of the skip register, the last is the integer part of the dimension. There are two calls to the internal routine `scandimen´, one for each component of the glue (the shrink component is omitted, hence not read).
The next example comes from page 2.6.
1 [3506] \count0=2\ifnum\count0=\count13\fi4
2 {\count}
3 +scanint for \count->0
4 +\ifnum3532
5 +scanint for \count->0
6 +scanint for \ifnum->7
7 +\fi3532
8 +scanint for \count->13
9 +scanint for \ifnum->7
10 +iftest3532 true
11 +scanint for \count->2
12 {\relax}
13 +\fi3532
14 Character sequence: 4 .
We have already explained that `scanint´ is used to read something in case of assignment; as you can see, the procedure is also called in the case of a conditional. This example is a bit strange. Let´s explain what happens. A line of characters is read (see line L1), tokens are constructed, expanded and evaluated. The evaluator sees a first token, printed on line L2. This matches the rule: <simple assignment>, in fact, the first clause, which is <variable assignment>, that is defined as <integer variable> <equals> <number>, and the first term is \count<8-bit number>. There are two calls to `scanint´, the first with a range check. In order to makes things easier to understand, we have given an index to each call, like , , etc.
The job of is easy: there is one digit, printed on L3. The equals character is the first unread character. It is an <equals>. After the equals sign an integer is read, via . This sees the digit 2, then the conditional . This number was computed by Tralics, it is printed on line L4 to make debug easier. The \ifnum command reads two numbers, and a character between them, and compares the numbers. First number is read via . In fact, sees \count and calls . Procedure sees the number 0, followed by an equals sign. It prints that value on line L5. Now knows that its value is in \count0, this is 7, printed on line L6. After that, has a first number 7, and sees the equal sign, and reads the second number via . This sees \count and reads a number via . This reads 13. Then comes \fi. The \fi command prints line L7 on the transcript file. This terminates . This is not possible: our conditional is still reading the second number. As a consequence, two tokens are pushed back, a \fi and a \relax, in this order: the \relax is read again first. This terminates expansion of the \fi.
Our procedure is programmed to fully expand tokens, and read them as long as digits are seen (even if the result overflows). It is unaware of the fate of the \fi token. All it knows is that the first unexpandable token after the digit 3 is \relax. Thus, has finished its jobs: the value is 13, printed on line L8. Then knows its result: the value is \count13, hence 7, printed on line L9. After that, has two numbers, they are the same, the test is true, as can been seen on line L10. Normal expansion resumes; however the condition stack has a marker that tells that the next \fi or \else matches . If the test had been false, the expansion of the test would have read, at high speed, all tokens up to the next \fi or \else. There are four unread tokens: a \relax, a \fi, the digit 4, and the newline character. Remember : this is a procedure that has read a digit, and wonders what follows. It does not care how complicated the task of `expand´ may be. It just wants a non-expandable token. In fact, the current token is \relax. Thus, knows it has read all digits; it prints the result of the transcript file L11. As a consequence, 2 is stored in \count0. The \relax token does nothing (let´s hope nobody has redefined it), see line L12. The conditional is terminated because of the inserted \fi token, line L13. After the last character on the line is translated, a new line is read, and a line of the form L1 will be printed; before a line is added to the transcript file, the internal buffer is flushed, this explains line L14. Note that the following sequence provokes an error in TeX(if both counters are equal)
\edef\FOO{\ifnum\count1=\count13\fi}
\expandafter\def\FOO{2x}
It is accepted by Tralics. As a consequence, the special \relax token inserted by TeX always behaves like \relax.
When Tralics sees a \else in a true condition, it reads everything at high speed, until finding the matching \fi; the example below shows the trace in such a case.
1 [1] \iftrue \else \ifcat 11\ifx ab \else \fi \ifnum1=2 \else \fi \fi\fi
2 +\iftrue1
3 +iftest1 true
4 +\else1
5 +\ifcat1(+1)
6 +\ifx1(+2)
7 +\else1(+2)
8 +\fi1(+2)
9 +\ifnum1(+2)
10 +\else1(+2)
11 +\fi1(+2)
12 +\fi1(+1)
13 +\fi1
We explain here the translation of some commands related to the picture environment. The syntax is unusual. In some cases, a pair of integers or a pair of real numbers are read. These numbers are multiplied by the value of the current unit of length, and the XML file contains these values, in pt, without the unit. The default value of \unitlength is 1pt. For instance
\setlength{\unitlength}{3pt}
\def\ten{10}
\put(\ten,\ten.2){x}
translates as <pic-put xpos=´30´ ypos=´30.59999´>x</pic-put>. As the example shows, arithmetic on scaled integers is exact, but `10.2´ cannot be represented exactly. In some cases, arguments are converted to attributes, and errors can be signaled. In the case `\put(1.2.3,4) {}”, you will see Missing unit (replaced by pt) {Character . of catcode 12}, followed by three other errors. In the case of `\makebox(1,2)[$\alpha$]{x}´ the error is unexpected element formula. Without the dollar signs, an error is signaled, the math formula is discarded, a second error is signaled with unexpected element error. If you invoke Tralics with `-noxmlerror´, the first error produces no <error> element, so that there is only one error.
\begin{picture}(A,B)(C,D) ...\end{picture}. The first two arguments are required, the other ones are optional. Normally, there should be no text in the environment, the mode is neither horizontal not vertical, \par commands are forbidden. Example:
\begin{picture}(1,2)
\begin{picture}(3,4)(5,6)
  1=1
\end{picture}
\end{picture}
This translates as
<picture width='1' height='2'>
   <picture xpos='5' ypos='6' width='3' height='4'>
     1=1
   </picture>
</picture>
\fboxrule, \fboxsep. These two dimensions are defined by LaTeX, unused by Tralics. Default values: 0pt and 3pt.
\makebox(A,B)[x]{y}. This translates the value y, inside a group (as is the case for all `box´ commands that follow). The result is <pic-framebox> element, with attributes width=`A´, height=`B´, and position=`x´.
\framebox(A,B)[x]{y}. Same as \makebox above, but the attribute framed is set to true. As an example, the translation of
\makebox(1,2)[l]{\it x}
\makebox(1,2){\it x}
\framebox(1,2)[l]{\it x}
\framebox(1,2){\it x}
is
<pic-framebox width='1' height='2' position='l'>
    <hi rend='it'>x</hi></pic-framebox>
<pic-framebox width='1' height='2'>
    <hi rend='it'>x</hi></pic-framebox>
<pic-framebox width='1' height='2' position='l' framed='true'>
    <hi rend='it'>x</hi></pic-framebox>
<pic-framebox width='1' height='2' framed='true'>
    <hi rend='it'>x</hi></pic-framebox>
\makebox[w][x]{y}. See alternate syntax above. The first argument must be a dimension, it is the width of the box; its value is currently ignored. The second argument must be one character of `lrcs´. A paragraph is started if necessary. The result is a <mbox> element, containing the translation of y, unless either the box contains only a <figure>, or if it contains only text (characters, and font changes), case where the result is y.
\mbox{y}. This is exactly like \makebox, with a simple syntax. For instance:
\makebox{\it x} \mbox{\it x}
\makebox[2cm]{y\it x}
\makebox[2cm][l]{\it x}
\makebox{$x$} \mbox{$x$}
\makebox{\xbox{foo}{bar}} \mbox{\xbox{foo}{bar}}
\makebox{\includegraphics{x}}\mbox{\includegraphics{x}}
translates as
<hi rend='it'>x</hi> <hi rend='it'>x</hi>
<mbox>y<hi rend='it'>x</hi></mbox>
<mbox position='l'><hi rend='it'>x</hi></mbox>
<mbox><formula type='inline'><simplemath>x</simplemath></formula></mbox>
<mbox><formula type='inline'><simplemath>x</simplemath></formula></mbox>
<mbox><foo>bar</foo></mbox> <mbox><foo>bar</foo></mbox>
<figure rend='inline' file='x'/><figure rend='inline' file='x'/>
\framebox[w][x]{y}. This is like \makebox, but the result is a <fbox>, instead of <mbox>, with attribute rend =`boxed´. In the case where the content is a <figure>, then no box is created but the attribute framed is added to the figure.
\fbox{y}. Like \framebox, with a simple syntax. For instance
\framebox{\it x} \fbox{\it x}
\framebox[2cm]{y\it x}
\framebox[2pt][l]{\it x}
\framebox{$x$} \fbox{$x$}
\framebox{\xbox{foo}{bar}} \fbox{\xbox{foo}{bar}}
\framebox{\includegraphics{x}} \fbox{\includegraphics{x}}
translates as
<fbox rend='boxed'><hi rend='it'>x</hi></fbox>
<fbox rend='boxed'><hi rend='it'>x</hi></fbox>
<fbox width='56.9055pt' rend='boxed'>y<hi rend='it'>x</hi></fbox>
<fbox width='2.0pt' position='l' rend='boxed'><hi rend='it'>x</hi></fbox>
<fbox rend='boxed'><formula type='inline'><simplemath>x</simplemath>
  </formula></fbox>
<fbox rend='boxed'><formula type='inline'><simplemath>x</simplemath>
   </formula></fbox>
<fbox rend='boxed'><foo>bar</foo></fbox>
<fbox rend='boxed'><foo>bar</foo></fbox>
<figure framed='true' rend='inline' file='x'/>
<figure framed='true' rend='inline' file='x'/>
\scalebox{x}{y}. The translation is a <scalebox> containing y, with a scale attribute whose value is x.
\rotatebox{x}{y}. The translation is a <pic-rotatebox> containing y, with a angle attribute whose value is x.
\dashbox{A}(B,C)[d]{y}. The translation is a <pic-dashbox> containing y, with a position attribute whose value is d. The three values A, B and C are numbers, affected by the unit length. They produce attributes dashdim, width and height. Example:
\setlength\unitlength{2pt}
\scalebox{3}{\it x}
\rotatebox{90}{\it x}
\dashbox{1.2}(2,3)[l]{\it x}
\dashbox{1.2}(2,3){\it x}
The translation is
<scalebox scale='3'><hi rend='it'>x</hi></scalebox>
<pic-rotatebox angle='90'><hi rend='it'>x</hi></pic-rotatebox>
<pic-dashbox dashdim='2.4' width='4' height='6' position='l'>
  <hi rend='it'>x</hi></pic-dashbox>
<pic-dashbox dashdim='2.4' width='4' height='6'>
  <hi rend='it'>x</hi></pic-dashbox>
\begin{minipage}[x][y][z][t]{dim} ...\end{minipage}. Optional arguments y and t are ignored. Arguments x and z should define vertical position. The last argument is a glue. Note: the translation starts in vertical mode. The command \nocentering is called.
\parbox[x][y][z]{dim}{y}. This should be the non-environment version of `minipage´, but it is much more primitive. It behaves like \hbox and \xbox for argument parsing. Example
\begin{center}
a
\begin{minipage}{2cm} a \end{minipage}
\begin{minipage}[c][l][b][r]{2cm plus 3pt} a \end{minipage}
\end{center}
\parbox[foo][bar][gee]{2cmPlus3mm}{some \it box content}.
The translation is
<p rend='center'>a
<minipage width='56.9055pt'><p>a </p></minipage>
<minipage inner-pos='b' pos='c' width='56.9055pt'><p>a </p></minipage></p>
some <hi rend='it'>box content</hi><p>.</p>
\bezier{N}(A,B)(C,D)(E,F). The first argument must be an integer, others are real numbers, affected by \unitlengh. The result is a <pic-bezier> element.
\qbezier[N](A,B)(C,D)(E,F). As above, but the first argument is optional. A Bezier curve is defined by three points, you must give the coordinates. In the first implementation, you had to specify the number of intermediate points used for plotting. For instance
\bezier{10}(1,2)(3,4)(5,6)
\qbezier(1,2)(3,4)(5,6)
\qbezier[10](1,2)(3,4)(5,6)
translates as
<pic-bezier a1='1' a2='2' b1='3' b2='4' c1='5' c2='6' repeat='10'/>
<pic-bezier a1='1' a2='2' b1='3' b2='4' c1='5' c2='6'/>
<pic-bezier a1='1' a2='2' b1='3' b2='4' c1='5' c2='6' repeat='10'/>
\put(A,B){x}. The translation is a <pic-put> element containing the translation of x, with attributes xpos and ypos that come from A and B.
\xscale, \yscale, \xscaley, \yscalex. These are user defined commands, that should contain real numbers. The default values are 1, 1, 0, and 0.
\scaleput(A,B){x}. The translation is a <pic-scaleput>. It is like \put, but current scale values are put in the element. For instance the translation of
\setlength\unitlength{2pt}
\put(1,2){x}
\def\xscale{2.0}\def\yscale{3.0}\def\xscaley{4}\def\yscalex{0.5}
\scaleput(1,2){x}
is
<pic-put xpos='2' ypos='4'>x</pic-put>
<pic-scaleput xpos='2' ypos='4'
  xscale='2.0' yscale='3.0' xscaley='4' yscalex='0.5'>x</pic-scaleput>
\multiput(A,B)(a,b){n}{x}. The translation is a <pic-multiput> element, with all the arguments as attributes. If the command is followed by a star, then n calls of \put are evaluated, with the same argument x, but at positions instead of . See example of the little car on figure 4; the ruler was constructed with \multiput, a star is used for the figures.
\frame{x}. This translates as <pic-frame> with the value of x.
\oval(A,B)[c]. This translates as <pic-oval/> with some attributes, xpos, ypos, spec.
\line(A,B){c}. This translates as <pic-line/>. The first two arguments have to be integers. Only small values are recognized by LaTeX. The last argument is a real number. Attributes are xdir, ydir, width.
\vector(A,B){c}. This translates as <pic-vector/>. Same comments as above. Example.
\setlength\unitlength{2pt}
\oval(2,3) \oval(2,3)[4]
\frame{x}
\line(2,3){12.2} \vector(2,3){12.2}
The translation is
<pic-oval xpos='4' ypos='6'/>
<pic-oval xpos='4' ypos='6' specs='4'/>
<pic-frame>x</pic-frame>
<pic-line xdir='2' ydir='3' width='24.4'/>
<pic-vector xdir='2' ydir='3' width='24.4'/>
\linethickness{x}. The translation is <pic-linethickness> with attribute size.
\arc[n](A,B){c}. The translation is an empty <pic-arc> with attributes nbsymb, angle, xpos, ypos (and also unit-length).
\bigcircle[n]{c}. The translation is an empty <pic-bigcircle> element with attributes nbsymb, size, (and also unit-length).
\circle{c}. The translation is an empty <pic-circle>. For instance
\setlength\unitlength{2pt}
\arc[17](2,3){40} \arc(2,3){40}
\bigcircle[17]{40} \bigcircle{40}
\circle{40}
translates to
<pic-arc angle='40' xpos='4' ypos='6' unit-length='2' nbsymb='17'/>
<pic-arc angle='40' xpos='4' ypos='6' unit-length='2'/>
<pic-bigcircle size='40' unit-length='2' nbsymb='17'/>
<pic-bigcircle size='40' unit-length='2'/>
<pic-circle size='80'/>
\curve[n](A1,B1)(A2,B2)(A3,B3),...,(An,Bn).
\closecurve[n](A1,B1)(A2,B2)(A3,B3),...,(An,Bn).
\tagcurve[n](A1,B1)(A2,B2)(A3,B3),...,(An,Bn). These produces curves.
\dashline[A]{B}[C](A1,B1)(A2,B2)(A3,B3),...,(An,Bn).
\dottedline[A]{B}[C](A1,B1)(A2,B2)(A3,B3),...,(An,Bn).
\drawline[A][C](A1,B1)(A2,B2)(A3,B3),...,(An,Bn). These produce dashes. Example:
\setlength\unitlength{2pt}
\curve[12](1,2)(3,4)(4,5)(7,8)
\tagcurve[12](1,2)(3,4)(4,5)(7,8)
\closecurve[12](1,2)(3,4)(4,5)(7,8)
\curve(1,2)(3,4)(4,5)(7,8)
\tagcurve(1,2)(3,4)(4,5)(7,8)
\closecurve(1,2)(3,4)(4,5)(7,8)
\dashline[12]{13}[14](1,2)(3,4)(4,5)(7,8)
\dottedline[12]{13}[14](1,2)(3,4)(4,5)(7,8)
\drawline[12][14](1,2)(3,4)(4,5)(7,8)
The translation is
<pic-curve unit-length='2' nbsymb='12'>1,2</pic-curve><p>(3,4)(4,5)(7,8)
<pic-tagcurve unit-length='2' nbsymb='12'>1,2</pic-tagcurve>(3,4)(4,5)(7,8)
<pic-closecurve unit-length='2' nbsymb='12'>1,2</pic-closecurve>(3,4)(4,5)(7,8)
<pic-curve unit-length='2'>1,2</pic-curve>(3,4)(4,5)(7,8)
<pic-tagcurve unit-length='2'>1,2</pic-tagcurve>(3,4)(4,5)(7,8)
<pic-closecurve unit-length='2'>1,2</pic-closecurve>(3,4)(4,5)(7,8)
<dashline arg3='14' arg2='13' arg1='12'>
   <point xpos='2' ypos='4'/><point xpos='6' ypos='8'/>
   <point xpos='8' ypos='10'/><point xpos='14' ypos='16'/></dashline>
<dottedline arg3='14' arg2='13' arg1='12'><point xpos='2' ypos='4'/>
   <point xpos='6' ypos='8'/><point xpos='8' ypos='10'/>
   <point xpos='14' ypos='16'/></dottedline>
<drawline arg3='14' arg1='12'><point xpos='2' ypos='4'/>
   <point xpos='6' ypos='8'/><point xpos='8' ypos='10'/>
<point xpos='14' ypos='16'/></drawline>
Consider the following document fragment. Note the spellings of the commands \keyword and \motcle, this is not the same as for the environments of the Raweb.
1 \documentclass[a4paper]{report}
2 \usepackage{RR}
3
4 \providecommand\Tralics{\xbox{Tralics}{}}
5 \def\XML{XML}
6
7 \RRtitle{Tralics, a \LaTeX\ to XML translator\\Partie I}
8 \RRetitle{Tralics, a \LaTeX\ to XML translator\\Part I}
9 \RRauthor{José Grimm\thanks{Email: Jose.Grimm@sophia.inria.fr}}
10
11 \RRprojet{Apics}
12 \RRtheme{\THNum}
13
14 \RRresume{
15 Dans cet article\par nous décrivons le logiciel \Tralics,\par...}
16 \RRabstract{
17 In this paper we describe \Tralics, a \LaTeX\ to \XML\ translator.}
18
19 \RRdate{Aout 2005}
20 \URSophia
21 \motcle{Latex, XML, HTML, MathML, Perl, PostScript, Pdf}
22 \keyword{Latex, XML, HTML, MathML, Perl, PostScript, Pdf}
23
24 \begin{document}
25 \makeRR
26 text
This is translated by Tralics as follows.
<?xml version='1.0' encoding='iso-8859-1'?>
<!DOCTYPE std SYSTEM 'classes.dtd'>
<!-- Translated from latex by tralics 2.9, date: 2006/10/03-->
<std chapters='true'>
<ftitle>Tralics, a <LaTeX/> to XML translator Partie I</ftitle>
<title>Tralics, a <LaTeX/> to XML translator Part I</title>
<author>José Grimm<note id='uid1' place='foot'>Email:
Jose.Grimm@sophia.inria.fr</note></author><inria-team>Apics</inria-team>
<theme>THnum</theme><resume><p>Dans cet article</p>
<p>nous décrivons le logiciel <Tralics/>,</p>
<p>...</p></resume>
<abstract><p>In this paper we describe <Tralics/>, a <LaTeX/> to XML
translator.</p></abstract>
<date>Aout 2005</date><location>Sophia Antipolis</location>
<motcle>Latex, XML, HTML, MathML, Perl, PostScript,
Pdf</motcle><keyword>Latex, XML, HTML,  MathML, Perl, PostScript,
Pdf</keyword><p>text</p>
</std>
The document you are reading here is a technical report (it has \makeRT instead of \makeRR, but it uses the same commands starting with `RR´, they are defined in the file RR.sty, and Tralics (since version 2.9) uses some equivalents from the file RR.plt. This was translated to XML then HTML (may be you are reading the HTML version).
Since year 2006, Inria´s research reports are to be put on HAL(note: ➳); before that, they were stored on Inria´s Web server. The meta-data were generated automatically: the author sends to the “gescap” mailing list the beginning of the document, up to the magic command \makeRR; this is translated by Tralics (that does not care about missing \end{document}); a post-processor extracts the <RRstart> element from the XML result, and converts it to HTML.
Let´s compile the same file as above with the command tralics tptest.tex -type RR.
<?xml version='1.0' encoding='iso-8859-1'?>
<!DOCTYPE rr SYSTEM 'raweb.dtd'>
<!-- Translated from latex by tralics 2.9, date: 2006/10/03-->
<rr type='RR' chapters='true'>
<RRstart><UR>
<URSophia/>
</UR>
<title>Tralics, a <LaTeX/> to XML translator Partie I</title>
<etitle>Tralics, a <LaTeX/> to XML translator Part I</etitle>
<projet>Apics</projet>
<motcle>Latex, XML, HTML, MathML, Perl, PostScript, Pdf</motcle>
<keyword>Latex, XML, HTML, MathML, Perl, PostScript, Pdf</keyword>
<resume><p>
Dans cet article</p>
<p>nous décrivons le logiciel <Tralics/>,</p>
<p>...</p></resume>
<abstract><p>
In this paper we describe <Tralics/>, a <LaTeX/> to XML translator.</p></abstract>
<author><auth>José Grimm<note id='uid1' place='foot'>
   Email: Jose.Grimm@sophia.inria.fr</note></auth>
</author>
<date>Aout 2005</date>
<RRnumber>????</RRnumber>
<Theme>
<THNum/>
</Theme>
</RRstart>
<p>text</p>
</rr>
We have shown above the content of the files RR.plt and RR.tcf. One file ends with \let \RRstyisuseful \relax and the other starts with \ifx \RRstyisuseful \relax \endinput \fi. As a result, if you load the tcf file, the content of the plt file is discarded.
The syntax in the TitlePage part of a configuration file is the following: each line has some fields, that can be of type A (the word `alias´, or `action´ or `execute´) or type C (a command, a backslash followed by some letters), or E (an element name, delimited by less-than and greater-than) or S (a string, delimited by a double quote). Before each field, you can put one or two modifiers. Only the second and the third fields can have a modifier. More details can be found on the web page. The following combinations are recognized.
as in \makeRR <RRstart> "" “type = ´RR´”. This declaration has to be the first in the list. It can be given only once. No modifiers are allowed. It defines a command \makeRR, that can be used only once in the document, after \begin{document}.
The effect is to insert the <RRstart> element into the XML tree, after some checks (that may produce an error). In what follows, we shall call it the TPA element. This element is formed of other elements defined by the titlepage info, the names of these elements are statically defined, their content is dynamic (i.e., the names depends on the configuration file, the content on the TeX document). The first string is a list of attributes added to the TPA element and the second string is a list of attributes added to the document element. In our example, the first string is empty.
In the case where one of the attributes of the second string has the value `only title page´, then \endinput is evaluated just after the Titlepage command. This means that everything after the titlepage command is ignored. This is useful if you want to extract the titlepage information from a document, without converting the whole document.
as in alias "" “type = ´RT´”. This declaration is valid only after a CESS declaration (or after another AESS declaration). It defines a command \makeRT that can be used instead of \makeRR (only one of these commands can be used). The result is the same; however it can use different attributes. (Same remark as above for special attribute values in the second string). In what follows, the \TPA command means one of the commands defined by this rule or the preceding one.
as in \RRauthor + <author> <auth> “Pas d´auteurs”. Note that the plus sign is required before the <author> element. This declaration has as side effect that the TPA element will contain a <author> element, formed of a number of <auth> elements. Initially there is only one, initialized with `Pas d´auteurs´.
The declaration has another effect, it defines a command \RRauthor, that has to be used before the \TPA command. It takes one argument, and creates a <auth> element whose content is the translation of the argument. This element is added to the end of the <author> element. The command can be used more than once, in the case there are multiple authors. Note that the default value is removed in case at least one value is given.
as in \myself \RRauthor “JG”. The effect is the same as \def\myself{\RRauthor{JG}}. However, the string argument is not translated, it is taken verbatim.
as in alias \URRocq. This makes \URrocq an alias for the command defined on the previous line. Aliasing is achieved via \let.
as in <UR> -. The dash after the element is required. Another example can be <sUR fr=´unité de recherche´ en=´research unit´> -. In this second example, we have an element named <sUR>, that has two attributes. The effect is to put, in the XML result, this element (with its attributes), and its content is a list of items declared in the configuration file (the list can be empty).
as in \URSophia ?+<UR> or \URFuturs ?+<UR d=´true´>. This has as effect to define a command, here \URSophia or \URFuturs, that takes no argument, whose effect is to insert, to the element <UR> (that must be defined by a previous rule), an empty element, whose name is <URSophia>, and that has the attributes of <UR>.
as in \Paris ?<UR> <Rocquencourt>. The effect is to define a command \Paris, that behaves like \URsophia, but the element created is <Rocquencourt> instead of one named <Paris>.
A character string is inserted verbatim. Note that less-than signs are not converted to entities like <.
as in execute \foo or action \foo. The expression \xbox{}{\foo} is translated. The resulting box is added to the XML tree.
as \RRtitle <title> “pas de titre”. This is the generic command. The element can have the modifiers p, q, e or E, and the value can have the modifiers +ABC. The effect is to define a command \RRtitle (or an environment `RRtitle´ if the E modifier has been given), that can be used only before the \TPA command. The argument of the command (or the content of the environment) is translated, put in a <title> element, and added to the TPA element.
If no modifier is given for the element, paragraphs are forbidden in the argument. If you want to use paragraphs (either \par or \\) you must use the P modifier (lower-case letter). In the same fashion, a lower case E means environment without paragraphs, an upper case E means environment with paragraphs. If the q modifier is given, paragraphs are forbidden, but you can use \\, which is ignored. (In fact, the command reads an optional star, an optional argument, and the result is replaced by a space). Note that, in this document, there is a \\ in the title, that appears as a space in the page headings. This is done by redefining \\ to \space, so that optional arguments are not taken into account. There is a dirty hack in Tralics.
If no modifier is given for the value, then <title>pas de titre</title> is added to the TPA element in case the command is never used.
Near the end of the titlepage example, we define \cmdp, \cmdA, \cmdB, and \cmdC in a similar fashion, but add a modifier before the value. None of these commands is used in the TeX file; if you uncomment them, you can observe the following facts.
Tralics complains with: Error signaled at line 25 of file tptest.tex: No value given for command \cmdp. In fact, when Tralics sees the \makeRR command, it notices that \cmdp has not been called and complains, because the plus-sign modifier means: this value is required.
In the case where the modifier is one of A, B or C, then the default value is a LaTeX command (in fact, a list of characters, that may be interpreted as a set of LaTeX commands, and must be translated). Tralics removes the double quotes, and inserts the characters in one of its buffers, or converts the string into a token list that is appended to the input token list. The non trivial point is: when is the command evaluated?
In thee case of `A´ modifier, the command is evaluated just before the \documentclass command. There may be other lines that are not in the TeX source file that are evaluated there.
In the case of `B´ modifier, the command is evaluated at begin-document. More precisely \cmdb{\cmdBval} is tokenised, and the result is added to the token list maintained by \AtBeginDocument.
In the case of `C´ modifier, the command is evaluated when the TPA command is seen. The important point is that category codes in effect at this moment will be used to convert the string into a sequence of tokens.
There is special trick for the case where the name of the element associated to the command is empty. Assume that the configuration file contains \RRtheme <> +“pas de theme”. In the case where the user does not use \RRtheme, an error will be signaled, and the text will appear in the resulting XML. If the user says \RRtheme{foo}, then Tralics remembers the use and issues no complain. Moreover, it reads the argument, and pushes foo\par in the input stream (the reason why \par is executed is to make sure that Tralics remains in vertical mode).
We describe here the implementation of the arrays in Tralics. One has to distinguish between `table´ which is an environment in which you can put some objects (in general tables) with a caption; like the `figure´ environment, this generates a floating object. On the other hand, the `array´ and `tabular´ environments can be used to create a table: the first one is designed for math only, the second for non-math material. Math tables are described in the chapter about mathematics. There is currently no difference between `figure´, `figure*´ and `wrapfigure´.
Example
\begin{table}
\begin{tabular}{c} x \\y \end{tabular}
\caption{My caption}
\label{tl}
\end{table}
\begin{tabular}{c} \ref{tl} \end{tabular}
The translation is a follows. As you can see, both objects have the same name. If the table contains a tabular, only one XML object is created.
<table id='uid1'>
  <head>My caption</head>
  <row><cell halign='center'>x</cell></row>
  <row><cell halign='center'>y</cell></row>
</table>
<p><table rend='inline'><row><cell halign='center'><ref target='uid1'/></cell>
</row></table></p>
You can say \begin{tabular} [pos] {cols} ...\end{tabular} or \begin{tabular*}{width} [pos] {cols} ...\end{tabular*}. In both cases, the result is a <table> element. This element has a vpos attribute whose value is t, b or c, provided that the optional [pos] argument is one of [t], [b] or [c]. The element has a width attribute with value xx, provided that the `tabular*´ environment has been used and the first argument evaluates to xx as a dimension. The resulting element consists of some <row> elements, each of which contains some <cell> elements. A more complicated example:
\begin{tabular*}{10pc}[b]{lrc}
\hline
a&b&c\\[2pt]
\multicolumn{1}{l}{A}&B&C\\\hline
\end{tabular*}
The translation here shows that the name of elements and attributes can be changed.
<Table VPos='b' TableWidth='120.0pt' rend='inline'>
  <Row SpaceAfter='2.0pt' TopBorder='true'>
     <Cell Align='Cleft'>a</Cell>
     <Cell Align='Cright'>b</Cell>
     <Cell Align='Ccenter'>c</Cell>
  </Row>
  <Row BottomBorder='true'>
     <Cell Align='Cleft' Cols='1'>A</Cell>
     <Cell Align='Cright'>B</Cell>
     <Cell Align='Ccenter'>C</Cell>
  </Row>
</Table>
This is an example of halign from the TeXbook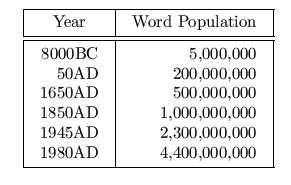
The preamble of the array is the quantity marked `{cols}´ in the description above. This is a specification for columns. It specifies how the columns should be formatted. In standard LaTeX, you cannot use more columns than specified; in Tralics, this is not relevant. The TeX primitive is called \halign, and LaTeX has to construct a preamble that matches the requirements of TeX; it is very difficult to implement the TeX algorithm, so that we make no attempt to implement the commands. This is an example
\vbox{\offinterlineskip
\hrule
\halign{&\vrule#&
\strut \quad\hfil#\quad\cr
height2pt &\omit&&\omit&\cr
&Year\hfil&&Word Population&\cr
height2pt &\omit&&\omit&\cr
\noalign{\hrule}
\noalign{\vskip 2pt}
\noalign{\hrule}
height2pt &\omit&&\omit&\cr
&8000BC&&5,000,000&\cr
&50AD&&200,000,000&\cr
&1650AD&&500,000,000&\cr
&1850AD&&1,000,000,000&\cr
&1945AD&&2,300,000,000&\cr
&1980AD&&4,400,000,000&\cr
height2pt &\omit&&\omit&\cr}\hrule}
The table has 5 columns, of the form ABABA, because the preamble has the form &A&B\cr, the first & marks repetition. Both templates A and B are formed of a 〈u〉 part, then #, then a 〈v〉 part. In the table, the # means: “stick the text of each column entry in this place”. In the case of A, this is almost always empty. In some cases, it is `height2pt´, case where the values of B are \omit. Here \omit says that 〈u〉 and 〈v〉 should be omitted; the important point is that the \strut be omitted. This gives additional vertical space, of exactly 2pt; other rows have (at least) the vertical size of a \strut. Very often row are too narrow; LaTeX has a command \arraystretch that controls this. Note that A is \vrule# and \vrule is a command that accepts an optional argument. Note how horizontal rules are inserted in the table.
As the previous example shows, there are three standard column types: c, l and r (centered, left-aligned, right-aligned). A TeX preamble like \quad\hfil#\quad corresponds to `r´ (instead of \quad, LaTeX uses some default intercolumn space that can be modified). You can also say p{dim}. This should typeset the column in a \parbox[t]{dim}. This feature is not implemented: the argument is ignored, and p is replaced by c. Note: \parbox currently ignores its argument in Tralics.
The array.sty package adds two options that take a dimension as argument: `m´ and `b´. The `b´ option is like the `p´ option, but bottom-aligned. The `m´ option should be used only in math mode (i.e. for the array environment, and not tabular). In Tralics, there is no difference between `b´, `m´ and `p´.
There is a @{text} option. It inserts `text´ in every row, where `text´ is processed in math mode in the `array´ environment and in LR mode in the `tabular´ and `tabular*´ environments. Such an expression suppresses the space that LaTeX normally inserts between columns. For instance, an array specification like {l@{\hspace{1cm}}l} says that the two columns of text should be separated by exactly one centimeter. A specification like {@{}c@{}} says that no additional space should be added neither of the left not the right of the column. An \extracolsep{wd} command can be used inside such an expression. It causes an extra space to appear to the left of all subsequent columns. Note that \extracolsep expands to \tabskip; this TeX primitive is not implemented in Tralics. In fact, Tralics ignores an `@´ and its argument.
You can use a | for specifying a vertical rule. However, in Tralics you cannot use double or triple rules. Sorry. There is also a !{...} options that is not implemented.
Every specification (`l´, `r´, `c´, `p´, `b´, `m´) can be preceded by a >{xx} declaration, and followed by a <{yy} declaration. In case of multiple declarations, the last will be executed first. Said otherwise, >{3}>{b}c<{a}<{z} is the same as >{b3}c<{za}. The effect is to insert `b3´ before the cell in the current position, and `za´ after the cell. See the last tabular in table 2. This corresponds to 〈u〉 and 〈v〉 parts of a TeX array. Note that the cell is finished when a token is sensed that indicates either a new cell, a new row or the end of the array. Technically, this means a &, a \\, or an \end (the end of the environment). A special marker is pushed back after the `za´. This is a special endtemplate token in the case of a cell, and a \cr in the case of \\. You should not use \cr or \crcr outside an array defined by \halign (this is not yet implemented). You must be careful that the `za´ (more generally, the 〈v〉 part) does not contain something that reads the special end marker. For instance \def\x#1{}\halign{#\x&#\cr 1&2\cr} is an error. Finally, *{N}{text} can be used instead of N occurrences of `text´.
Note. At the end of Chapter 22 of the TeXbook, Knuth gives an example of a table where the preamble is \centerline{#}. Such a construction cannot be done in Tralics, since a specification of the form >{\centerline}c<{} would transform into \centerline?#? and question marks cannot be replaced by braces; you could try >{\expandafter\centerline?} and replace the question mark by something that expands to an open brace but contains as many open braces as closing ones, for instance \expandafter {\iffalse}\fi. However, it is not possible to put in the <{?} part something that the parser considers as a closing brace followed by some other text (otherwise, this closing brace would terminate parsing of the <{?} part).
Knuth says that an entry of the form a}b{c is legitimate, with respect to this template. This cannot be the case in Tralics, but it would be valid for a template like >{\bgroup\bf}c<{\egroup}. This justifies that a table has to be terminated by \cr or \crcr. In the case of Tralics, this is not needed.
You can add new column types to the list of existing one, using \newcolumntype, with as argument a letter. For instance:
\newcolumntype{C}{>{$}c<{$}}
\newcolumntype{L}{>{$}l<{$}}
\newcolumntype{R}{>{$}r<{$}}
\newcolumntype{d}[1]{>{\rightdots{#1}}r<{\endrightdots}}
\newcolumntype{X}{CLR}
\begin{tabular}{*{3}{|c|}d{23}X}
\end{tabular}
In this case, the transcript file will contains (line breaks added before `r´)
{Push tabular 2}
array preamble at start: |c||c||c|d{23}X
array preamble after X: |c||c||c|d{23}CLR
array preamble after d: |c||c||c|>{\rightdots {23}}
                              r<{\endrightdots }CLR
array preamble after C: |c||c||c|>{\rightdots {23}}
                              r<{\endrightdots }>{$}c<{$}LR
array preamble after L: |c||c||c|>{\rightdots {23}}
                              r<{\endrightdots }>{$}c<{$}>{$}l<{$}R
array preamble after R: |c||c||c|>{\rightdots {23}}
                              r<{\endrightdots }>{$}c<{$}>{$}l<{$}>{$}r<{$}
array preamble parse: | c | | c | | c | >>{}
                              r <<{} >>{} c <<{} >>{} l <<{} >>{} r <<{}
Whenever a tabular is seen, optional arguments are read, and then the first argument is handled. In a first pass, * is evaluated. This gives the lines marked `at start´. After that, the preamble contains, at toplevel (outside braces) two characters `d´ and `X´ that are defined to be new column types. These are evaluated one after the other (the order is irrelevant, here alphabetic order is used so that X is expanded first). Since the expansion was non trivial, a second try is made. Note that only a finite numbers of tries are executed. In case of recursion, strange things can happen. Note how you can use commands with arguments (here `d´ takes one argument, it is `23´).
The table is empty, on purpose, because there are two undefined macros, moreover, because, in the current version of Tralics, dollar signs have to be explicit, and not hidden in a >{}...<{} construction.
We consider here the following new column types. As you can see, one of them is the character +, another is the character _. The fact that these characters have special catcodes is irrelevant (they cannot be of catcode 1 and 2, because this would interfere with brace matching, and they cannot be of catcode 10, because space characters should be ignored in the preamble).
\newcolumntype{L} {>{\large\bfseries 2}l <{y}|}
\newcolumntype{+} {>{B}l <{D}|}
\newcolumntype{_}{rlc<{x}}
\newcolumntype{x}{>{b}c<{a}}
Consider the four following tables
\begin{tabular*}{339pt}[b]{*{4}{_c|}}
a1&a2&a3&a4  & b1&b2&b3&b4 & c1&c2&c3&c4& d1&d2&d3&d4\\
Wa1&Wa2&Wa3&Wa4  & Wb1&Wb2&Wb3&Wb4 & Wc1&Wc2&Wc3&Wc4& Wd1&Wd2&Wd3&Wd4\\
\end{tabular*}

\begin{tabular}{|ll|rr|cc|}
\hline a&b&c&d&e&f\\
aaa&bbb&ccc&ddd&eee&fff\\
\hline
A&\multicolumn{3}{+}{C}&E&F\\
\multicolumn{2}{|l}{ab}&c&d&e&f\\
\cline{1-3}\cline{6-6}
aaa&bbb&ccc&ddd  &eee&fff\\\hline
\end{tabular}

\begin{tabular} {| >{\large 1}c <{x}| L > {\large\itshape 3}c <{z}|}
\hline A&B&C\\\hline 100&10 &1\\\hline
\end{tabular}

\begin{tabular} {| >{\large 1}c <{x}| L > {\large\itshape 3}x <{z}|}
\hline A&B&C\\\hline 100&10 &1
\end{tabular}
Table 2. Some LaTeX tables
| a1 | a2 | a3x | a4 | b1 | b2x | b3 | b4 | c1 | c2x | c3 | c4 | d1 | d2x | d3 | d4 |
| Wa1 | Wa2 | Wa3x | Wa4 | Wb1 | Wb2x | Wb3 | Wb4 | Wc1 | Wc2x | Wc3 | Wc4 | Wd1 | Wd2x | Wd3 | Wd4 |
| a | b | c | d | e | f |
| aaa | bbb | ccc | ddd | eee | fff |
| A | BCD | E | F | ||
| ab | c | d | e | f | |
| aaa | bbb | ccc | ddd | eee | fff |
| 1Ax | 2By | 3Cz |
| 1100x | 210y | 31z |
| 1Ax | 2By | b3Cza |
| 1100x | 210y | b31za |
You can see the LaTeX result on table 2. We had to change the \tabcolsep of the first table to 0, otherwise, it is two wide. Specifying 0pt as width gives the following warning : Overfull \hbox (339.38422pt too wide) in alignment, from this we deduced that 339pt could be a good value, specifying 340 gives an underful box. The XML translation can be found on the Web page. In order to explain what happens, we consider an example:
\begin{tabular*}{10pc}[b]{l>{x}r<{y}c}
\hline
a&b&c\\[2pt]
a&\omit b&c\\
\multicolumn{1}{l}{A}&B&C\\\hline
\end{tabular*}
We explain now the translation. Line numbers refer to the transcript file given below. We do not show the start of the job (initialization). The command \par is redefined to do nothing. It is restored on line 107.
A first procedure is used to start a row. See example, lines 1, 35, 63, 101. It can take an argument, that explains that some vertical spacing should be added between rows, this is the case for line 35. Tokens are read and expanded. Spaces are ignored. If the command that comes next is \hline, for instance lines 1 and 101, we add a bottom-border attribute to the previous row (if we are about to start the first row, we mark this as top-border for the current row). If the command is \cline, see syntax above, we try to add a bottom-border attribute to some cells (this is not shown on the example). This could fail, because cells can span more than one column; in this case an row of empty cells may be added. If the next token is \end, we do nothing (line 101). Otherwise, we create a new \row element (lines 3, 36, and 63) and start a cell.
When a cell is started, the equivalent of \begingroup is evaluated, and a \cell element is started. The example table has 9 cells, started on lines 4, 12, 22, 37, 45, 53, 64, 82, 92. The `Push´ line indicates that a <cell> element is created, the line that follows show the \begingroup command. We consider the first non space token after expansion. This token may be \omit, as on line 47. The cell is marked omitted; otherwise the 〈u〉 part of the current template is added. The current token could be \multicolumn. This is a command that takes 3 arguments: an integer n, a specification c, a value v. The example on lines 66 to 69 shows how n is read; this might change, LaTeX uses the equivalent of \setcounter for parsing the number. The specification is handled in the same fashion as an array preamble (lines 70-71), it should provide only one cell specification. The integer n specifies the span, it will be added as an attribute to the cell, but also used to find the position of the next cell in the row.
The cell is marked `omit´; in fact, we push in the current input stream the value of the 〈u〉 part, 〈v〉 part and content (last argument) of \multicolumn. Braces are added for some obscure reason (see lines 72 and 73).
Translation proceeds as usual, three events may change it. Assume that we see &, as on lines 7, 15, 40, 77, 85. This is only allowed in a table. A final space in the XML element will be removed. A \endtemplate token is pushed to be read again. It will be read again on lines 9, 18, 42, 79, and 88. If the cell on the stack is not marked `omit´ then the 〈v〉 part of the template is inserted in the input stream (see lines 17 and 87).
The translation of \endtemplate is trivial: it is an error if not in a cell. Otherwise, the current cell is finished, the equivalent of \endgroup is executed, and a new cell is started as above. On line 10 you can see for instance that the cell and the row are in `array´ mode, the tabular in horizontal mode, the paragraph and the document in vertical mode.
Assume that we see \\, for instance lines 25, 56, 95. We have explained the meaning of this command outside a cell. In any case, an optional argument is read (between the command and the optional argument can be a space or a newline character, so that source line 10 is read; see line 58). The behavior is like &, except that \cr is pushed instead of \endtemplate. (in the case of an optional argument, the code is a bit hacked, see line 30).
The translation of \cr is trivial. We have two versions: one that reads a dimension, and one that does not. On lines 27-29, you can see how `scanglue´ reads to optional argument to \\, on line 31, you see that `scanint´ reads 1703, this is the address in a table of the string that represents the glue. The command finishes the cell, finishes the row, evaluates \endgroup and starts a new row.
The \end command, with argument `tabular´ or `tabular*´ behaves in a strange manner: If inside a cell, it behaves like \\, except that it does not insert \endtemplate but itself with the argument, then a \cr. We have seen that \cr starts a new row. We have seen that no row is started if the token is \end. The magic is that the top-stack contains the `begin´, and a normal `end´ can be used, instead of a hacked one. In our example, the array is terminated by \\\hline, so that the end occurs when we are about to start a new row. In order to show this, we have commented out this line, and re-run the example. The result can be seen on line 111, a \cr is inserted and evaluated on line 115, the second \end is evaluated on line 19.
The commands \cr, \crcr, \span, \halign, \valign, \noalign are not implemented as described in the TeXbook.
This is the transcript file.
1 [7] \hline
2 [8] a&b&c\\[2pt]
3 {Push row 3}
4 {Push cell 4}
5 +stack: level + 3 for cell
6 Character sequence: a.
7 {alignment tab character &}
8 {Text:a}
9 {\endtemplate}
10 {Pop 4: document_v p_v tabular*_h row_a cell_a}
11 +stack: level - 3 for cell
12 {Push cell 4}
13 +stack: level + 3 for cell
14 Character sequence: xb.
15 {alignment tab character &}
16 {Text:xb}
17 Character sequence: y.
18 {\endtemplate}
19 {Text:y}
20 {Pop 4: document_v p_v tabular*_h row_a cell_a}
21 +stack: level - 3 for cell
22 {Push cell 4}
23 +stack: level + 3 for cell
24 Character sequence: c.
25 {\\}
26 {Text:c}
27 +scanint for \\->2
28 +scandimen for \\->2.0pt
29 {scanglue 2.0pt}
30 {\cr withargs}
31 +scanint for \cr withargs->1703
32 {Pop 4: document_v p_v tabular*_h row_a cell_a}
33 +stack: level - 3 for cell
34 {Pop 3: document_v p_v tabular*_h row_a}
35 [9] a&\omit b&c\\
36 {Push row 3}
37 {Push cell 4}
38 +stack: level + 3 for cell
39 Character sequence: a.
40 {alignment tab character &}
41 {Text:a}
42 {\endtemplate}
43 {Pop 4: document_v p_v tabular*_h row_a cell_a}
44 +stack: level - 3 for cell
45 {Push cell 4}
46 +stack: level + 3 for cell
47 Character sequence: b.
48 {alignment tab character &}
49 {Text:b}
50 {\endtemplate}
51 {Pop 4: document_v p_v tabular*_h row_a cell_a}
52 +stack: level - 3 for cell
53 {Push cell 4}
54 +stack: level + 3 for cell
55 Character sequence: c.
56 {\\}
57 {Text:c}
58 [10] \multicolumn{1}{l}{A}&B&C\\\hline
59 {\cr}
60 {Pop 4: document_v p_v tabular*_h row_a cell_a}
61 +stack: level - 3 for cell
62 {Pop 3: document_v p_v tabular*_h row_a}
63 {Push row 3}
64 {Push cell 4}
65 +stack: level + 3 for cell
66 {Push argument 5}
67 Character sequence: 1.
68 {Text:1}
69 {Pop 5: document_v p_v tabular*_h row_a cell_a argument_a}
70 array preamble at start: l
71 array preamble parse: l
72 {begin-group character {}
73 +stack: level + 4 for brace
74 Character sequence: A.
75 {end-group character }}
76 +stack: level - 4 for brace
77 {alignment tab character &}
78 {Text:A}
79 {\endtemplate}
80 {Pop 4: document_v p_v tabular*_h row_a cell_a}
81 +stack: level - 3 for cell
82 {Push cell 4}
83 +stack: level + 3 for cell
84 Character sequence: xB.
85 {alignment tab character &}
86 {Text:xB}
87 Character sequence: y.
88 {\endtemplate}
89 {Text:y}
90 {Pop 4: document_v p_v tabular*_h row_a cell_a}
91 +stack: level - 3 for cell
92 {Push cell 4}
93 +stack: level + 3 for cell
94 Character sequence: C.
95 {\\}
96 {Text:C}
97 {\cr}
98 {Pop 4: document_v p_v tabular*_h row_a cell_a}
99 +stack: level - 3 for cell
100 {Pop 3: document_v p_v tabular*_h row_a}
101 [11] \end{tabular*}
102 {\end}
103 {\end tabular*}
104 {\endtabular*}
105 {Pop 2: document_v p_v tabular*_h}
106 {\endgroup (for env)}
107 +stack: restoring \par=\par
108 +stack: ending environment tabular*; resuming document.
109 +stack: level - 2 for environment
110 Character sequence:  .
Alternate version, where the final \\\hline is commented out
111 [11] \end{tabular*}
112 {\end}
113 {Text:C}
114 {\end tabular*}
115 {\cr}
116 {Pop 4: document_v p_v tabular*_h row_a cell_a}
117 +stack: level - 3 for cell
118 {Pop 3: document_v p_v tabular*_h row_a}
119 {\end}
120 {\end tabular*}
121 {\endtabular*}
An action is defined by a name, an equals sign, and a value. Optional spaces can be used. The syntax of DocType and DocAttrib is special. In all other cases, double quotes must delimit the value. All names contain only letters, digits, and underscores. If the name has the form att_foo, this changes the value of attribute `foo´. If the name has the form xml_foo, it changes the value of element `foo´. In a previous version you had to give the full name, xml_foo_name. Names of elements and attributes can be dynamically changed: when you say
\ChangeElementName{item}{Item}
\ChangeElementName*{rend}{rendering}
\ChangeElementName*{quote}{quotation}
this changes the name of element `item´ and attributes `rend´ and `quote´.
In the examples that follow, we shall assume that the file defined in section 6.3.6 is loaded.
makefo, makehtml, checkxml, makepdf, makedvi, dvitops, generatedvi, generateps. These specify actions for the Raweb. For details see the Web page.
theme_vals (Raweb only). This defines the list of all Inria Themes.
section_vals (Raweb only). This defines the list of all valid sections in the Raweb. If the first character is a `+´ sign, the remaining of the line is appended to the previous value. You must use a slash as separator.
ur_vals (Raweb only). This defines the list of all valid UR (name and value) in the Raweb. If the first character is a `+´ sign, the remaining of the line is appended to the previous value. You must use a slash as separator. After each name, you must give a value (if empty, the name will be used). Only letters can be used in the name.
affiliation_vals, profession_vals (Raweb only). Same syntax as above. These lists specify which values are valid for argument 3 and 4 of the \pers command. The value `Other´ is always valid.
catperso_vals, (Raweb only). Same syntax as above. These lists specify which values are valid for argument of the \catperso command. If no such declaration is given, any value is accepted.
Language. The main element contains an attribute pair of the form language=´english´. Specifying `Language´ in the configuration file modifies the name of the attribute.
lang_fr, lang_en. See above. These two commands can parametrize the value of the attribute. The attribute pair is added to the main element: just after translation of the preamble in the Raweb case, by the titlepage command, or in the at-begin-document hook. The language chosen is the “default language”.
url_font. If you specify a value `\foo´, then \def\urlfont{\foo} will be added to the document-hook. The command is empty by default. It is the font used for urls.
distinguish_refer_in_rabib (Raweb only). This overrides the command line argument of the same name.
entity_names. This overrides the command line option entnames.
bibtex_fields. This specifies a list of additional BibTeX fields that Tralics should read and translate.
bibtex_extensions. This specifies a list of additional BibTeX entry types that Tralics should read and translate.
everyjob. If the value is `\foo´, then \everyjob={\foo} will be executed. In fact, this is the last line of the bootstrap code. After these lines are translated, the value of the token list \everyjob is inserted in the input stream, before the first line of the input file.
no_footnote_hack. If the value is `true´, then no hack is applied to footnotes. The translation of
a\footnote{B}\footnote{C\par D}
<p>a<note id='uid1' place='foot'>B</note>
<note id='uid2' place='foot'><p>C</p> <p>D</p>
</note></p>
As you can see, if the footnote holds only a single <p> element, it will be removed. If the switch is true, then all footnotes translate the same.
xml_footnote_name, att_place, att_foot_position. These assignments explain how to change the name of the <note> element, the attribute name and the attribute value in `place=´foot´. Thus, the translation of the example above can be:
<p>a<Note id='uid12' Place='Inline'><p>B</p>
</Note><Note id='uid13' Place='Inline'><p>C</p>
<p>D</p>
</Note>
use_font_elt. The default translation of {\tiny \textit{A}B} is
<hi rend='small'><hi rend='it'>A</hi></hi><hi rend='small'>B</hi>
If you say `use_font_elt=true´, this changes the translation as follows
<small><it>A</it></small><small>B</small>
We shall see below how to replace `small´ by something else. the method is the same whether `small´ is the name of a an element or an attribute value.
use_all_sizes. By default, Tralics knows only three font sizes, normal, smaller, larger. If the switch is true, the previous example translates to
<small4><it>A</it></small4><small4>B</small4>
or
<hi rend='small4'><hi rend='it'>A</hi></hi><hi rend='small4'>B</hi>
xml_font_small, xml_font_large, xml_font_normalsize. These elements specify the names of small, large and normal size. The translation of {\tiny a}{\normalsize b}{\large c} can be changed to
<Small>a</Small>b<Large>c</Large>
Currently, no tag is inserted in the case of \normalsize. In some cases, this is wrong.
xml_font_small1, xml_font_small2, xml_font_small3, xml_font_small4, xml_font_large1, xml_font_large2, xml_font_large3, xml_font_large4, xml_font_large5.
These specify the names of all font sizes for the case where all sizes are used. For instance, the translation of
{\Huge a}{\huge b}{\LARGE c}{\Large d}{\large e}{\normalsize f}{\small
  g}{\footnotesize h}{\scriptsize i}{\tiny j}
is
<font-large5>a</font-large5><font-large4>b</font-large4>
<font-large3>c</font-large3><font-large2>d</font-large2>
<font-large1>e</font-large1>f<font-small1>g</font-small1>
<font-small2>h</font-small2><font-small3>i</font-small3>
<font-small4>j</font-small4>
It can be changed to
<hi rend='font-large5'>a</hi><hi rend='font-large4'>b</hi>
<hi rend='font-large3'>c</hi><hi rend='font-large2'>d</hi>
<hi rend='font-large1'>e</hi>f<hi rend='font-small1'>g</hi>
<hi rend='font-small2'>h</hi><hi rend='font-small3'>i</hi>
<hi rend='font-small4'>j</hi>
xml_font_upright, xml_font_it, xml_font_slanted, xml_font_sc. These four parameters specify the shape. The first one is currently unused. The default translation of
{\upshape a}{\itshape b}{\slshape c}{\scshape d}
is
a<hi rend='it'>b</hi><hi rend='slanted'>c</hi><hi rend='sc'>d</hi>
or (using elements):
a<it>b</it><slanted>c</slanted><sc>d</sc>
You can change it to:
a<font-italic-shape>b</font-italic-shape>
<font-slanted-shape>c</font-slanted-shape>
<font-small-caps-shape>d</font-small-caps-shape>
xml_font_medium, xml_font_bold. These two parameters specify the series. The first is currently unused.
xml_font_roman, xml_font_tt, xml_font_sansserif. These three parameters specify the family. The first is currently unused. The translation of
{\mdseries e}{\bfseries f}{\ttfamily h}{\sffamily h}{\rmfamily i}
is
e<hi rend='bold'>f</hi><hi rend='tt'>h</hi><hi rend='sansserif'>h</hi>i
but you can change it to
e<bold>f</bold><tt>h</tt><sansserif>h</sansserif>i
or
e<font-bold-series>f</font-bold-series>
<font-typewriter-family>h</font-typewriter-family>
<font-sansserif-family>h</font-sansserif-family>i
xml_sup_name, xml_sub_name. These two parameters control the name of superscript and subscripts in text mode.
xml_oldstyle_name, xml_overline_name, xml_underline_name. These parameters control the names used for oldstyle numbers, overline and underline.
xml_caps_name, xml_ul_name, xml_hl_name, xml_so_name, xml_st_name. These control element names and attributes defined by the soul package. The translation of
\ul{a}\caps{b}\hl{c}\so{d}\st{e}
\textsuperscript{f}\textsubscript{g}
\oldstylenums{h}\overline{i}\underline{j}
is by default
<hi rend='ul'>a</hi><hi rend='caps'>b</hi><hi rend='hl'>c</hi>
<hi rend='so'>d</hi><hi rend='st'>e</hi>
<hi rend='sup'>f</hi><hi rend='sub'>g</hi>
<hi rend='oldstyle'>h</hi><hi rend='overline'>i</hi>
<hi rend='underline'>j</hi>
but can be changed to
<font-ul>a</font-ul><font-caps>b</font-caps><font-hl>c</font-hl>
<font-so>d</font-so><font-st>e</font-st>
<font-super>f</font-super><font-sub>g</font-sub>
<font-oldstyle>h</font-oldstyle><font-overline>i</font-overline>
<font-underline>j</font-underline
alternate_item. If true or false, it redefines \item to \@item or \@@item. The translation of
\begin{itemize}
\makeatletter
\@item [A]b
\@@item [A]b
\end{itemize}
is
<List type='simple'>
<Item id='uid14' Label='A'><p Noindent='true'>b</p>
</Item><Label>A</Label>
<Item id='uid15'><p Noindent='true'>b</p>
</Item></List>
xml_labelitem_name. This specifies the name of the element containing the optional argument of an \item. Default value is `label´. If alternate items are used, it specifies the names of an attribute.
xml_item_name. This specifies the name of the element containing an \item. Default value is `item´.
xml_list_name. This is the name of the element generated by list environments like itemize, enumerate and description.
att_user_list. List defined by the `list´ environment are by default of type `description´. Example
\begin{list}{}{}
\item[item label] item value
\begin{description}
\item[first item] okok
\item[second item]
\begin{itemize}
\item First
\item Second
\begin{enumerate}
\item some item
\item another one
\end{enumerate}
\end{itemize}
\end{description}
\end{list}
This translates by default to
<list type='description'><label>item label</label>
<item id='uid3'><p noindent='true'>item value</p>
<list type='description'><label>first item</label>
<item id='uid4'><p noindent='true'>okok</p>
</item><label>second item</label>
<item id='uid5'>
<list type='simple'>
<item id='uid6'><p noindent='true'>First</p>
</item>
<item id='uid7'><p noindent='true'>Second</p>
<list type='ordered'>
<item id='uid8'><p noindent='true'>some item</p>
</item>
<item id='uid9'><p noindent='true'>another one</p>
</item></list>
</item></list>
</item></list>
</item></list>
It can be changed to:
<List type='MyList'>
<Item id='uid16' Label='item label'><p Noindent='true'>item value</p>
<List type='description'>
<Item id='uid17' Label='first item'><p Noindent='true'>okok</p>
</Item>
<Item id='uid18' Label='second item'>
<List type='simple'>
<Item id='uid19'><p Noindent='true'>First</p>
</Item>
<Item id='uid20'><p Noindent='true'>Second</p>
<List type='ordered'>
<Item id='uid21'><p Noindent='true'>some item</p>
</Item>
<Item id='uid22'><p Noindent='true'>another one</p>
</Item></List>
</Item></List>
</Item></List>
</Item></List>
xml_gloitem_name. This specifies the name of the element containing the first argument of \glo. Default value is `label´.
att_gloss_type. In a glossary, a <list> element is created with attribute type=´gloss´. This variable can be used to change the value of the attribute. The translation of
\begin{glossaire}
\glo{aa}{bb}
\glo{cc}{dd}
\end{glossaire}
can be
<List type='Gloss'>
<Head>The famous glossary</Head>
<Glolabel>aa</Glolabel><Item><p>bb</p></Item>
<Glolabel>cc</Glolabel><Item><p>dd</p></Item>
</List>
xml_head_name. This is the name of the <head> element in a title.
att_nonumber. This is the value of the `rend´ attribute for unnumbered sections.
xml_frontmatter_name, xml_mainmatter_name, xml_backmatter_name. These are the name of elements associated to frontmatter, mainmatter and backmatter.
xml_div0_name, xml_div1_name, xml_div2_name, xml_div3_name, xml_div4_name,
xml_div5_name, xml_div6_name. This specifies the name of a section. The default translation of
\frontmatter
\chapter{Chapter one}  OK
\mainmatter
\part{First Part of document}
Some text here
\part{Second Part}
\chapter{Chapter two}
\section{Section one}
\subsection{Subsection one}
\subsubsection{Subsubsection one}
\paragraph{First paragraph}
\subparagraph{First sub paragraph}
Normal text\label{a}
\backmatter
We are now in the backmatter.\ref{a}\pageref{a}
is
<frontmatter>
<div1 id='uid1' rend='nonumber'><head>Chapter one</head>
<p>OK</p>
</div1></frontmatter>
<mainmatter>
<div0 id='uid2'><head>First Part of document</head>
<p>Some text here</p>
</div0>
<div0 id='uid3'><head>Second Part</head>
<div1 id='uid4'><head>Chapter two</head>
<div2 id='uid5'><head>Section one</head>
<div3 id='uid6'><head>Subsection one</head>
<div4 id='uid7'><head>Subsubsection one</head>
<div5 id='uid8'><head>First paragraph</head>
<div6 id='uid9'><head>First sub paragraph</head>
<p>Normal text</p>
</div6></div5></div4></div3></div2></div1></div0></mainmatter>
<backmatter><p>We are now in the backmatter.
<ref target='uid9'/><ref target='uid9' rend='page'/></p>
</backmatter>
but you can use these commands to get:
<Frontmatter>
<Xdiv1 id='uid1' Rend='NoNumber'><Head>Chapter one</Head>
<p>OK</p>
</Xdiv1></Frontmatter>
<Mainmatter>
<Xdiv0 id='uid2'><Head>First Part of document</Head>
<p>Some text here</p>
</Xdiv0>
<Xdiv0 id='uid3'><Head>Second Part</Head>
<Xdiv1 id='uid4'><Head>Chapter two</Head>
<Xdiv2 id='uid5'><Head>Section one</Head>
<Xdiv3 id='uid6'><Head>Subsection one</Head>
<Xdiv4 id='uid7'><Head>Subsubsection one</Head>
<Xdiv5 id='uid8'><Head>First paragraph</Head>
<Xdiv6 id='uid9'><Head>First sub paragraph</Head>
<p>Normal text</p>
</Xdiv6></Xdiv5></Xdiv4></Xdiv3></Xdiv2></Xdiv1></Xdiv0></Mainmatter>
<Backmatter><p>We are now in the backmatter.
<Ref target='uid9'/><Ref target='uid9' Rend='Page'/></p>
</Backmatter>
xml_fbox_name, xml_scalebox_name, xml_box_name. These control the names of various box commands.
att_boxed. This is the name of the attributed added by \fbox, unless it is a includegraphics.
att_framed. If a figure is in a \fbox, it will have framed=´true´. This changes the name of the attribute.
att_box_width. Name of width attribute for commands like \framebox.
att_box_scale. This controls the name scale attribute, unless in a figure. Example
\fbox{foo}\scalebox{0.3}{foo}\framebox(10,10){foo}\framebox[10pt][11]{foo}
translates as
<fbox rend='boxed'>foo</fbox>
<scalebox scale='0.3'>foo</scalebox>
<pic-framebox width='10' height='10' framed='true'>foo</pic-framebox>
<fbox width='10.0pt' rend='boxed'>foo</fbox>
You can change it to
<Framebox Rendering='Boxed'>foo</Framebox>
<Scalebox BoxScale='0.3'>foo</Scalebox>
<Xbox Width='10' Height='10' Framed='true'>foo</Xbox>
<Framebox BoxWidth='10.0pt' Rendering='Boxed'>foo</Framebox>
xml_keywords_name. This is the name of the element generated by `motscle´ environment. The default value is `keywords´.
xml_term_name. This is the name of the element used for each keyword. The default value is `term´. For instance,
\begin{motscle} first, second, {(max,+)}\end{motscle}
translates to
<keywords>
<term>first</term>
<term>second</term>
<term>(max,+)</term>
</keywords>
and can be changed to
<Keywords>
<Term>first</Term>
<Term>second</Term>
<Term>(max,+)</Term>
</Keywords>
xml_scaption_name. Special caption (outside figure or table).
xml_mbox_name. This is the name of the element used by the \mbox, unless the result is trivial.
xml_rotatebox_name. This is the name of the element generated by \rotatebox.
att_rotate_angle. This controls the name of the angle attribute in the case of \rotatebox.
xml_subfigure_name. This is the name of the element generated by \subfigure. The default value is `subfigure´.
xml_texte_name. This is the name of the element generated by \subfigure, containing the required argument.
xml_leg_name. This is the name of the element generated by \subfigure, containing the optional argument.
For instance, the translation of
\noindent \mbox{\xbox{a}{b}} \rotatebox{30}{x}
\subfigure[a]{b}
is
<p noindent='true'>
   <mbox><a>b</a></mbox>
   <pic-rotatebox angle='30'>x</pic-rotatebox>
   <subfigure><leg>a</leg><texte>b</texte></subfigure>
</p>
but can be changed to
<p Noindent='true'>
   <Xmbox><a>b</a></Xmbox>
   <Rotatebox Rangle='30'>x</Rotatebox>
   <Xsubfigure><Leg>a</Leg><Texte>b</Texte></Xsubfigure>
</p>
xml_topic_name, xml_topic_title, att_topic_num. These are used for topics (Raweb only). The default values for the elements are `topic´ and `t_titre´, for the attribute it is `num´.
xml_caption_name, xml_graphics_name, xml_figure_env_name, xml_table_env_name, xml_Table_name. These names are used by some commands and environments. For instance, consider the following code. Normally, you put a tabular in a table, an image in a figure (as in B or D), this gives smaller XML objects.
\begin{tabular}{c}a\end{tabular}
\caption{A}
%
\begin{table}[htbp]
\begin{tabular}{c}a\end{tabular}
\caption{B}
\end{table}
%
\begin{table}[htbp]
\includegraphics{a}
\caption{C}
\end{table}
%
\begin{figure}[htbp]
\includegraphics{a}
\caption{D}
\end{figure}
This is the default translation:
<table rend='inline'><row><cell halign='center'>a</cell></row></table>
<p><caption>A</caption></p>
<table rend='display' id='uid10'><head>B</head>
   <row><cell halign='center'>a</cell></row></table>
<table rend='display' id='uid11'><head>C</head>
   <figure rend='inline' file='a'/></table>
<figure file='a' id='uid12'><head>D</head></figure>
This shows how all names can be parametrized.
<Table Rend='inline'><Row><Cell Halign='Center'>a</Cell></Row></Table>

<p><SCaption><p>A</p></SCaption></p>

<FloatTable Rend='display' id='uid14'>
  <Caption><p>B</p></Caption>
  <Row><Cell Halign='Center'>a</Cell></Row>
</FloatTable>

<FloatTable Rend='display' id='uid15'>
 <Caption><p>C</p></Caption>
 <Figure Rend='inline' File='a'/>
</FloatTable>

<FloatFigure File='a' id='uid16'>
   <Caption><p>D</p></Caption>
</FloatFigure>
xml_xref_name. This is the name of the element associated to \url.
xml_project_name. This controls the name of the <projet> element.
xml_accueil_name. This controls the name of the <accueil> element.
xml_composition_ra_name. This controls the name of the <composition> element. In fact, in Raweb mode, when a environment `RAsection´ is closed, and the argument of the environment is the value of this variable, then modules inside the element are replaced by their content.
xml_xtheorem_name. This controls the theorem names. This is an example of theorems
\theorembodyfont{\sl}
\theoremstyle{break}
\newtheorem{Cor}{Corollary}
\theoremstyle{plain}
%\newcounter{section}
\setcounter{section}{17}
\newtheorem{Exa}{Example}[section]
{\theorembodyfont{\rmfamily}\newtheorem{Rem}{Remark}}
\theoremstyle{marginbreak}
\newtheorem{Lem}[Cor]{lemma}
\theoremstyle{change}
\theorembodyfont{\small\itshape} \newtheorem{Def}[Cor]{Definition}
\theoremheaderfont{\scshape}
\def\Lenv#1{\texttt{#1}}

\begin{Cor}
 This is a sentence typeset in the theorem environment \Lenv{Cor}.
\end{Cor}
\begin{Exa}
 This is a sentence typeset in the theorem environment \Lenv{Exa}.
\end{Exa}
\begin{Rem}
 This is a sentence typeset in the theorem environment \Lenv{Rem}.
\end{Rem}
\begin{Lem}[Ben User]
 This is a sentence typeset in the theorem environment \Lenv{Lem}.
\end{Lem}
\begin{Def}[Very Impressive definition]
 This is a sentence typeset in the theorem environment \Lenv{Def}.
\end{Def}
This is the translation:
<p><hi rend='sc'>Corollary 1 </hi><hi rend='slanted'>This
is a sentence typeset in the theorem environment </hi>
<hi rend='slanted'><hi rend='tt'>Cor</hi></hi><hi rend='slanted'>.</hi></p>

<p><hi rend='sc'>Example 17.1 </hi><hi rend='slanted'>This
is a sentence typeset in the theorem environment </hi>
<hi rend='slanted'><hi rend='tt'>Exa</hi></hi><hi rend='slanted'>.</hi></p>

<p><hi rend='sc'>Remark 1 </hi>This is a sentence typeset in
the theorem environment <hi rend='tt'>Rem</hi>.</p>

<p><hi rend='sc'>lemma 2 (Ben User) </hi><hi rend='slanted'>
This is a sentence typeset in the theorem environment </hi><hi
rend='slanted'><hi rend='tt'>Lem</hi></hi><hi rend='slanted'>.</hi></p>

<p><hi rend='sc'>Definition 3 (Very Impressive definition) </hi><hi
      rend='small'/><hi rend='small'><hi rend='it'>
This is a sentence typeset in the theorem environment </hi></hi>
<hi rend='small'><hi rend='it'><hi rend='tt'>Def</hi></hi></hi>
<hi rend='small'><hi rend='it'>.</hi></hi></p>
This may be changed to:
<BTheorem id='uid29'><p><SC>Corollary 1 </SC>
<SL>This is a sentence typeset in the theorem environment </SL>
<SL><TT>Cor</TT></SL><SL>.</SL></p>
</BTheorem>
<BTheorem id='uid30'><p><SC>Example 17.1 </SC>
<SL>This is a sentence typeset in the theorem environment </SL>
<SL><TT>Exa</TT></SL><SL>.</SL></p>
</BTheorem>
<BTheorem id='uid31'><p><SC>Remark 1 </SC>
This is a sentence typeset in the theorem environment <TT>Rem</TT>.</p>
</BTheorem>
<BTheorem id='uid32'><p><SC>lemma 2 (Ben User) </SC><SL>
This is a sentence typeset in the theorem environment
</SL><SL><TT>Lem</TT></SL><SL>.</SL></p>
</BTheorem>
<BTheorem id='uid33'><p><SC>Definition 3 (Very Impressive definition) </SC>
<Small/><Small><IT>
This is a sentence typeset in the theorem environment
</IT></Small><Small><IT><TT>Def</TT></IT></Small><Small><IT>.</IT></Small></p>
</BTheorem>
xml_theorem_head. This controls the element that contains the optional argument of the theorem, if the alternate syntax is used (default is alt_head, shown as AltHead below).
xml_theorem_name. This is used for theorems. The value of the variable is unused. Redefining the command changes the meaning of \@begintheorem to \@xbegintheorem. As a consequence the translation of the previous theorem is:
<BTheorem style='break' type='Cor' id='uid29'>
<Head>Corollary</Head>
<p>This is a sentence typeset in the theorem environment <TT>Cor</TT>.</p>
</BTheorem>
<BTheorem style='plain' type='Exa' id='uid30'>
<Head>Example</Head>
<p>This is a sentence typeset in the theorem environment <TT>Exa</TT>.</p>
</BTheorem>
<BTheorem style='plain' type='Rem' id='uid31'>
<Head>Remark</Head>
<p>This is a sentence typeset in the theorem environment <TT>Rem</TT>.</p>
</BTheorem>
<BTheorem style='marginbreak' type='Lem' id='uid32'>
<Head>lemma</Head>
<ThHead>Ben User</ThHead>
<p>This is a sentence typeset in the theorem environment <TT>Lem</TT>.</p>
</BTheorem>
<BTheorem style='change' type='Def' id='uid33'>
<Head>Definition</Head>
<ThHead>Very Impressive definition</ThHead>
<p>This is a sentence typeset in the theorem environment <TT>Def</TT>.</p>
</BTheorem>
mfenced_separator_val. If the value of this quantity is `X´, then Tralics will add separators = `X´ to each <mfenced> that are created (except for fences for arrays, i.e., matrices and the like). The default value is the empty string. If the value is `NONE´, no attribute will be added. If the value is `mrow´, no attribute is added, but the <mfence> elements has a single child, a <mrow> element being inserted, if needed. Example
$\left[ a +b \right ] \left(x\right) $
This is the translation if the separator is  
<formula type='inline'>
<math xmlns='http://www.w3.org/1998/Math/MathML'>
<mrow>
<mfenced separators=' ' open='[' close=']'>
<mi>a</mi><mo>+</mo><mi>b</mi>
</mfenced>
<mfenced separators=' ' open='(' close=')'>
<mi>x</mi>
</mfenced>
</mrow>
</math>
</formula>
Translation if the value the separator is the empty string (this is the default behavior). No separator added in case where the <mfenced> element has a single child.
<formula type='inline'>
  <math xmlns='http://www.w3.org/1998/Math/MathML'>
    <mrow>
      <mfenced separators='' open='[' close=']'>
         <mi>a</mi><mo>+</mo><mi>b</mi>
      </mfenced>
      <mfenced open='(' close=')'><mi>x</mi></mfenced>
    </mrow>
  </math>
</formula>
Translation if the value the separator is `mrow´. Here a <mrow> element is added.
<formula type='inline'>
  <math xmlns='http://www.w3.org/1998/Math/MathML'>
    <mrow>
      <mfenced open='[' close=']'>
        <mrow><mi>a</mi><mo>+</mo><mi>b</mi></mrow>
      </mfenced>
      <mfenced open='(' close=')'><mi>x</mi></mfenced>
    </mrow>
  </math>
</formula>
Translation if the value the separator is `NONE´. This is the behaviour of Tralics before 2.9.4.
<formula type='inline'>
  <math xmlns='http://www.w3.org/1998/Math/MathML'>
    <mrow>
      <mfenced open='[' close=']'><mi>a</mi><mo>+</mo><mi>b</mi></mfenced
      <mfenced open='(' close=')'><mi>x</mi></mfenced>
    </mrow>
  </math>
</formula>
xml_biblio. This controls the name of the element that contains the bibliography.
att_box_pos. This controls the name of the pos attribute in a box.
att_full. If a star follows \circle, an attribute pair full=´true´ is added. This controls the attribute name.
att_pos. Used by environments like `minipage´, for the horizontal position.
att_inner_pos. Used by `minipage´, for the third optional argument.
att_minipage_width. Used by `minipage´, for the mandatory argument.
xml_figure_name. This controls the name of the element produced by \includegraphics.
att_file, att_angle, att_scale, att_clip, att_width, att_height. These control the attribute names set by \includegraphics.
The translation of
\fbox{\includegraphics[clip=, angle=90, scale=3, %
       width=10cm, height=3m]{A}}
is
<figure framed='true' rend='inline' height='3m' width='10cm'
scale='3' angle='90' clip='true' file='A'/>
You can change it to
<Figure Framed='true' Rend='inline' Height='3m' Width='10cm' Scale='3'
Angle='90' Clip='true' File='A'/>
att_rend, att_fbox_rend. These control the name of the rend attribute (why is `fbox´ a special case ?)
att_space_before. This is the name of the attribute that indicates space between the current paragraph and the element before it.
att_flush_right, att_flush_left, att_quotation, att_quote, att_centering. The five environments center, quote, quotation, flushleft, and flushright modify (locally) an integer that asks each <p> to get an attribute rend with value `flushed-left´, `flushed-right´, `center´ or `quote´. These environment execute the equivalent of \par just after the \begin (before the parameter is changed), and just after the \end. The \centering command modifies the integer and the attribute list of the current <p>. These assignments show how to control the value of the attribute. Example:
a\\[2pt]b
\begin{center}A\end{center}
\begin{quote}B\end{quote}
\begin{quotation}C\end{quotation}
\begin{flushleft}D\end{flushleft}
\begin{flushright}E\end{flushright}
The default translation is
<p>a</p>
<p noindent='true' spacebefore='2.0pt'>b</p>
<p rend='center'>A</p>
<p rend='quoted'>B</p>
<p rend='quoted'>C</p>
<p rend='flushed-left'>D</p>
<p rend='flushed-right'>E</p>
but you can change it to
p>a</p>
<p Noindent='true' Spacebefore='2.0pt'>b</p>
<p Rend='Center'>A</p>
<p Rend='Quote'>B</p>
<p Rend='Quotation'>C</p>
<p Rend='FlushLeft'>D</p>
<p Rend='FlushRight'>E</p>
att_cell_bottomborder, att_cell_leftborder, att_cell_rightborder, att_cell_topborder. Specifying a \hline in a table, or vertical rules may add attributes to cells. The name is left-border etc. The name of the attribute can be changed via these commands.
att_row_spaceafter, att_row_spacebefore. Inside a table, an optional argument to \\ asks for a space before or after the current row. This is done by adding a spacebefore and spaceafter attribute. The name of the attribute can be changed via this variable. Note: There is no spacebefore in the current version; is this a bug?
att_cols, att_halign, att_cell_left, att_cell_right, att_cell_center. The translation of a command of the form \multicolumn{1}{c}{...} is a cell, with attributes halign=`center´ and cols=`1´. These parameters allow you to change the name of the attribute name or value.
xml_table_name, xml_row_name, xml_cell_name. These commands allow you to change the names of the elements <table>, <row> and <cell>.
The default translation of
\begin{tabular}{|r|l|c}
\hline a&b&\multicolumn{1}{c|}{x}\hline\\[2pt]
\end{tabular}
$\begin{array}{|r|l|}
a&b&\multicolumn{1}{c|}{x}\\[2pt]
\end{array}$
is
<table rend='inline'>
  <row spaceafter='2.0pt' top-border='true'>
    <cell right-border='true' halign='right' left-border='true'>a</cell>
    <cell  right-border='true' halign='left'>b</cell>
    <cell right-border='true' halign='center' cols='1'>x</cell>
  </row>
</table>
<formula type='inline'>
  <math xmlns='http://www.w3.org/1998/Math/MathML'>
    <mtable>
     <mtr>
       <mtd columnalign='right'><mi>a</mi></mtd>
       <mtd columnalign='left'><mi>b</mi></mtd>
       <mtd columnspan='1'><mi>x</mi></mtd>
     </mtr>
    </mtable>
  </math>
</formula>
You can parametrize the <table>, using all parameters shown above. Of course, it has no influence on the <mtable>.
<Table Rend='Inline'>
  <Row Spaceafter='2.0pt' Topborder='true'>
    <Cell Rightborder='true' Halign='Right' Leftborder='true'>a</Cell>
    <Cell Rightborder='true' Halign='Left'>b</Cell>
    <Cell Rightborder='true' Halign='Center' Cols='1'>x</Cell>
  </Row>
</Table>
att_prenom, att_full_first, att_nom, att_particule, att_junior, xml_bpers_name. These control typesetting of \bpers in a bibliography. The default translation of
\bpers[E]{A}{B}{C}{D}
is
<bpers prenom='A' part='B' nom='C' junior='D' prenomcomplet='E'/>
xml_pers_name. This controls the element name of the \pers command.
att_affiliation, att_profession, att_HDR. These control the attributes of the fields of the \pers command added in 2006 (first name and last name use att_nom and att_prenom).
xml_citation_name. This is the name of the element produced by the \citation command. Since this command is assumed to appear only in a bibliography, it cannot be used directly in the text, thus the calls to \@setmode here. Example
\makeatletter {
\leavevmode\@setmode 4
\citation{A}{cite:B}{bid2}{D}{E}
\bauthors{\bpers {a}{}{c}{d}}
\beditors{\bpers[AA] {a}{b}{c}{d}}
\endcitation
\@setmode 1}\par
Translation
<p>
<Citation from='D' key='A' id='bid2' userid='cite:B' type='E'>
<bauteurs><Bpers Firstname='a' Lastname='c' Junior='d'/></bauteurs>
<bediteur>
  <Bpers Firstname='a'P article='b' Lastname='c' Junior='d' FullFirst='AA'/>
</bediteur>
</Citation></p>
xml_cit_name, xml_ref_name. Translation of \cite is a <ref> in a <cit>; these switches control the element names.
xml_prenote_name, xml_citetype_name. These control elements defined for the natbib extensions to \cite. For instance,
\def\cite@prenote{cf}
\def\cite@@type{fx}
\cite[p 30]{toto}
translates as
<Cit Prenote='cf' Citetype='fx'><Ref target='bid0'>p 30</Ref></Cit>
xml_leaders_name xml_cleaders_name, xml_xleaders_name. For leaders. Example
\setbox0\xbox{foo}{bar}
\leaders\copy0\hfil\cleaders\copy0\hfil\xleaders\copy0\hfil
Translation is
<Leaders><foo>bar</foo></Leaders><hfil/>
<Cleaders><foo>bar</foo></Cleaders><hfil/>
<Xleaders><foo>bar</foo></Xleaders><hfil/>
att_page. Translation of \ref is a ref element, whose name can be changed as above, translation of \pageref is the same, with a attribute rend, with value `page´, that can be changed via this flag; for instance we may get
<Ref target='uid9'/><Ref target='uid9' Rend='Page'/>
xml_texmath_name. Name of the element produced by the trivial math mechanism.
xml_index_name, xml_theindex_name. These variables indicated the name of the element produced by the \index command, and the name of the index (produced by \makeindex).
att_level. An index has a level attribute (that can be 1, 2 or 3). This controls the name of the attribute.
att_encap. Controls page encapsulation for the \index command. In the following example we have three anchors, because some \index commands are followed by a space (shown as newline in the XML document).
\noindent Word\index{foo}
\index{foo!a@barb|gee}
\index{foo!b@bara}%
\index{foo}
Translation.
<p Noindent='true'>Word<Anchor id='uid27'/>
<Anchor id='uid28'/>
<Anchor id='uid29'/></p>
...
<TheIndex>
  <Index target='uid27 uid29' Level='1'>foo</Index>
  <Index target='uid28' Level='2' Encap='gee'>barb</Index>
  <Index target='uid29' Level='2'>bara</Index>
</TheIndex>
xml_picture_name. This can be used to change the name of the element created by the `picture´ environment (it is `picture´).
xml_bezier_name. This specifies the name of the element produced by \bezier.
xml_put_name. This specifies the name of the element produced by \put.
xml_arc_name. This specifies the name of the element produced by \arc.
xml_scaleput_name. This specifies the name of the element produced by \scaleput.
xml_multiput_name. This specifies the name of the element produced by \multiput.
xml_line_name. This specifies the name of the element produced by \line.
xml_lineC_name. This specifies the name of the element produced by \centerline and friends.
xml_vector_name. This specifies the name of the element produced by \vector.
xml_oval_name. This specifies the name of the element produced by \oval.
xml_dashline_name. This specifies the name of the element produced by \dashline.
xml_drawline_name. This specifies the name of the element produced by \drawline.
xml_dottedline_name. This specifies the name of the element produced by \dottedline.
xml_circle_name. This specifies the name of the element produced by \circle.
xml_bigcircle_name. This specifies the name of the element produced by \bigcircle.
xml_curve_name. This specifies the name of the element produced by \curve.
xml_closecurve_name. This specifies the name of the element produced by \closecurve.
xml_tagcurve_name. This specifies the name of the element produced by \tagcurve.
xml_thicklines_name. This specifies the name of the element produced by \thicklines.
xml_thinlines_name. This specifies the name of the element produced by \thinlines.
xml_linethickness_name. This specifies the name produced by \linethickness.
att_xpos, att_ypos, att_xdir, att_ydir, att_size, att_dx, att_dy, att_repeat. These attributes are used by some picture commands.
att_xscale, att_xscaley, att_yscale, att_yscalex. Commands \xscale, \xscaley, \yscale, and \yscalex read values and store them somewhere. Whenever needed, they are put as attribute on the elements. The default name of the argument is the name of the command, but this can be changed.
att_curve_nbpts. Commands like \arc, \bigcircle, \closecurve, \tagcurve, \curve take an optional argument, the number of points. It will be stored in an attribute, named `nbsymb´. This parameter can change the name of the attribute.
att_unit_length. Inside a picture environment, the value of \unitlength is stored in an attribute named `unit-length´. It can be changed using this command.

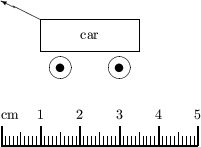
The example of a picture environment is
\setlength{\unitlength}{1.8mm}
\begin{picture}(40,30)
  \thicklines
  \multiput(20,5)(20,12){2} {\line(0,-1){2}\line(-5,3){20}}
  \multiput(20,5)(-20,12){2} {\line(5,3){20}}
  \put(20,3){\line(5,3){20}}
  \put(20,3){\line(-5,3){20}}
  \put(0,15){\line(0,1){2}}
  \linethickness{1pt}
  \put(20,5) {
   \renewcommand{\xscale}{1}
   \renewcommand{\xscaley}{-1}
   \renewcommand{\yscale}{0.6}
   \renewcommand{\yscalex}{0.6}
   \scaleput(10,10){\bigcircle{10}}
   \put(0,-2){%
      \scaleput(10,10){\arc(5,0){121}}
      \scaleput(10,10){\arc(5,0){-31}}}}
\end{picture}
it is translated as
<picture width='204.85962' height='153.64471'>
  <pic-thicklines/>
  <pic-multiput xpos='102.42981' ypos='25.60745'
       repeat='2' dx='102.42981' dy='61.45789'>
    <pic-line xdir='0' ydir='-1' width='10.24298'/>
    <pic-line xdir='-5' ydir='3' width='102.42981'/>
  </pic-multiput>
  <pic-multiput xpos='102.42981' ypos='25.60745'
     repeat='2' dx='-102.42981' dy='61.45789'>
   <pic-line xdir='5' ydir='3' width='102.42981'/>
  </pic-multiput>
  <pic-put xpos='102.42981' ypos='15.36447'>
    <pic-line xdir='5' ydir='3' width='102.42981'/></pic-put>
  <pic-put xpos='102.42981' ypos='15.36447'>
    <pic-line xdir='-5' ydir='3' width='102.42981'/></pic-put>
  <pic-put xpos='0' ypos='76.82236'>
    <pic-line xdir='0' ydir='1' width='10.24298'/></pic-put>
  <pic-linethickness size='1pt'/>
  <pic-put xpos='102.42981' ypos='25.60745'>
   <pic-scaleput xpos='51.2149' ypos='51.2149'
       xscale='1' yscale='0.6' xscaley='-1' yscalex='0.6'>
    <pic-bigcircle size='10' unit-length='5.12149'/>
   </pic-scaleput>
   <pic-put xpos='0' ypos='-10.24298'>
     <pic-scaleput xpos='51.2149' ypos='51.2149' xscale='1'
         yscale='0.6' xscaley='-1' yscalex='0.6'>
       <pic-arc angle='121' xpos='25.60745' ypos='0' unit-length='5.12149'/>
     </pic-scaleput>
     <pic-scaleput xpos='51.2149' ypos='51.2149' xscale='1'
         yscale='0.6' xscaley='-1' yscalex='0.6'>
       <pic-arc angle='-31' xpos='25.60745' ypos='0' unit-length='5.12149'/>
     </pic-scaleput>
   </pic-put>
 </pic-put>
</picture>
You can parametrize it so as to obtain this
<Xpicture Width='204.85962' Height='153.64471'>
  <Thicklines/>
  <Multiput Xpos='102.42981' Ypos='25.60745'
      Repeat='2'Dx='102.42981' Dy='61.45789'>
    <Xline XDir='0' YDir='-1' Width='10.24298'/>
    <Xline XDir='-5' YDir='3' Width='102.42981'/>
  </Multiput>
  <Multiput Xpos='102.42981' Ypos='25.60745'
      Repeat='2' Dx='-102.42981' Dy='61.45789'>
    <Xline XDir='5' YDir='3' Width='102.42981'/>
  </Multiput>
  <Xput Xpos='102.42981' Ypos='15.36447'>
    <Xline XDir='5' YDir='3' Width='102.42981'/></Xput>
  <Xput Xpos='102.42981' Ypos='15.36447'>
    <Xline XDir='-5' YDir='3' Width='102.42981'/></Xput>
  <Xput Xpos='0' Ypos='76.82236'>
    <Xline XDir='0' YDir='1' Width='10.24298'/></Xput>
  <Linethickness Size='1pt'/>
  <Xput Xpos='102.42981' Ypos='25.60745'>
    <Scaleput Xpos='51.2149' Ypos='51.2149'
        Xscale='1' Yscale='0.6' XscaleY='-1' YscaleX='0.6'>
      <Bigcircle Size='10' Unitlength='5.12149'/>
    </Scaleput>
    <Xput Xpos='0' Ypos='-10.24298'>
      <Scaleput Xpos='51.2149' Ypos='51.2149'
          Xscale='1' Yscale='0.6' XscaleY='-1' YscaleX='0.6'>
        <Arc Angle='121' Xpos='25.60745' Ypos='0' Unitlength='5.12149'/>
      </Scaleput>
      <Scaleput Xpos='51.2149' Ypos='51.2149'
          Xscale='1' Yscale='0.6' XscaleY='-1' YscaleX='0.6'>
        <Arc Angle='-31' Xpos='25.60745' Ypos='0' Unitlength='5.12149'/>
      </Scaleput>
    </Xput>
  </Xput>
</Xpicture>
A second example:
\newcounter{cms}
\setlength{\unitlength}{1mm}
\begin{picture}(50,39)
\put(0,7){\makebox(0,0)[bl]{cm}}
\multiput*(10,7)(10,0){5}{%  remove the * for latex
  \addtocounter{cms}{1}\makebox(0,0)[b]{\arabic{cms}}}
\put(15,20){\circle{6}}
\put(30,20){\circle{6}}
\put(15,20){\circle*{2}}
\put(30,20){\circle*{2}}
\put(10,24){\framebox(25,8){car}}
\put(10,32){\vector(-2,1){10}}
\multiput(1,0)(1,0){49}{\line(0,1){2.5}}
\multiput(5,0)(10,0){5}{\line(0,1){3.5}}
\thicklines
\put(0,0){\line(1,0){50}}
\multiput(0,0)(10,0){6}{\line(0,1){5}}
\end{picture}
The translation is
<Xpicture Width='142.26303' Height='110.96516'>
  <Xput Xpos='0' Ypos='19.91682'>
    <Xbox Width='0' Height='0' BPos='bl'>cm</Xbox></Xput>
  <Xput Xpos='28.4526' Ypos='19.91682'>
    <Xbox Width='0' Height='0' BPos='b'>1</Xbox></Xput>
  <Xput Xpos='56.90521' Ypos='19.91682'>
    <Xbox Width='0' Height='0' BPos='b'>2</Xbox></Xput>
  <Xput Xpos='85.35782' Ypos='19.91682'>
    <Xbox Width='0' Height='0' BPos='b'>3</Xbox></Xput>
  <Xput Xpos='113.81042' Ypos='19.91682'>
    <Xbox Width='0' Height='0' BPos='b'>4</Xbox></Xput>
  <Xput Xpos='142.26303' Ypos='19.91682'>
    <Xbox Width='0' Height='0' BPos='b'>5</Xbox></Xput>
  <Xput Xpos='42.67891' Ypos='56.90521'>
    <Xcircle Size='17.07156'/></Xput>
  <Xput Xpos='85.35782' Ypos='56.90521'>
    <Xcircle Size='17.07156'/></Xput>
  <Xput Xpos='42.67891' Ypos='56.90521'>
    <Xcircle Full='true' Size='5.69052'/></Xput>
  <Xput Xpos='85.35782' Ypos='56.90521'>
    <Xcircle Full='true' Size='5.69052'/></Xput>
  <Xput Xpos='28.4526' Ypos='68.28625'>
    <Xbox Width='71.13152' Height='22.76208' Framed='true'>car</Xbox></Xput>
  <Xput Xpos='28.4526' Ypos='91.04834'>
    <Xvector XDir='-2' YDir='1' Width='28.4526'/></Xput>
  <Multiput Xpos='2.84526' Ypos='0' Repeat='49' Dx='2.84526' Dy='0'>
    <Xline XDir='0' YDir='1' Width='7.11314'/></Multiput>
  <Multiput Xpos='14.2263' Ypos='0' Repeat='5' Dx='28.4526' Dy='0'>
    <Xline XDir='0' YDir='1' Width='9.9584'/></Multiput>
  <Thicklines/>
  <Xput Xpos='0' Ypos='0'>
    <Xline XDir='1' YDir='0' Width='142.26303'/></Xput>
  <Multiput Xpos='0' Ypos='0' Repeat='6' Dx='28.4526' Dy='0'>
    <Xline XDir='0' YDir='1' Width='14.2263'/></Multiput>
</Xpicture>
This is a part of the transcript file for the titlepage command.
1 Defining \makeRR as \TitlePageCmd 0
2    main <RRstart  -- type = 'RR'/>
3 Defining \makeRT as \TitlePageCmd 1
4    main <RRstart  -- type = 'RT'/>
5 Defining \UR as \TitlePageCmd 2
6    ur_list <UR/>
7 Defining \URSophia as \TitlePageCmd 3
8    ur <URSophia/>
9 Defining \URRocquencourt as \TitlePageCmd 4
10    ur <URRocquencourt/>
11 Defining \URRocq as alias to \URRocquencourt
12 Defining \Paris as \TitlePageCmd 6
13    ur <Rocquencourt/>
14 Defining \URRhoneAlpes as \TitlePageCmd 7
15    ur <URRhoneAlpes/>
16 Defining \URRennes as \TitlePageCmd 8
17    ur <URRennes/>
18 Defining \URLorraine as \TitlePageCmd 9
19    ur <URLorraine/>
20 Defining \URFuturs as \TitlePageCmd 10
21    ur <URFuturs d='true'/>
22 Defining \RRtitle as \TitlePageCmd 11
23    usual <title/> (flags -par)
24 Defining \RRetitle as \TitlePageCmd 12
25    usual <etitle/> (flags -par)
26 Defining \RRprojet as \TitlePageCmd 13
27    usual <projet/>
28 Defining \motcle as \TitlePageCmd 14
29    usual <motcle/>
30 Defining \keyword as \TitlePageCmd 15
31    usual <keyword/>
32 Defining \RRresume as \TitlePageCmd 16
33    usual <resume/> (flags +par)
34 Defining \RRabstract as \TitlePageCmd 17
35    usual <abstract/> (flags +par)
36 Defining \RRauthor as \TitlePageCmd 18
37    list <author/> and <auth/>
38 Defining \RRdate as \TitlePageCmd 19
39    usual <date/>
40 Defining \RRNo as \TitlePageCmd 20
41    usual <RRnumber/>
42 Defining \RRtheme as \TitlePageCmd 21
43    usual </> (flags +list)
44 Defining \Theme as \TitlePageCmd 22
45    ur_list <Theme/>
46 Defining \THNum as \TitlePageCmd 23
47    ur <THNum/>
48 Defining \THCog as \TitlePageCmd 24
49    ur <THCog/>
50 Defining \THCom as \TitlePageCmd 25
51    ur <THCom/>
52 Defining \THBio as \TitlePageCmd 26
53    ur <THBio/>
54 Defining \THSym as \TitlePageCmd 27
55    ur <THSym/>
56 Defining \myself as \TitlePageCmd 28
57    list? <grimm/> and <auth/>
58 Defining \cmdp as \TitlePageCmd 29
59    usual <cmdp/> (flags +list)
60 Defining \cmda as \TitlePageCmd 30
61    usual <cmdA/> (flags +A)
62 Defining \cmdb as \TitlePageCmd 31
63    usual <cmdB/> (flags +B)
64 [1] \cmdb{\cmdBval}
65 ++ End of virtual file.
66 Defining \cmdc as \TitlePageCmd 32
67    usual <cmdC/> (flags +C)
68 [1] \documentclass[a4paper]{report}
69 ...
70 [1] \cmda{\cmdAval}
71 {(Unknown)}
72 {\titlepage 30}
73 {\titlepage 30=\cmda}
74 {Push cmdA 1}
75 Error signaled at line 1 of file tptest.tex:
76 Undefined command \cmdAval.
77 ...
78 [8] \RRetitle{Tralics, a \LaTeX\ to XML translator\\Part I}
79 {(Unknown)}
80 {\titlepage 12}
81 {\titlepage 12=\RRetitle}
82 {Push etitle 1}
83 ...
84 [12] \RRtheme{\THNum}
85 {(Unknown)}
86 {\titlepage 21}
87 {\titlepage 21=\RRtheme}
88 {(Unknown)}
89 {\titlepage 23}
90 {\titlepage 23=\THNum}
91 {\par}
92 [13]
93 ...
94 [24] \begin{document}
95 {\begin}
96 {\begin document}
97 +stack: level + 2 for environment
98 {\document}
99 +stack: ending environment document; resuming document.
100 +stack: level - 2 for environment
101 +stack: level set to 1
102 [1] \let\do\noexpand\ignorespaces
103 ++ End of virtual file.
104 atbegindocumenthook= \cmdb {\cmdBval }\let \AtBeginDocument \@notprerr \let \do
105 \noexpand \ignorespaces
106 {(Unknown)}
107 {\titlepage 31}
108 {\titlepage 31=\cmdb}
109 {Push cmdB 1}
110 Error signaled at line 24 of file tptest.tex:
111 Undefined command \cmdBval.
112 {Pop 1: document_v cmdB_t}
113 {\let}
114 {\let \AtBeginDocument \@notprerr}
115 {\let}
116 {\let \do \noexpand}
117 {\ignorespaces}
118 [25] \makeRR
119 {(Unknown)}
120 {\titlepage 0}
121 {\titlepage 0=\makeRR}
122 Error signaled at line 25 of file tptest.tex:
123 No value given for command \cmdp.
124 [1] \cmdc{\cmdCval}
125 ++ End of virtual file.
126 {(Unknown)}
127 {\titlepage 32}
128 {\titlepage 32=\cmdc}
129 {Push cmdC 1}
130 Error signaled at line 25 of file tptest.tex:
131 Undefined command \cmdCval.
132 {Pop 1: document_v cmdC_t}
133 {Push p 1}
134 [26] text
135 ...
136 Output written on tptest.xml (1059 bytes).
137 There were 4 errors.
138 (For more information, see transcript file tptest.log)
We describe here the extensions defined by ϵ-TeX, and how they are implemented in Tralics.
Tracing and Diagnostics. When \tracingcommands has a value of 3 or more, the commands following a prefix (like \global) are shown by ϵ-TeX; this is the standard behaviour of Tralics. When \tracinglostchars has a value of two or more, missing characters are displayed on the terminal; no character is lost by Tralics. When \tracingassigns has a value of 1 and more, all assignments subject to TeX´s grouping mechanism are traced. This is set to one by \tracingall. When \tracingifs has a value of one or more, all conditionals are traced, together with the starting line and nesting level; not implemented in Tralics, but it is easy to find the \if associated to a \fi because each of them has a serial number. When \tracinggroups has a value of 1 or more, the start and end of each save group is traced, together with the starting line and grouping level. Not implemented in Tralics, but since version 2.9, you will see line numbers when a group is started (for instance +stack: level + 2 for brace entered on line 9) or terminated (as in +stack: level - 2 for brace from line 9). When \tracingnesting has a value of 1 or more, unclosed conditionals are printed in the transcript file; not implemented in Tralics. When \tracingscantokens has a value of one or more, the opening and closing of pseudo files is recorded as for any another file.
Example. Given the following input
1 \global\count66=12
2 {\count66=12  \count66=13}
3 \catcode200=12
4 \parindent=3pt\parindent=1\parindent\global\parindent=2\parindent
5 \parskip=\parindent plus 2pt\parskip=\parskip
6 \setbox0\null
7 \setbox0\xbox{foo}{bar}
8 \everyhbox{abc}\everyhbox{abc}\everyhbox{c}
9 \let\foo\relax
10 \newcommand*\foo{\relax}\renewcommand\foo{\relax}
11 \let\bar\foo
We get the following lines in the transcript file.
1 [8] \global\count66=12
2 {\global}
3 {\global\count}
4 +scanint for \count->66
5 +scanint for \count->12
6 {globally changing \count66=0 into \count66=12}
7 [9] {\count66=12  \count66=13}
8 {begin-group character}
9 +stack: level + 2 for brace entered on line 9
10 {\count}
11 +scanint for \count->66
12 +scanint for \count->12
13 {reassigning \count66=12}
14 {\count}
15 +scanint for \count->66
16 +scanint for \count->13
17 {changing \count66=12 into \count66=13}
18 {end-group character}
19 +stack: restoring integer value 12 for \count66
20 +stack: level - 2 for brace from line 9
21 [10] \catcode200=12
22 {\catcode}
23 +scanint for \catcode->200
24 +scanint for \catcode->12
25 {reassigning \catcode200=12}
26 [11] \parindent=3pt\parindent=1\parindent\global\parindent=2\parindent
27 {\parindent}
28 +scanint for \parindent->3
29 +scandimen for \parindent->3.0pt
30 {changing \parindent=0.0pt into \parindent=3.0pt}
31 {\parindent}
32 +scanint for \parindent->1
33 +scandimen for \parindent->3.0pt
34 {reassigning \parindent=3.0pt}
35 {\global}
36 {\global\parindent}
37 +scanint for \parindent->2
38 +scandimen for \parindent->6.0pt
39 {globally changing \parindent=3.0pt into \parindent=6.0pt}
40 [12] \parskip=\parindent plus 2pt\parskip=\parskip
41 {\parskip}
42 +scanint for \parskip->2
43 +scandimen for \parskip->2.0pt
44 {scanglue 6.0pt plus 2.0pt}
45 {changing \parskip=0.0pt into \parskip=6.0pt plus 2.0pt}
46 {\parskip}
47 {reassigning \parskip=6.0pt plus 2.0pt}
Transcript for boxes and token lists:
1 [13] \setbox0\null
2 {\setbox}
3 \null ->\hbox {}
4 +scanint for \setbox->0
5 {Constructing an anonymous box}
6 +stack: level + 2 for brace entered on line 13
7 {Push hbox 1}
8 {end-group character}
9 +stack: finish a box of type 0
10 {Pop 1: document_v hbox_v}
11 +stack: level - 2 for brace from line 13
12 {changing \box0=</> into \box0=}
13 [14] \setbox0\xbox{foo}{bar}
14 {\setbox}
15 +scanint for \setbox->0
16 {Push argument 1}
17 Character sequence: foo.
18 {Text:foo}
19 {Pop 1: document_v argument_v}
20 {Constructing a box named foo}
21 +stack: level + 2 for brace entered on line 14
22 {Push hbox 1}
23 Character sequence: bar.
24 {end-group character}
25 +stack: finish a box of type 0
26 {Text:bar}
27 {Pop 1: document_v hbox_v}
28 +stack: level - 2 for brace from line 14
29 {changing \box0= into \box0=<foo>bar</foo>}
30 [15] \everyhbox{abc}\everyhbox{abc}\everyhbox{c}
31 {\everyhbox}
32 {changing \everyhbox= into \everyhbox=abc}
33 {\everyhbox}
34 {reassigning \everyhbox=abc}
35 {\everyhbox}
36 {changing \everyhbox=abc into \everyhbox=c}
This is the transcript file for the case of \def and friends. Here, two lines are printed by \tracingassigns.
1 [16] \let\foo\relax
2 {\let}
3 {\let \foo \relax}
4 {changing \foo=undefined}
5 {into \foo = \relax}
6 [17] \newcommand*\foo{\relax}\renewcommand\foo{\relax}
7 {\newcommand}
8 {\newcommand* \foo}
9 {changing \foo=\relax}
10 {into \foo= macro:->\relax }
11 {\renewcommand}
12 {\newcommand \foo}
13 {changing \foo=macro:->\relax }
14 {into \foo=\long macro:->\relax }
15 [18] \let\bar\foo
16 {\let}
17 {\let \bar \foo}
18 {changing \bar=macro:->\mathaccent "7016\relax }
19 {into \bar = \long macro:->\relax }
In order to debug conditionals, the variables \currentiflevel, \currentifbranch and also \currentiftype can be consulted. The level is the number of currently active conditionals, the branch is 1 if the `then branch´ is taken, -1 if the `else branch´ is taken, 0 otherwise (condition not yet evaluated, or out of condition). The type is given in the following table (if the case of \unless, the opposite of this number is returned).
| 1 | \if | 8 | \ifmmode | 15 | \iftrue |
| 2 | \ifcat | 9 | \ifinner | 16 | \iffalse |
| 3 | \ifnum | 10 | \ifvoid | 17 | \ifcase |
| 4 | \ifdim | 11 | \ifhbox | 18 | \ifdefined |
| 5 | \ifodd | 12 | \ifvbox | 19 | \ifcsname |
| 6 | \ifvmode | 13 | \ifx | 20 | \iffontchar |
| 7 | \ifhmode | 14 | \ifeof |
The \unless command is an extension of ϵ-TeX; the behavior of \unless\iftrue is the same as \iffalse. This means the following: This command is expandable; it reads a token; this token must be a conditional, but not \ifcase. The conditional computes a truth value, which is then negated. Expansion of the command is the same as that of the conditional, said otherwise, the next token, if the test is true, otherwise what follows the \else or \fi.
Example.
\def\showif{%
\typeout{type \the\currentiftype,
level \the\currentiflevel,
branch \the\currentifbranch.}}
\count3=0

\unless\iffalse
\showif
\iffalse\showif\else\showif
\ifnum\count3=\currentifbranch
\showif \fi\fi\fi
The following is printed on the terminal.
type -16, level 1, branch 1.
type 16, level 2, branch -1.
type 3, level 3, branch 1.
The command \ifdefined is a conditional; it reads a token and its truth value is true if this token is defined. The command \ifcsname reads and expands all tokens as \csname, until finding \endcsname. The condition is true if the token exists and is defined. If the token does not exist, it will not be created. In LaTeX, \@ifundefined call \csname, but has as side effect that the resulting token is never undefined.
The command \iffontchar is a conditional; it reads a font identifier, and a character position, and evaluates to true in the case where this character is defined in the font. Since Tralics does not read font metric files, nothing special happens, we pretend that the character exists, unless the font is the null font. Thus
\ifdefined \undefined \bad\fi
\ifdefined \par\else\bad \fi
\ifcsname foo bar\endcsname\bad\fi
\ifcsname bar\endcsname\else\bad\fi
\csname foo bar\endcsname\ifcsname foo bar\endcsname\else\bad\fi
\unless\iffontchar\font 32 \bad\fi
\iffontchar\nullfont 32 \bad\fi
The command \protected is a prefix, like \long, that applies to a macro definition. A protected macro is not expanded when building an expanded token list (for instance in \edef).
The command \scantokens absorbs a list of unexpanded tokens, converts it into a character string, that is treated as if it were an external file and starts to read from this pseudo file. Every newline character(note: ➳) is interpreted as the start of a new line.
The command \showgroups shows the current grouping structure. The read-only integer \currentgrouplevel returns the current save group level, and \currentgrouptype returns a number representing the type of the current group. This gives a number between 0 and 16, see the ϵ-TeX documentation. The values used by Tralics are: 0 is bottom level (no group), 1 is simple group, 9 is math group, 14 is semi simple group, 18 is environment, 19 is a cell in a table, 20 is a local group (corresponds to 4 and 5 in ϵ-TeX), 21 is a title-page group, 17 is impossible.
Example. If we have a file with
\begin{foo}
\begingroup
{
\begin{tabular}{c}
  \showgroups!
\end{tabular}
\the\currentgrouplevel
\the\currentgrouptype
}
\endgroup
\end{foo}
The following is printed by ϵ-TeX
### simple group (level 10) entered at line 13 ({)
### align group (level 9) entered at line 12 (align entry)
### align group (level 8) entered at line 12 (\halign{)
### vcenter group (level 7) entered at line 12 (\vcenter{)
### math shift group (level 6) entered at line 12 ($)
### hbox group (level 5) entered at line 12 (\hbox{)
### semi simple group (level 4) entered at line 12 (\begingroup)
### simple group (level 3) entered at line 11 ({)
### semi simple group (level 2) entered at line 10 (\begingroup)
### semi simple group (level 1) entered at line 9 (\begingroup)
### bottom level
or by Tralics
### cell group (level 5) entered at line 13
### environment group (level 4) entered at line 12
### brace group (level 3) entered at line 11
### \begingroup group (level 2) entered at line 10
### environment group (level 1) entered at line 9
### bottom level
You may wonder why ϵ-TeX uses twice as many stack levels as Tralics. This is because tables are implemented in a different way. For instance, using math mode for tables is very strange; one might wonder what the current mode is, when \tracinggroupd is seen; the answer is restricted horizontal mode, but why? If we insert a \showlist command, we see
### restricted horizontal mode entered at line 13 []
spacefactor 3000
### restricted horizontal mode entered at line 13 []
spacefactor 0
### internal vertical mode entered at line 12
prevdepth ignored
### internal vertical mode entered at line 12
prevdepth ignored
### math mode entered at line 12
### restricted horizontal mode entered at line 12
spacefactor 1000
### horizontal mode entered at line 12 []
spacefactor 1000
### vertical mode entered at line 0
### current page: []
In the same situation, you will see the following lines in the Tralics transcript file. Here, the level is an index in the XML stack, and you can see that the current mode is `a´ (for array).
level 0 entered at line 0, type document, mode_v:
<std>
<table rend='inline'><row><cell/></row></table></std>
level 1 entered at line 12, type tabular, mode_v:
<table rend='inline'><row><cell/></row></table>
level 2 entered at line 13, type row, mode_a:
<row><cell/></row>
level 3 entered at line 13, type cell, mode_a:
<cell/>
If you translate the following line in verbose mode
{\the\currentgrouplevel}
you will see the following in the transcript file. The current level outside the group is one, so that you see it increase to 2; but ϵ-TeX shows it as zero, so that the \the inside the group expands to one. The reason for this strange behaviour is that a quantity defined at level zero is never defined; the level is never zero, so that the \the never returns a negative value.
[9] {\the\currentgrouplevel}
{begin-group character}
+stack: level + 2 for brace entered on line 9
{\the}
{\the \currentgrouplevel}
\the->1.
{end-group character}
+stack: level - 2 for brace from line 9
The command \eTeXversion expands to a token list containing the current ϵ-TeX revision. The counter \eTeXversion returns ϵ-TeX´s major version number. Thus
\message{\number\eTeXversion\eTeXrevision}
prints something like `2.0´.
The commands \gluestretchorder, \glueshrinkorder, \gluestretch, \glueshrink can be used when some internal quantity is scanned, for instance after \the. They read some glue and return one part of the glue, it can be the stretch order or the shrink order (an integer between 0 and 3), or the stretch or shrink value (as a dimension). The commands \gluetomu, \mutoglue read and return some glue. The ϵ-TeX manual says: glue is converted into muglue and vice versa by simply equating 1pt with 1mu. Example: we define here a command, whose value will be used later.
\muskip0 = 18mu plus 36mu minus 1 fill
\skip0 = 10pt plus 20pt minus 1 fil
\edef\uselater{%
\the\muskip0,%
\the\mutoglue\muskip0,%
\the\skip0,%
\the\gluetomu\skip0,%
\the\mutoglue\gluetomu\skip0,%
\the\glueshrink\skip0,%
\the\gluestretch\skip0,%
\the\glueshrinkorder\skip0,%
\the\gluestretchorder\skip0}
The commands \detokenize and \unexpanded read a token list. The second command returns the list unchanged, the first one detokenizes it; said otherwise the token list is converted into a character list, of category code 12 (except for space). These commands behave like \the, in that the resulting token list is not expanded, even in a \edef or \write. This example shows how \unexpanded works.
\def\foo{12}\def\equals{<}
\edef\A{\unexpanded{\foo\equals}\foo\relax}
\def\equals{=}
\ifnum\A\else\bad\fi
\def\foo{11}
\ifnum\A\bad\fi
\ifnum\unexpanded{\foo\equals}\foo\relax\else\bad\fi
The command \uselater, defined above, should compare equal to \xoo defined here(note: ➳)
{\let\GDEF\gdef\let\XDEF\xdef\def\S{ }
 \catcode`m=12 \catcode`u=12 \catcode`p=12 \catcode`f=12
 \catcode`i=12  \catcode`l=12 \catcode`n=12 \catcode`i=12 \catcode`s=12
 \catcode`t=12
 \GDEF\MU{mu}\GDEF\PT{pt}\GDEF\FIL{fil}\GDEF\FILL{fill}%
 \GDEF\PLUS{plus}\GDEF\MINUS{minus}
\XDEF\xoo{18.0\MU\S \PLUS\S 36.0\MU\S \MINUS\S 1.0\FILL,%
18.0\PT\S \PLUS\S 36.0\PT\S \MINUS\S 1.0\FILL,%
10.0\PT\S \PLUS\S 20.0\PT\S \MINUS\S 1.0\FIL,%
10.0\MU\S \PLUS\S 20.0\MU\S \MINUS\S 1.0\FIL,%
10.0\PT\S \PLUS\S 20.0\PT\S \MINUS\S 1.0\FIL,%
1.0\PT,20.0\PT,1,0}}
Using \detokenize makes life easier. The test should be true here.
\edef\yoo{\detokenize{18.0mu plus 36.0mu minus 1.0fill,%
18.0pt plus 36.0pt minus 1.0fill,%
10.0pt plus 20.0pt minus 1.0fil,%
10.0mu plus 20.0mu minus 1.0fil,%
10.0pt plus 20.0pt minus 1.0fil,%
1.0pt,20.0pt,1,0}}
\ifx\yoo\xoo\else\bad\fi
As in the case of ϵ-TeX, Tralics provides the notion of expressions of type number, dimen, glue or muglue, that can be used whenever a quantity of that type is needed. Such an expression is read by the scanning mechanism; basically scanint and friends are used to read a quantity, and \multiply and friends are used to perform operations. The four commands that can be used are \numexpr, \dimexpr, \glueexpr and \muexpr. They determine a type t, the type of the result, and read an expression, that is followed by an optional \relax (that will be read). When scanning for an operator or the end of an expression, spaces are discarded. An expression consists of one or more terms of type t, that are added or subtracted. A term of type t consists of an initial factor of type t, multiplied or divided by a numeric (integer) factor. Finally, a factor is either a quantity of type t, or a parenthesized expression. Example.
\ifdim \dimexpr(2pt-5pt) *\numexpr 3-3*13/5\relax + 34pt/2=32pt
\else\bad\fi
Here the \relax terminates the \numexpr. This is the trace. You will see expr so far when a term is converted into an expression (prefix `=´), or after an addition or subtraction (prefix `+´ or `-´). You will see term so far after a multiplication or division (prefix ´*´ or ´/´) or a scaling (prefix backslash). In the case of , a 64bit intermediate product is computed.
[8] \ifdim \dimexpr(2pt-5pt) *\numexpr 3-3*13/5\relax + 34pt/2=32pt
+\ifdim1
+scanint for \dimexpr->2
+scandimen for \dimexpr->2.0pt
+expr so far for \dimexpr= 2.0pt
+scanint for \dimexpr->5
+scandimen for \dimexpr->5.0pt
+expr so far for \dimexpr- -3.0pt
+scanint for \numexpr->3
+expr so far for \numexpr= 3
+scanint for \numexpr->3
+scanint for \numexpr->13
+scanint for \numexpr->5
+term so far for \numexpr\ 8
+expr so far for \numexpr- -5
+scan for \numexpr= -5
+scanint for \dimexpr->-5
+term so far for \dimexpr* 15.0pt
+expr so far for \dimexpr= 15.0pt
+scanint for \dimexpr->34
+scandimen for \dimexpr->34.0pt
+scanint for \dimexpr->2
+term so far for \dimexpr/ 17.0pt
+expr so far for \dimexpr+ 32.0pt
+scan for \dimexpr= 32.0pt
+scandimen for \ifdim->32.0pt
+scanint for \ifdim->32
+scandimen for \ifdim->32.0pt
+iftest1 true
Note that 3*13/5 is 8-1/5, and this is rounded to 8. In the case of \divide, the result is truncated. All intermediate expressions are checked for overflow(note: ➳), which is for an integer, and otherwise (in magnitude). This means that dimensions and components of glue must be less than in units of pt, mu or fil.
One important point is that these operations do no side effects, hence can be used inside an \edef. If used out of context, you can see error messages like You can´t use `\numexpr´ in horizontal mode, (the messages depends on the current mode), in Tralics, the error is Read only variable \numexpr, because these operations are implemented as the value of a read only variable. Example
\def\foo#1#2{\number#1
  \ifnum#1<#2, %
  \expandafter\foo
  \expandafter{\number\numexpr#1+1\expandafter}%
  \expandafter{\number#2\expandafter}%
  \fi}

\edef\Bar{\foo{7}{13}}
\def\xBar{7, 8, 9, 10, 11, 12, 13}
\ifx\Bar\xBar\else \bad\fi
The integer \lastnodetype returns a number indicating the type of the last node, if any, on the current list. This is not implemented in Tralics, and the value is always zero.
The \interactionmode command allows you to get or set the current interaction mode, an integer between 0 and 3. Setting it is no-op in Tralics (no error signaled), the value is always zero (this is batchmode in TeX, which is more or less the only mode of interaction of Tralics).
The commands \fontcharwd, \fontcharht, \fontchardp, \fontcharic can be used to get some information about characters; do not use them to set a value. The command reads a font identifier, and a character position; if the character does not exists, the value is zero, otherwise the width, height, depth or italic correction. In the following example, Tralics shows 0 for the interaction mode, and 0.0pt for the other values; in ϵ-TeX, only the italics correction is zero.
{
 \showthe\interactionmode
 \interactionmode=2
 \showthe\fontcharwd\font`q
 \showthe\fontcharht\font`q
 \showthe\fontchardp\font`q
 \showthe\fontcharic\font`q
}
\showthe\interactionmode
The commands \parshapelength, \parshapeindent, read an integer n; they return the length or indentation of the line n in the current parshape; the command \parshapedimen reads or , and returns one of these quantities, depending on the parity of the argument. Example: in the following code, the \bad macro is not called.
\parshape 3 1pt 2pt 3pt 4pt 5pt 6pt
\ifnum\parshape         = 3 \else\bad\fi
\ifdim\parshapelength 1 = 2.0pt\else\bad\fi
\ifdim\parshapeindent 2 = 3.0pt\else\bad\fi
\ifdim\parshapedimen 4  = 4.0pt\else\bad\fi
\ifdim\parshapedimen 5  = 5.0pt\else\bad\fi
\ifdim\parshapedimen 6  = 6.0pt\else\bad\fi
\ifdim\parshapedimen 7  = 5.0pt\else\bad\fi
\ifdim\parshapedimen 0  = 0.0pt\else\bad\fi
\parshape 0
\ifdim\parshapedimen 1  = 0.0pt\else\bad\fi
The four commands \interlinepenalties, \clubpenalties, \widowpenalies, as well as \displaywidowpenalties can be used to get or set penalties. The values are read, but not used by Tralics. The syntax is the following. In a set context, an optional equals sign is read, followed by an integer n. If the integer is positive, then n integer values are read and stored, otherwise the table is cleared. In a get context, an integer n is read, and the result is an integer; if n is negative, this is zero, if n is zero it is the length of the table, if n is positive it is the value found in the table (or the last value if n is too big). Example: in the following code, the \bad macro is not called.
\interlinepenalties=3 1 2 3
\clubpenalties=3 11 12 13
\widowpenalties=3 101 102 103
\displaywidowpenalties=3 1001 1002 1003
\widowpenalties= -1
\edef\foo{%
\the\interlinepenalties 1
\the\clubpenalties\interlinepenalties2
\the\displaywidowpenalties -1
\the\displaywidowpenalties 0
\the\displaywidowpenalties 4
\the\widowpenalties 0}
\def\xfoo{1120310030}
\ifx\foo\xfoo\else\bad\fi
The command \showtokens reads a token list, and prints it on the terminal and transcript file. As the example below shows, the start of the token list is obtained by expanding tokens and ignoring \relax until a brace (implicit or explicit) is found.
\showtokens \expandafter{\jobname}
\showtokens \expandafter{\tralicsversion }
The command \readline has the same syntax as \read, it is followed by a channel number, a to keyword, and a definable command. It reads a line from a file, and puts it in the command. The difference is that all characters are assumed of category code 12, except space that has its standard category code; only one line is read, since the result is always properly nested.
The command \everyeof holds a token list, like \everypar, that is inserted at the end of every file, or virtual file.
The counter \lastlinefit contains an integer, that is used by ϵ-TeX to set the glue in the last line of a paragraph. For each line, the actual space used by by a glue item of the form 10pt plus 4pt minus 3pt is or , depending on whether the natural width is too big or too small. The last line of a paragraph is generally terminated by an infinite stretchable glue, so that the glue factor f for normal glue is zero. In ϵ-TeX, you can use the same factor as the previous line, or an interpolation ( times the factor of the previous line), where l is the value of \lastlinefit, or 0 if negative, or 1000 if greater than 1000. Not used in Tralics.
The integer quantity \savinghyphcodes, when positive, tells ϵ-TeX to store the current \lccode table together with the hyphenation table of the current language. See ϵ-TeX documentation for why it is useful to store such a table; not used in Tralics.
When TeX´s page builder transfers material from the `recent contribution´ to the `page so far´, it discards discardable items preceding the first box or rule on the page. When ϵ-TeX´s parameter \savingdiscards is positive, these discarded items are stored in a special list; the command \pagediscards reinserts these items (and clears the list). The same holds for \vsplit, the command is then \splitdiscards.
The \middle command is not implemented in Tralics. This is a math-only command that reads a delimiter, and should be placed between \left and \right, more than one such command can be used. The height of the delimiter of \left, \right and \middle is the height of the formula, from \left to \right.
The six commands \marks, \firstmarks, \topmarks \botmarks, \splitfirstmarks, and \splitbotmarks generalise commands like \mark, they read an integer N, and set a mark at position N, or get the mark at position N. No error is signalled if N is out of range.
There is a possibility to type text from, left to right or right to left in ϵ-TeX. Not implemented in Tralics. The use of these features is controlled by the integer \TeXXeTstate.
The integer \predisplaydirection contains the text direction preceding a display. The commands \beginL, \beginR, \endL, \endR mark the start and end of a left-to-right or right-to-left region.
The transcript file of Tralics contains a line for each use of \dimendef or friends. Here is the list of all standard definitions (for Tralics version 2.12). Note that \count@ is counter 255, while \dimen@ is dimension 0. The names (and values) of the commands \z@, \@ne, \tw@, \thr@@, \sixt@@n, \@cclv, \@cclvi, \m@ne, \@m, \@M, \@Mi, \@Mii, \@Miii, \@Miv, \@MM, were chosen by Knuth (maybe Lamport). The values are 0, 1, 2, 3, 16, 255, 256, -1, 1000, 10000, 10001, 10002, 10003, 10004, and 20000. These numbers were typeset via \number\@MM.
Remember that the internal name of the LaTeX counter `enumi´ is \c@enumi.
\trivialmath=1
{\countdef \count@=\count255}
{\countdef \c@page=\count0}
{\dimendef \dimen@=\dimen0}
{\dimendef \dimen@i=\dimen1}
{\dimendef \dimen@ii=\dimen2}
{\dimendef \epsfxsize=\dimen11}
{\dimendef \epsfysize=\dimen12}
{\chardef \@ne=\char1}
{\chardef \tw@=\char2}
{\chardef \thr@@=\char3}
{\chardef \sixt@@n=\char16}
{\chardef \@cclv=\char255}
{\mathchardef \@cclvi=\mathchar256}
{\mathchardef \@m=\mathchar1000}
{\mathchardef \@M=\mathchar10000}
{\mathchardef \@Mi=\mathchar10001}
{\mathchardef \@Mii=\mathchar10002}
{\mathchardef \@Miii=\mathchar10003}
{\mathchardef \@Miv=\mathchar10004}
{\mathchardef \@MM=\mathchar20000}
{\chardef \active=\char13}
{\tokesdef \toks@=\toks0}
{\skipdef \skip@=\skip0}
{\dimendef \z@=\dimen13}
{\dimendef \p@=\dimen14}
{\dimendef \oddsidemargin=\dimen15}
{\dimendef \evensidemargin=\dimen16}
{\dimendef \leftmargin=\dimen17}
{\dimendef \rightmargin=\dimen18}
{\dimendef \leftmargini=\dimen19}
{\dimendef \leftmarginii=\dimen20}
{\dimendef \leftmarginiii=\dimen21}
{\dimendef \leftmarginiv=\dimen22}
{\dimendef \leftmarginv=\dimen23}
{\dimendef \leftmarginvi=\dimen24}
{\dimendef \itemindent=\dimen25}
{\dimendef \labelwidth=\dimen26}
{\dimendef \fboxsep=\dimen27}
{\dimendef \fboxrule=\dimen28}
{\dimendef \arraycolsep=\dimen29}
{\dimendef \tabcolsep=\dimen30}
{\dimendef \arrayrulewidth=\dimen31}
{\dimendef \doublerulesep=\dimen32}
{\dimendef \@tempdima=\dimen33}
{\dimendef \@tempdimb=\dimen34}
{\dimendef \@tempdimc=\dimen35}
{\dimendef \footnotesep=\dimen36}
{\dimendef \topmargin=\dimen37}
{\dimendef \headheight=\dimen38}
{\dimendef \headsep=\dimen39}
{\dimendef \footskip=\dimen40}
{\dimendef \columnsep=\dimen41}
{\dimendef \columnseprule=\dimen42}
{\dimendef \marginparwidth=\dimen43}
{\dimendef \marginparsep=\dimen44}
{\dimendef \marginparpush=\dimen45}
{\dimendef \maxdimen=\dimen46}
{\dimendef \normallineskiplimit=\dimen47}
{\dimendef \jot=\dimen48}
{\dimendef \paperheight=\dimen49}
{\dimendef \paperwidth=\dimen50}
{\skipdef \topsep=\skip11}
{\skipdef \partopsep=\skip12}
{\skipdef \itemsep=\skip13}
{\skipdef \labelsep=\skip14}
{\skipdef \parsep=\skip15}
{\skipdef \fill=\skip16}
{\skipdef \@tempskipa=\skip17}
{\skipdef \@tempskipb=\skip18}
{\skipdef \@flushglue=\skip19}
{\skipdef \listparindent=\skip20}
{\skipdef \hideskip=\skip21}
{\skipdef \z@skip=\skip22}
{\skipdef \normalbaselineskip=\skip23}
{\skipdef \normallineskip=\skip24}
{\skipdef \smallskipamount=\skip25}
{\skipdef \medskipamount=\skip26}
{\skipdef \bigskipamount=\skip27}
{\skipdef \floatsep=\skip28}
{\skipdef \textfloatsep=\skip29}
{\skipdef \intextsep=\skip30}
{\skipdef \dblfloatsep=\skip31}
{\skipdef \dbltextfloatsep=\skip32}
{\countdef \m@ne=\count20}
{\countdef \c@FancyVerbLine=\count21}
{\countdef \c@enumi=\count22}
{\countdef \c@enumii=\count23}
{\countdef \c@enumiii=\count24}
{\countdef \c@enumiv=\count25}
{\countdef \c@footnote=\count26}
{\countdef \c@part=\count27}
{\countdef \c@chapter=\count28}
{\countdef \c@section=\count29}
{\countdef \c@subsection=\count30}
{\countdef \c@subsubsection=\count31}
{\countdef \c@paragraph=\count32}
{\countdef \c@subparagraph=\count33}
{\countdef \c@mpfootnote=\count34}
{\countdef \c@bottomnumber=\count35}
{\countdef \c@topnumber=\count36}
{\countdef \@tempcnta=\count37}
{\countdef \@tempcntb=\count38}
{\countdef \c@totalnumber=\count39}
{\countdef \c@dbltopnumber=\count40}
{\countdef \interfootnotelinepenalty=\count41}
{\countdef \interdisplaylinepenalty=\count42}
{\toksdef \@temptokena=\toks11}
{\chardef \@tempboxa=\char11}
{\chardef \voidb@x=\char12}
At the start of the run, some commands are created; we start with commands that take no argument, whose expansion is formed of characters only.
\lbrack, \rbrack (left and right brackets) expansion is `[´ and `]´.
\xscale, \yscale, \xscaley, \yscalex. Expansion is one, one, zero, zero (in fact `1.0´ and `0.0´).
\textfraction, \floatpagefraction, \dblfloatpagefraction,\bottomfraction, \dbltopfraction, \topfraction. Parameters for float placement. Expansion is 20%, 50%, 50%, 30%, 70%, and 70%, in the form of `.7´ for instance.
\@vpt, \@vipt, \@viipt, \@viiipt, \@ixpt, \@xpt, \@xipt, \@xiipt, \@xivpt, \@xviipt, \@xxpt, \@xxvpt. Font sizes. Expansion is 5, 6, 7, 8, 9, 10, 10.95, 12, 14.4, 17.28, 20.74 and 24.88.
\@height, \@depth, \@width, \@plus, \@minus. Expansion is the name of the command without the at-sign. In the LaTeX kernel, you can see `\vskip \z@ \@plus.2\p@´ instead of the more obvious `\vskip 0pt plus 0.2pt´.
\encodingdefault, \familydefault, \seriesdefault, \shapedefault: This default the current font as T1+cmr/m/n.
\I, \J. Uppercase version of \i and \j. Expansion is I or J.
\space, \thinspace, \@headercr\headercr"@headercr: Expansion is a single space character.
\footcitesep, \citepunct. Expansion is comma space for both commands.
We continue with more complicated commands:
Space, sharp, underscore, newline, as active characters, are defined to be equivalent, respectively, to \space, \#, \_ and \par.
An active & character produces &.
An active form-feed character is an outer \par.
The tilde and no-breakspace (character 160) expand to \nobreakspace.
\@vobeyspaces makes the space character active, and defines it to be \nobreakspace.
\obeylines makes newline character active (and defines it to be \par).
The sloppypar environment expands to \par in the begin and end part.
The \null command produces an empty box. This is invisible, but some rules will be applied differently (for instance it can inhibit ligatures).
\labelitemi, \labelitemii, \labelitemiii, and \labelitemiv produce a bullet, endash, asterisk centered, and period centered, via \textbullet, etc.
The guillemets environment produces \guillemotleft and \guillemotright
\@thirdofthree reads three arguments, and expands to the last.
\@carcube reads three arguments and returns them. Moreover, it reads and discards all tokens up to \@nil.
The \date command takes an argument that LaTeX puts in \@date which is filled with \today. The \today command is defined in some classes using English month names, and some packages (using local names). In Tralics, the default is a numeric list like `2006/10/12 19:14:59´ (this is the same string that appears in the transcript file). The \date command produces a <date> element with the arguments.
The commands \markright and \markboth take one or two arguments and call \mark; since \mark does nothing in Tralics, the implementation is oversimplified; it modifies the command \@themark.
\mod, \bmod, \pmod, \pod are commands that take one argument,they are different implementation of the modulo operator.
The six following commands \chaptermark, \sectionmark, \subsectionmark, \subsubsectionmark, \paragraphmark, and \subparagraphmark are defined by compatibility with LaTeX to take an argument and ignore it. These commands are redefined by standard classes(note: ➳) and typically call \markboth or \markright.
\addto@hook takes two arguments A and B. First argument is assumed to be a reference to a token list (for instance \everypar). The tokens in the the list B are put at the end of A.
\g@addto@macro takes two arguments A and B. First argument is assumed to be a macro that takes no argument. The tokens in the the list B are put at the end of A. Assignment is global.
The command \@setmode scans an integer. Values outside the range 0-6 are replaced by 0. Other values correspond to argument mode (0), or horizontal mode (1), or vertical mode(2), no mode (3), bibliographic mode (4), array mode (5), mathmode (6). Do not use this command if you do not understand the consequences. In a case like 1\@setmode 2 \space3 4 5\par, there is no space between 1 and 3, because we are vertical mode, horizontal mode is entered when the the digit 3 is seen. In a case like 1\@setmode 4 \space3 4 5\par there is no space at all since they are ignored in bib mode. The \par command is ignored as well, so you had better to add \@setmode1 or enclose everything in a group.
\x@tag and \y@tag are internal macros for equation tags.
We show here the meaning of \@sanitize, \@nnil and \do.
\@sanitize=macro: ->\@makeother \ \@makeother \\\@makeother \$\@makeother
\&\@makeother \#\@makeother \^\@makeother \_\@makeother \%\@makeother \~.
\dospecials=macro: ->\do \ \do \\\do \$\do \&\do \#\do \^\do \_\do \%\do
\~\do \{\do \}.
\@nnil=macro: ->\@nil .
The page counter is \count0. We first define \c@page, via \countdef, then \cl@page to be empty, \c@page to be one, and \thepage to use arabic numbers; the \pagenumbering command redefines the \thepage. The command \p@page is not defined because \p@foo is used only for printing the label associated to the counter (if you want the page number of reference `foo´, use \pageref). Note that in Tralics, the page counter is never modified, \pageref is the same as \ref. Consider a reference to the page containing the start of the verbatim environment we are commenting: ✻. In LaTeX, the value of \@currentlabel is considered, in Tralics, the current anchor is used instead; this works well for \ref. The current label is defined here:6.13, at the start of the section. For the HTML version of the document, we have cheated a bit. We have added an \index command, and this inserts an anchor after the word `bootstrap´; the label follows the \index. The \pageref command uses this label. Note that the \anchor command adds an anchor, but this is not defined by LaTeX. The commands defined here produce a <pagestyle> element.
\def\pagenumbering#1{\xmlelt{pagestyle}{\XMLaddatt{numbering}{#1}}}
\def\pagestyle#1{\xmlelt{pagestyle}{\XMLaddatt{style}{#1}}}
\def\thispagestyle#1{\xmlelt{pagestyle}{\XMLaddatt{this-style}{#1}}}
We show now the remaining of the bootstrap code. We start with filling some registers.
[1] %% Begin bootstrap commands for latex [2] \@flushglue = 0pt plus 1fil [3] \hideskip =-1000pt plus 1fill [4] \smallskipamount=3pt plus 1pt minus 1pt [5] \medskipamount=6pt plus 2pt minus 2pt [6] \bigskipamount=12pt plus 4pt minus 4pt [7] \z@=0pt\p@=1pt\m@ne=-1 \fboxsep = 3pt % [8] \c@page=1 \fill = 0pt plus 1fill [9] \paperheight=297mm\paperwidth=210mm [10] \jot=3pt\maxdimen=16383.99999pt
The two commands defined here take as argument either a character or a one character command.
[33] \def\@makeother#1{\catcode`#1=12\relax}
[34] \def\@makeactive#1{\catcode`#1=13\relax}
Other commands
[11] \def\newfont#1#2{\font#1=#2\relax}
[12] \def\symbol#1{\char #1\relax}
[16] \newenvironment{cases}{\left\{\begin{array}{ll}}{\end{array}\right.}%
[19] \def\stretch#1{\z@ \@plus #1fill\relax}
[20] \theoremstyle{plain}\theoremheaderfont{\bfseries}
[21] \def\@namedef#1{\expandafter\def\csname #1\endcsname}
[22] \def\@nameuse#1{\csname #1\endcsname}
[23] \def\@arabic#1{\number #1}
[24] \def\@roman#1{\romannumeral#1}
[25] \def\@Roman#1{\Romannumeral#1}
[30] \def\LaTeXe{\LaTeX2$\epsilon$}
[32] \def\enspace{\kern.5em }
[35] \def\root#1\of{\@root{#1}}
[40] \def\eqref#1{(\ref{#1})}
[43] \def\on@line{ on input line \the\inputlineno}
[47] %% End bootstrap commands for latex
Version 1 of this document described the status of standard packages for Tralics2.9. It has been withdrawn. The list of all packages, with documentation, is be found on the web.
We give here some examples of the \includegraphics command. We consider a file with the following content. Notice that the clip attribute is set to true if `clip´ appears in the list, whether or not a value has been given. A colon and an underscore in a file name is never interpreted. The extension is always removed:
\let\IC=\includegraphics
\def\FILE{Logo-INRIA-couleur}
\IC[angle=0,width=3cm,clip=]{\FILE}
\IC[angle=20,width=.5\textwidth,height=.3\textheight]{\FILE.ducon}
\IC[angle=0,width=\columnwidth,height=\textheight]{\FILE.foo_bar}
{\language=1 a:c
\IC[angle=0, =foo,,width=3cm,scale=1,scale=2,clip]{../../a_b:c}
}
\framebox{\includegraphics{x_.ps}}
We continue with an example of \epsfbox.
{
\setlength\epsfxsize{50pt}
\setlength\epsfysize{60pt}
\epsfbox{x.ps}
\setlength\epsfysize{70pt}
\epsfbox{x.eps}
\epsfbox{x.epsf}
}
Tralics pretends that there are 4 different images. The translation is:
<figure rend='inline' clip='true' width='3cm' file='Logo-INRIA-couleur'/> <figure rend='inline' height='6.cm' width='7.5cm' angle='20' file='Logo-INRIA-couleur'/> <figure rend='inline' height='20.cm' width='15.cm' file='Logo-INRIA-couleur'/> a :c <figure rend='inline' clip='true' scale='2' width='3cm' file='../../a_b:c'/> <figure framed='true' rend='inline' file='x_'/></p> <figure height='60.0pt' width='50.0pt' rend='inline' file='x'/> <figure height='70.0pt' rend='inline' file='x'/> <figure rend='inline' file='x'/>
The file `\jobname.img´ contains the following. The last number is the number of times the image was included. The second number explains in which format the file has been found. Whether or not the image file is found is irrelevant. The information given in the file is for information only.
# images info, 1=ps, 2=eps, 4=epsi, 8=epsf, 16=pdf, 32=png, 64=gif
see_image("Logo-INRIA-couleur",1+16,3);
see_image("../../a_b:c",0,1);
see_image("x_",0,1);
see_image("x",0,3);
The only requirements for the xii file is that ~ is an active character, \ has category code 0, % is a comment character, the end of line character is as usual. The file modifies the category code of 7, F, j and P, in such a way that `jdefjx71F71P´ is the same as `\def\x#1{#1}´. This is one way of making the code incomprehensible, the other is to use commands so that `six´, `geese´ and `laying´ are replaced by `/sx´, `Yegse´ and `RyalD´. The programs make the letter H active and defines it via `AHHFLP´. For those who want to write puzzles like this one: is it possible to avoid doubling the H? Without using all these strange commands, the file could be written as
\let~\catcode ~`A13 \defA#1{~`#113\def}
AZZ{}APP{\par}AXX#1{\bigskip On the #1 day of Christmas my true love gave to me}
ABB{PZAZZ{and }a partridge in a pear tree.}
ACC{Ptwo turtle doves}
ADD{Pthree french hens}
AEE{Pfour calling birds}
AFF{Pfive gold rings}
AGG{Psix geese a laying}
AHH{Pseven swans a swimming}
AII{Peight maids a milking}
AJJ{Pnine ladies dancing}
AKK{Pten lords a leaping}
ALL{Peleven pipers piping}
AMM{Ptwelve drummers drumming}
\def\F#1#2#3{}AVV#1\fi{\fi#1}
ATT#1 #2,#3:{\if.#3.\elseT#3:\fiX{#1}\U#1 #2,#3:}
\def\U#1#2#3#4 #5,#6{\F#1#2#3#5\if:#6\elseV\U#6\fi}
Ttwelfth M,eleventh L,tenth K,ninth J,eighth I,seventh H,sixth G,fifth
F,fourth E,third D,second C,first B,:\bye
The size of the file is 698 characters (compare to the 767 of the xii file). Note how the double loop is constructed. The xii file is made obscure by replacing B, C, D etc., by expression that have the same expansion, using instead of \F a command that uses some characters (because `nine´ and `ninth´ start with the same letters, etc.) An interesting point is that we can write a smaller file, with all loops unrolled, replacing the last 5 lines by the following (this makes a total of 642 characters):
X{first}BX{second}CBX{third}DCBX{fourth}EDCBX{fifth}FEDCBX{sixth}GFEDCB
X{seventh}HGFEDCBX{eighth}IHGFEDCBX{ninth}JIHGFEDCBX{tenth}KJIHGFEDCB
X{eleventh}LKJIHGFEDCBX{twelfth}MLKJIHGFEDCB\bye