


We explain in this chapter how Tralics can be used to convert general documents into HTML. Two examples are considered, the Tralics documentation and the thesis of C. Roméro.
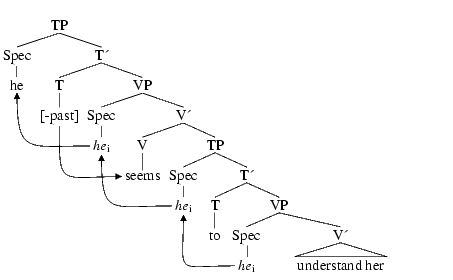
One non-trivial point of the thesis is that it contains trees: these are formed of text, connected by straight lines, or other curves, see figure 3. The original Pdf version of the thesis was obtained by converting a dvi file to a PostScript file, adding PostScript commands for the connections, and converting everything to Pdf; an alternate solution would be to use pdfLaTeX, and the pdftricks package: this package automatically extracts the trees, writes them to an external file, uses LaTeX for obtaining a dvi file, which is converted in PostScript and Pdf, as explained above, and includes each tree as an image. The same idea will be used: the document is converted to XML, trees are automatically extracted, converted to dvi, PostScript, then png, then re-inserted as images.
In the simple case, we use a shell script like the following
#!/bin/bash
SGML_CATALOG_FILES=./catalog
export SGML_CATALOG_FILES
FILE=$1
tralics ${FILE} -noentnames -nostraightquotes -nozerowidthspace\
   -trivialmath=7 -usequotes
xsltproc --catalogs  --stringparam Main ${FILE} -o ${FILE}.html \
     ${FILE}html.xsl ${FILE}.xml
The idea is to convert a file, for instance foo.tex, that may input other source files, into foo.xml using Tralics (options will be explained later) and to convert this into foo.html, using the XML processor xsltproc; this second conversion depends on a style sheet, here it is foohtml.xsl (note how this depends on the initial file name).
Our examples do not use a configuration file, as a consequence the DTD will be `std´, this is a variant of the Raweb DTD, details are not important in this particular example, the catalog file explains where to find this DTD. In the case of the thesis, the shell script shown above can be applied (but trees are not fully rendered), but you can use a Perl script that proceeds exactly as above, but modifies the output of Tralics before converting it to HTML.
The following style sheets, that are part of thge Tralics distribution, will be used and explained:
TR1, TR2: (real name tralics-rr1html.xsl and tralics-rr2html.xsl). These two files are identical, and will be denoted by TR. They are used to convert the Tralics documentation, which is a sequence of two Inria Research Reports.
TF, TE: (real name thesehtml.xsl and thesishtml.xsl). These two files are used to convert the thesis (original French version, and its English translation).
TC: (real name thesis.xsl), common code for French and English version of the thesis.
CLS: (real name cls.xsl), common code for all files shown above.
This chapter describes the following points: the modifications to LaTeX source needed by Tralics, the style sheets used for the XML to HTML conversion, and the Perl script mentioned above.
If you have some complex document like a PhD thesis, that compiles well with LaTeX, trying to translate it into a beautiful HTML document using Tralics will often require non trivial changes to the document (or its environment, like style files or style sheets). Let´s consider first the case of the research report (the document you are reading right now).
The foo.ult file is automatically loaded by Tralics, before anything else, when you translate foo.tex; you can redefine some commands that come from the LaTeX kernel, or use the \AtBeginDocument mechanism to overwrite commands defined later. We describe here the file tralics-rr.ult that corresponds to the first part of the Tralics documentation, the other file being a subset of this one. This is the start of the file.
1 %% -*- latex -*-
2 %$Id: tralicsR10.tex 7 2008-04-01 06:45:31Z grimm $
3 %% This is the ult file for tralics-rr.tex
The three lines shown here define two skip registers and an environment. Our document modifies the content of the registers, this changes the page layout (Tralics ignores such parameters) and redefines the environment: we add a comment at the start of the index, that says that page numbering could be off by one, because the \index command of a word appearing in a verbatim block is inserted before the environment. Since Tralics does not typeset the index (i.e., the theindex environment produced by the makeindex program), this comment is lost; it can be re-inserted in the XML to HTML transformation phase.
4 \newskip\footskip
5 \newskip\topmargin
6 \newenvironment{theindex}{}{}
Here we are faced to a big problem: we want to explain that an italic Delta is not the same as a normal Delta, and we do not know how to translate the character. We found the following solution: these two lines of code provide the definitions required for the text to compile; we extracted an image of the glyphs from the dvi file, and inserted them conditionally (with a comment that explains the problem).
7 \def\DeclareMathSymbol#1#2#3#4{}
8 \let\itDelta\Delta
Same problem as above. We try to illustrate another difference between LaTeX and MathML.
\let\mathbbm\mathbb
\let\mathscr\mathcal
These redefinitions are a bit annoying. Our document gives a usage of these commands and shows the result (explaining that this cannot be translated by Tralics). It is like the italic Delta above, but concerns text fonts rather than math characters.
9 \def\fontencoding{\textit{fontencoding U}}
10 \def\fontfamily{\textit{fontfamily U}}
11 \def\fontseries{\textit{fontseries U}}
12 \def\fontshape{\textit{fontshape U}}
13 \def\fontsize{\textit{fontesize U}}
14 \def\selectfont{\textit{selectfont U}}
The first command shown here redefines \item (this is required in the case of the thesis, and since we want to avoid code duplication, it is also needed here). The third line redefines a command that is defined in a macro file, and we have to delay its evaluation. The effect is to add an attribute to the main XML element; we shall explain later how it will be used. The point is that the two parts of the report must have different values.
15 \let\item\@item
16 \AtBeginDocument{
17  \def\htmlprefix#1{\addattributestodocument{htmlprefix}{#1}}
For some reason, our document modifies the \tabcolsep length and the equation counter, these are quantities not managed by Tralics; a non-trivial problem is how to manage the layout of tables; currently, we use narrow tables, and sometimes add some space to widest element in each column. Note that the thesis starts with a list of tables, manually split across pages; they had to be edited, in order to improve the layout.
\newlength \tabcolsep
\newcounter{equation}
All web pages use an italic font for the Tralics name, and this document uses a sans-serif font; this explains the redefinition here. On the other hand, we prefer a normal font for the word `Pdf´ in the HTML version.
18 \def\Tralics{\textit{Tralics}}
19 \def\Pdf{Pdf}
We have no idea how to write the command \cstok that puts a box around its argument; it is used by Knuth in the TeXbook to represent a token; we underline the argument.
20 \def\cstok#1{\ul{#1}}
Here comes the big hack. Our document uses a lot of verbatim material, and we have chosen two different colors for LaTeX and XML code. As a consequence, we have removed all occurrences to the \verb command, and the short hands provided by the short-verb mechanism. This means that we had to replace a simple expression like \verb+\'e\"e+ by \LTC{\BS verb+\BS\apos e\BS \DQ e+} (remember that Tralics may be called with options that make single and double quote character intelligent, i.e., appropriate for text, but are no more verbatim).
A lot of commands use internally the first two commands shown here; but because of our laziness, the main text uses the shorter names that follow. The \xmlclor command is used in a case where we want a non-verbatim \xmlcode(note: ➳), it is a no-op in LaTeX. The last two lines are modifications to the verbatim environment provided by Tralics; of course we had to change the verbatim environments, as explained in the first part of this report.
21 \def\latexcode#1{\xbox{latexcode}{#1}}
22 \def\xmlcode#1{\xbox{xmlcode}{#1}}}
23 \def\LTC#1{\xbox{latexcode}{#1}}
24 \def\XC#1{\xbox{xmlcode}{#1}}
25 \def\xmlcolor#1{\xbox{xmlcolor}{#1}}
26 \def\verbatim@hook{}
27 \def\verbatimnumberfont#1{\xbox{vbnumber}{#1}
28 } % end of \AtBeginDocument commands
The following two lines appear in the main text. They are useful for conditional compilation.
\newif\iftralics\tralicsfalse
\ifx\tralicsversion\undefined\else\tralicstrue\fi
We show here the definition of the \image command, and an example of use: there are two LaTeX commands that produce a delta character, whose Tralics translation is identical; we conditionally include an image showing both glyphs. Note that we do not use \includegraphics.
\def\image#1#2#3{\iftralics#1\xbox{rawimage}{#2}#3\fi}
%\image{This is shown in the dvi file as }{deltadelta.png}{.}
We had to make some further changes to the report: the document contains code, preceded by comments, and some names in the code are indexed. Thus Tralics, creates an anchor; these are positionned before the verbatim text. In some pages, there is an end-of-paragraph between the comment and the code, this is invisible. However, if the \index command is set before the end-of-paragraph, the anchor is inside the <p> element (this is good), otherwise outside (this gives an invalid HTML document). We removed these spurious empty lines.
We shall explain later how the title page had to be modified. We already explained that the tables at the start of the document had to be modified. Here is one modification:
Langues :\par
\iftralics \else\hspace{1cm}\fi
\begin{tabular}[t]{ll}
AC\Tonly{\quad} & Anglais Contemporain \\
AE & Anglais Elisab\'ethain \\
MA & Moyen-Anglais \\
VA & Vieil-Anglais \\
\end{tabular}
The intented purpose of the \hspace command is to shift the table to the right with respect to its title. But Tralics never puts tables in horizontal mode, thus inserts a \par, and this give a blank line. As a consequence, there is too much vertical space betwen the table and its title. This explains why the space is conditionally inserted. The \Tonly command is a no-op in LaTeX, in inserts a \quad in Tralics (there is not enough space between columns).
Here is another modification. The table was too big to fit on the page, and was replaced by two tables with a \newpage between them. The code was modified; Tralics sees a single table.
\begin{tabular}[t]{ll}
...
+gen & trait g\'enitif \\
\iftralics\else
\end{tabular}

\newpage
\iftralics \else\hspace{1cm}\fi
\begin{tabular}[t]{ll}
\fi
+irr\'eel & trait irr\'eel \\
...
\end{tabular}
The thesis contains constructions like Mod$_{Necessity}$. One of the parameters of Tralics (shown in the shell script above) tells it to translate this as if it were \textsubscript; this is a non-standard LaTeX command, a variant of \textsuperscript; the HTML translation is obviously Mod <sub> Necessity </sub>. In the French version, an e with acute accent is needed, but Tralics does nothing special if commands like \acute appear in a Math formula. Hence, one of the modifications to the thesis was to replace such expressions by a command, that was conditionally defined:
\def\modneces{Mod$_{N\acute{e}cessit\acute{e}}$\xspace }
\iftralics\def\modneces{Mod\textsubscript{Nécessité}\xspace}\fi
The thesis contains a math expression like the following (we have shown only the first two lines of the table). It is currentlty impossible to put anything than text in a \mbox in a math formula. In the case where the \mbox{X} is the same as \mbox{A} B \mbox{C}, math expressions are allowed. This is not the case here because the math is hidden by the font change.
$\left. \begin{array}{c}
\mbox{<{\bf $\alpha$}we>} \\
\mbox{<c{\bf $\alpha$}n>} \\
\end{array}
\right \}$
We had to edit the code and replace it by:
$\left. \begin{array}{c}
\mbox{<}\alpha\mbox{we>} \\
\mbox{<c}\alpha\mbox{n>} \\
\end{array}
\right \}$
Finally, the thesis contains the following two lines:
\font\vag=cmoebx10 scaled 1200
{\vag g}
This code compiles perfectly well. However, the intented purpose was to use the character ezh, Unicode U+292. For this reason, we modified the source, replacing the first second line by {\jgvagg}, with the following definition.
\def\jgvagg{\vag g}
After this change, it was possible to conditionally redefine the command, for instance like this:
\def\jgvag{^^^^0292}
 |
We explain here the content of a Perl script that converts a file into HTML, it replaces trees by images. This is the header of the file.
1 #! /usr/bin/perl
2 # -*- perl -*-
3 $empty =""; # hack
4 #$Id="\$ Id: extract-table.pl,v 2.1 2006/11/06 18:09:19 grimm Exp $empty";
5 package main;
6 use strict;
This software is part of the Tralics distribution and has the same license.
7 $::Id =~ /,v (\S*?) /;
8 print "extract-table.pl $1 Copyright INRIA/APICS 2006-2007, Jos\'e Grimm\n";
9 print "Licensed under the CeCILL Free Software Licensing Agreement\n";
We start with the some global variables. If the argument of the procedure is `foo´, then we create foo.xml, then foo_e.xml will contain all elements that must be converted into images, and foo_g.xml is the same file with elements replaced by image names. We make the assumption that the DTD is in the current directory, as well as the catalog (this explains in particular where the MathML DTD files are located).
10 $::name = shift;   ## argument of the script
11 $::name_o = $::name . ".xml";  ## tralics file
12 $::name_a = $::name . "_e.xml"; ## the trees
13 $::name_t = $::name . "_g.xml"; ## file to be converted to HTML
14 $::name_x = $::name . "html.xsl"; ## the style sheet
15 $::SGML_CATALOG_FILES= "./catalog";
16 $::xml_dir="../../xml";
17 $::pstoimg_cmd = "pstoimg"; ## pathname of pstoimg
18 $::use_convert = 0;  ## Use convert instead of pstoimg if non-zero
19 $::img_ctr = 0;
Note the arguments given to Tralics. The `noentnames´ options says to use character entities instead of entity names, so that an XML processor can ignore the DTD. Note that the DTD is needed for cross references. The second options tells Tralics to not use straight quotes, this is better in two cases, if the quote is used as an apostrophe, or when it is a right quote that should match a left quote. The next option tells Tralics not to use the zero-width space character, because some browsers show it as some unknown character, rather that some invisible object. We enable all math hacks. Finally, the last options tells Tralics to convert double quotes as quotations marks; said otherwise `"foo"´ is interpreted in the same way as `“foo”´ (giving `« foo »´ in French).
20 $::tralics_options=
21    "-noentnames -nostraightquotes -nozerowidthspace -trivialmath=7 -usequotes";
We should test if the script is called with at least one argument; an error is signaled if the file foo.tex does not exist (if no argument is given, we test for .tex that should not exist).
22 print "Working on $::name\n";
23 -f $::name . ".tex" or die ("No tex source");
We have a hacked version of fotex.sty, and we have to make sure that is found by LaTeX; this file is incompatible with the current version of fotex.xmt, this should be fixed, so that the old file must be visible. The two files fotex-add.sty and raweb-uni.sty are needed so that we link them also. Finally, in order to convert an XML file via a driver named images.tex we must link raweb-cfg.sty to images.cfg.
24 sub link_files() {
25   unlink("images.cfg");
26   `ln -s $::xml_dir/raweb-cfg.sty images.cfg`;
27   unlink("fotex-add.sty");
28   `ln -s $::xml_dir/fotex-add.sty`;
29   unlink("fotex.sty");
30   `ln -s $::xml_dir/fotex.sty`;
31   unlink("fotex.xmt");
32   `ln -s $::xml_dir/fotex.xmt`;
33   unlink("raweb-uni.sty");
34   `ln -s $::xml_dir/raweb-uni.sty`;
35 }
This creates the driver file images.tex. It tells LaTeX to convert foo_e into a dvi file. We also create the hack file. This is like a configuration file (but the name `images.cfg´ is already in use). The first line says that the text width should be large enough (12cm is a bit small), and the second line says that we need the tree-dvips package. Finally we say that the hyperref package should not be loaded at all.
36 sub prepare_for_latex {
37   open OUT,"> images.tex" || die "cannot create images.tex\n";
38   print OUT "\\def\\xmlfile{$::name_a}\n";
39   print OUT "\\def\\LastDeclaredEncoding{T1}\n";
40   print OUT "\\input{xmltex.tex}\n";
41   print OUT "\\end{document}\n";
42   close OUT;
43   open OUT,"> fotex-supp.tex" || die "cannot create fotex-supp.tex\n";
44   print OUT "\\textwidth=17cm\n";
45   print OUT "\\RequirePackage{tree-dvips}\n";
46   print OUT "\\hyperreffalse\n";
47   close OUT;
48 }
This is a routine that converts a file into a character string. This seems complicated, but it works, so that there is no reason why something else should be tried. The job is aborted in case where the XML file cannot be opened.
49 sub slurp_input {
50     my($file) = @_;
51     my(@file_string);
52     open(INPUT, "<$file") or die "File $file cannot be opened";
53     while (<INPUT>) {
54         push(@file_string, $_ );
55     };
56     close INPUT;
57     join('',@file_string);
58 }
This creates the XML file with only the trees. The style sheet will be explained below.
59 sub extract() {
60   $ENV{SGML_CATALOG_FILES}= $::SGML_CATALOG_FILES;
61   `xsltproc --catalogs -o  $::name_a extract.xsl $::name_o`;
62 }
We use a Perl script to replace <table> by <img>. You may wonder why this is not done by the style sheet. One problem is that we do not know the number associated to the image (because we cannot increment a counter like img_ctr in a style sheet). The second reason is that we might insert in the element attributes known only after conversion (for instance the size of the image), so that the style sheet extract.xsl used above cannot be used here. It is however important that the same elements are considered by both programs. The style sheet considers elements T, this is a <table> element that has a <row> child that has a <cell> child that has a <node> child. A <preview> element that has a T as a child is handled, and a T element is handled (unless it is the child of a preview). The function below is applied to all elements Y of name X, where X is table or preview. We replace the element if it is <preview>, or a table that contains a <node> somewhere. This works in most cases.
63 sub convert_table {
64   my $x = $_[0];
65   my $y = $_[1];
66   if($x eq "preview" || $y =~ /<\/node>/) {
67     $::img_ctr ++;
68     return "<img src='images/tree_image_$::img_ctr.png' alt='Tree $::img_ctr'/>";
69   } else { return $y; }
70 }
This functions reads the transcript file of LaTeX. Processing image number N gives a line of the form `l2hSize :N:H::D::W´, where W, H and D are dimensions; we convert them from TeX points to PostScript points by applying the magic factor 72bp =72.27pt. These three quantities are remembered in a global table. The value of `align´ is not used (it is middle if H=D and bottom if D=0, but in general no such condition is true, and the value of align is ignored). One important point is `$ps_counter´, the number of images found. This has to be the same as the number of elements to be replaced.
71 sub read_log {
72   my ($logfile) = @_;
73   my ($name);
74   my $TeXpt = 72/72.27;
75   my $image_counter;
76   open(LOG, "<$logfile") || die "\nCannot read logfile $logfile\n";
77   while (<LOG>) {
78     if (/latex2htmlSize|l2hSize/) {
79       /:([^:]*):/;
80       $name = $1;
81       ++$image_counter;
82       s/:([0-9.]*)pt/$::x_height{$name} = $1*$TeXpt;''/e;
83       s/::([0-9.]*)pt/$::x_depth{$name} = $1*$TeXpt;''/e;
84       s/::([0-9.]*)pt/$::x_width{$name} = $1*$TeXpt;''/e;
85       $::x_align{$name} = "align = 'bottom'";
86       if($::x_depth{$name}) { $::x_align{$name} = "align='middle'";}
87     }
88   }
89   print STDOUT "Processing $image_counter images \n";
90   $::ps_counter = $image_counter;
91   close(LOG);
92 }
This piece of code is a bit tricky. The argument is a number, say 13, and we construct tmpdir/images013 which is the name of the PostScript file, that will be converted into a file named tree_image_13.png that we move into the images directory. For each image we have three dimensions, W, H and D. We compute H+D the total height (note how these numbers are converted into integers). The width and total height are parameters to the converter. After conversion, we use the file command in order to extract the size after conversion and store it in a table.
93 sub create_one_image {
94   my $name = $_[0];
95   my $im_name = "images";
96   if($name<100) { $im_name .= "0";}
97   if($name<10) { $im_name .= "0";}
98   $im_name .= $name;
99   my $w = $::x_width{$name};
100   my $h = $::x_height{$name};
101   my $d = $::x_depth{$name};
102   $w = int($w + 0.6);
103   $h = int($h + $d + 0.6);
104   my $size = "-geometry ${w}x$h";
105   my $cmd = "";
106   print "$name ";
107   if ($::use_convert) {
108     $cmd = $::convert_cmd;
109     $cmd .= " -crop ${w}x$h+64+44 ";
110     $cmd .= " tmpdir/$im_name tree_image_$name.png ";
111   } else {
112     $cmd = $::pstoimg_cmd;
113     $cmd .= " -type png -tmp tmpdir";
114     $cmd .= " -discard -interlace -antialias";
115     $cmd .= " -depth 1 -scale 1.4 $size";
116     # marges 78,72 ou 72,72 ???
117     $cmd .= " -margins 62,41 -crop abls -transparent";
118     $cmd .= " -out tree_image_$name.png tmpdir/$im_name";
119   }
120   print LOG "$cmd\n";
121   print LOG `$cmd`;
122
123   my $info = `file tree_image_$name.png`;
124   if($info =~ /PNG image data, (\d+) x (\d+),/) {
125     $::x_align{$name} .= " width ='$1' height ='$2'";
126   }
127   `mv tree_image_$name.png images`;
128 }
This subroutine creates the temporary directory, call dvips and converts all images.
129 sub convert_to_png {
130   `rm -rf tmpdir`;
131   `mkdir tmpdir`;
132   `rm -rf images`;
133   `mkdir images`;
134   my $DVIPSOPT="";
135   my $dvips  = "dvips -S1 -i $DVIPSOPT -otmpdir/images ./images.dvi";
136   open LOG, "> pstoimg.log";
137   print LOG `$dvips 2>&1`;
138   print "dvips done\n";
139   my $i;
140   foreach $i (1 .. $::ps_counter) { create_one_image ($i); }
141   print "\n";
142   `rm -rf tmpdir`;
143   close LOG;
144 }
This is the main routine. In case of trouble, you should first check that Tralics has correctly translated the input.
145 sub main()  {
146 print "Working on $::name\n";
147   `tralics $::name $::tralics_options`;
148   $::file = slurp_input($::name_o);
149   link_files();
150   prepare_for_latex();
151   print "Creating  $::name_a\n";
152   extract;
153   print "Running tex\n";
154   system("latex", "images");
155   read_log("images.log");
156   print "Converting images\n";
157   convert_to_png;
158   $::file =~ s!<(table|preview).*?</\1>!convert_table($1,$&)!egs;
159   open OUT,"> $::name_t" || die "cannot open $::name_t\n";
160   print OUT "$::file";
161   close OUT;
162   print "Seen $::img_ctr elements\n";
163   ($::ps_counter == $::img_ctr) or die "Wrong number of images";
164   print "xsltproc --catalogs  --stringparam Main $::name
165          -o $::name.html  $::name_x $::name_t\n";
166   `xsltproc  --stringparam Main $::name --catalogs
167     -o $::name.html  $::name_x $::name_t`
168 }
169 main;
For the thesis of C. Roméro, we have the following statistics. The runtime of Tralics and the style sheets is between one and two seconds. The time needed by LaTeX to convert the 130 images is over two minutes (nearly one second per image), and pstoimg is even slower (the total time is over five minutes). The XML file produced by Tralics has 1323K, that is reduced to 995K after replacement of tables by images. The XML file containing the images has a size of 920K, this is much more than the the difference of the two sizes given above. The essential reason is that the XSLT processor reads the DTD file, and replaces missing attributes by their value. For instance, an empty cell is translated into
<cell halign='center'/>
and then converted to
<cell halign="center" role="data" rows="1" cols="1" right-border="false"
left-border="false" top-border="false" bottom-border="false"/>
It should be possible to divide the size by two, hoping that the LaTeX runtime is also divided by two.
We give here a style sheet whose purpose is to extract some elements and convert them into images. In a first approximation, we select all <table> or <preview> elements containing a <node>, and handle the connectors. Details are given later.
This is the start of the file extract.xsl. We do not show the attributes of the style sheet elements, it is the same as for other files.
1 <?xml version="1.0" encoding="iso-8859-1"?>
2 <xsl:stylesheet>
3 <!--
4    Copyright INRIA/APICS 2006-2007, Jos\'e Grimm
5    Licensed under the CeCILL Free Software Licensing Agreement
6 -->
All connectors are in a dummy cell; if we do not take care, this cell produces a huge amount a space. The good solution would be to modify the LaTeX source, using a real element instead of this dummy cell. The temporary solution consists in ignoring spaces in cells, rows, tables.
7 <xsl:strip-space elements="cell row table"/>
8 <xsl:output method='xml' encoding='iso-8859-1'/>
In order to convert the XML file created here into dvi, it suffices to put a <fo:block> in a <fo:root>. We do something for each <table> and <preview> element.
9 <xsl:template match="std">
10   <fo:root>
11     <fo:block>
12       <xsl:apply-templates select ="//table | //preview "/>
13     </fo:block>
14   </fo:root>
15 </xsl:template>
In the case of the <table> element, if it contains a a <row> that contains a <cell> that contains a <node>, we construct a <tree> element, containing the table, translated via a template described below. A newline character is inserted in the XML file, to separate elements.
16 <xsl:template match="table"> 17 <xsl:if test="row/cell/node"> 18 <xsl:text>
</xsl:text> 19 <tree> 20 <xsl:call-template name="table" select="."/> 21 </tree> 22 </xsl:if> 23 </xsl:template>
In the case of the <preview> element, if it contains a <table> that contains a <row> that contains a <cell> that contains a <node>, we construct a <tree> element, containing the <table> in preview mode. The important point here is that we copy the attributes.
24 <xsl:template match="preview"> 25 <xsl:if test="table/row/cell/node"> 26 <xsl:text>
</xsl:text> 27 <tree> 28 <xsl:copy-of select="@*"/> 29 <xsl:apply-templates mode="preview"/> 30 </tree> 31 </xsl:if> 32 </xsl:template>
If a <table> is in a <preview>, but the previous rule does not match, we do nothing.
33 <xsl:template match="preview/table"/>
Translating the table in preview mode consists of applying the common template.
34 <xsl:template match="table" mode="preview">
35   <xsl:call-template name="table" select="."/>
36 </xsl:template>
Action is trivial: we copy the table and add the connectors. We assume that the table contains only rows.
37 <xsl:template name="table">
38   <table>
39      <xsl:copy-of select="@*"/>
40      <xsl:apply-templates/>
41   </table>
42   <xsl:call-template name="extractconnectors"/>
43 </xsl:template>
Action is trivial: we copy the row. We assume that the row contains only cells.
44 <xsl:template match="row">
45   <row>
46     <xsl:copy-of select="@*"/>
47     <xsl:apply-templates/>
48   </row>
49 </xsl:template>
Action is trivial: we copy the content in copy mode.
50 <xsl:template match="cell">
51   <cell>
52     <xsl:copy-of select="@*"/>
53     <xsl:apply-templates mode="copy"/>
54   </cell>
55 </xsl:template>
This is a simple recursive copy of everything.
56 <xsl:template match="*|@*|text()" mode="copy">
57  <xsl:copy>
58    <xsl:apply-templates mode="copy" select="*|@*|text()"/>
59  </xsl:copy>
60 </xsl:template>
In fact, we copy everything but the connectors.
61 <xsl:template mode="copy"
62  match="nodeconnect|anodeconnect|barnodeconnect| abarnodeconnect
63     |nodecurve|anodecurve|nodetriangle"/>
Connectors are copied by this piece of code.
64 <xsl:template name="extractconnectors">
65   <xsl:for-each select="row/cell/nodeconnect| row/cell/anodeconnext
66      |row/cell/barnodeconnect| row/cell/abarnodeconnect
67      |row/cell/nodecurve| row/cell/anodecurve|row/cell/nodetriangle">
68     <xsl:copy-of select="."/>
69   </xsl:for-each>
70 </xsl:template>
In the case of the thesis, we have completely changed the text of the first page. There is a first part that contains some information (place where the thesis has been defended, on two lines, the thesis type, the name of the student, the title of the thesis, the name of the supervisor, the defense date, and, for the English version, the original French title). We show here the French version:
\begin{metadata}
\begin{center}
\lieuthese{Université Paris III - La Sorbonne Nouvelle}
\lieuthesesuite{U.F.R. d'Anglais}
\typethese{Linguistique}
\doctorant{Céline}{Roméro}
\thesetitre{L'évolution syntaxique des verbes modaux dans l'histoire
de l'anglais}
\directeur{Jacqueline}{Guéron}
\datesoumission{18 novembre 2005}
\end{center}
There is a second part that contains the Jury.
\begin{jury}
\membre[Pr\'esident du Jury]{M.}{Claude}{Delmas}
\membre[Directrice de Recherche]{Mme}{Jacqueline}{Guéron}
\membre{Mme}{Annie}{Lancri}
\membre{Mme}{Jacqueline}{Lecarme}
\membre{Mme}{Susan}{Pintzuk}
\end{jury}
\end{metadata}
In order for these commands to work, we have defined a file titlepage.plt, starting like this:
\ProvidesPackage{titlepage}[2007/01/10 v1.1 Thesis TitlePage]
% Copyright Inria/Apics (Jos\'e Grimm) 2006-2007
The translation of \foo{bar} is <foo>bar<foo/>.
\newenvironment{metadata}{\begin{xmlelement*}{metadata}}{\end{xmlelement*}}
\newcommand\thesetitre[1]{\xbox{thesetitre}{#1}}
\newcommand\titrefrancais[1]{\xbox{titrefrancais}{#1}}
\newcommand\lieuthese[1]{\xbox{lieuthese}{#1}}
\newcommand\typethese[1]{\xbox{typethese}{#1}}
\newcommand\lieuthesesuite[1]{\xbox{lieuthesesuite}{#1}}
\newcommand\datesoumission[1]{\xbox{datesoumission}{#1}}
\newcommand\directeur[2]{\xbox{directeur}{#1 #2}}
\newcommand\doctorant[2]{\xbox{doctorant}{#1 #2}}
The command \membre takes three mandatory arguments plus an optional one. If arguments are A, B, C and D, the result is a <membre> element, with attributes type, prenom, nom, with values B, C, and D, and the content of the element is the optional argument A.
\newcommand\membre[4][]{%
   \xbox{membre}{#1%
         \XMLaddatt{type}{#2}\XMLaddatt{prenom}{#3}\XMLaddatt{nom}{#4}}}
\newenvironment{jury}{\begin{xmlelement*}{jury}}{\end{xmlelement*}}
This command is used elsewhere. Normally, a dedication is a small text on a page. It is preceded by a \chapter* command.
\newcommand{\dedicace}[1]
{\xbox{dedicace}{#1}}
This is now the XML translation. As you can see, the \chapter* command produces a <div0> element, with an empty title; it will appear in the table of contents as an invisible line, so that it is better to comment it out.
<metadata>
<lieuthese>Université Paris III - La Sorbonne Nouvelle</lieuthese>
<lieuthesesuite>U.F.R. d'Anglais</lieuthesesuite>
<typethese>Linguistique</typethese><doctorant>Céline Roméro</doctorant>
<thesetitre>L'évolution syntaxique des verbes modaux dans l'histoire
de l'anglais</thesetitre>
<directeur>Jacqueline Guéron</directeur>
<datesoumission>18 novembre 2005</datesoumission>
<jury><membre nom='Delmas' prenom='Claude' type='M.'>Président du Jury</membre>
<membre nom='Guéron' prenom='Jacqueline' type='Mme'>
           Directrice de Recherche</membre>
<membre nom='Lancri' prenom='Annie' type='Mme'/>
<membre nom='Lecarme' prenom='Jacqueline' type='Mme'/>
<membre nom='Pintzuk' prenom='Susan' type='Mme'/></jury>
</metadata>
<frontmatter>
<div0 id='uid1' rend='nonumber'><head/>
<dedicace>
Text of the dedication
</dedicace></div0>
The research report describing Tralics starts like this:
\RRtitle{Tralics, un traducteur de \LaTeX\ vers XML\\Partie II}
\RRetitle{Tralics, a \LaTeX\ to XML translator\\Part II}
\RRauthor{José Grimm\thanks{Email: Jose.Grimm@sophia.inria.fr}}
\RRprojet{Apics}
\RRtheme{\THNum}
\RRNo{310}
\RRresume{bla bla}
\RRabstract{bla bla}
\RRdate{September 2005}
\URSophia
\motcle{xyz}
\keyword{xyz}
\RRversion{2}
\RRdater{January 2007}
All the commands used above are defined in the file RR.sty, and Tralics uses RR.plt instead (the content of the file has been given in the first part of this document). The effect of these commands is to memorize the arguments (LaTeX case) or add some elements to the XML tree (Tralics case). The start of the document contains also the following two lines; the first line is ignored in Tralics mode, and the second one in LaTeX mode, otherwise the effect is to produce the title page, or add an attribute to the document element respectively. Part one and two of the Tralics documentation have different HTML prefixes.
\makeRT
\htmlprefix{tdoc2}
The XML translation is the following.
<ftitle>Tralics, un traducteur de <LaTeX/> vers XML Partie II</ftitle>
<title>Tralics, a <LaTeX/> to XML translator Part II</title>
<author>José Grimm
  <note id='uid1' place='foot'>Email: Jose.Grimm@sophia.inria.fr</note>
</author>
<inria-team>Apics</inria-team>
<theme>THnum</theme>
<rrnumber>310</rrnumber>
<resume><p>bla bla</p></resume>
<abstract><p>bla bla</p></abstract>
<date>September 2005</date>
<location>Sophia Antipolis</location>
<motcle>xyz</motcle>
<keyword>xyz</keyword>
<version-number>2</version-number>
<rev-date>January 2007</rev-date>
This is the main template for conversion to HTML. If the document contain some text, then a table of contents then a bibliography, then an index, then footnotes, it is difficult to find the TOC, and for this reason a short TOC is included. However, if the TOC is before the main text, this is redundant; if the variable $shorttoc is set to false, there is no short TOC. In the case where $split is not false, then the main document is split, and there is no need for a short TOC.
This template allows two modes for the meta data: in the case of the thesis, the meta data are children of <metadata>, and the template header is empty; in the case of the technical report, the translation of elements like <rev-date> is empty, and header constructs the title page.
1 <xsl:template match="std">
2   <html>
3     <xsl:call-template name="html-meta" />
4     <body>
5       <xsl:call-template name="header"/>
6       <xsl:if test="$shorttoc='true' or
7            ($shorttoc='maybe' and $split='false')">
8         <xsl:call-template name="shorttoc"/>
9       </xsl:if>
10       <xsl:apply-templates/>
11       <xsl:call-template name="footnotes" />
12     </body>
13   </html>
14 </xsl:template>
This is how we construct the HTML meta data. Three auxiliary templates are used, since we do not know how to access to the author, title and keywords.
15 <xsl:template name="html-meta">
16   <head>
17     <meta http-equiv="Content-Type" content="text/html; charset=iso-8859-1" />
18     <meta name="author">
19       <xsl:attribute name="content">
20         <xsl:call-template name="author" />
21       </xsl:attribute>
22     </meta>
23     <title> <xsl:call-template name="title" /></title>
24     <link rel="stylesheet" href="tralics.css" />
25     <meta name="keywords">
26       <xsl:attribute name="content">
27         <xsl:call-template name="keywords" />
28       </xsl:attribute>
29     </meta>
30   </head>
31 </xsl:template>
These three templates are used in the code above; since there are no keywords in the TeX source of the thesis, we invented some; for this reason the last rule exists in both French and English versions. In the case of the technical report, we select elements <author>, <title>, <keyword>. Note that these elements are converted in `text´ mode; the main idea is to omit the footnote in the author´s field.
32 <xsl:template name="author">
33   <xsl:apply-templates select="/std/metadata/doctorant" mode="text"/>
34 </xsl:template>
35 <xsl:template name="title">
36   <xsl:apply-templates select="/std//metadata/thesetitre" mode="text"/>
37 </xsl:template>
38 <xsl:template name="keywords">
39    <xsl:text>verbe anglais histoire</xsl:text>
40 </xsl:template>
In the case of the thesis, the metadata template outputs the title in a <h1> heading, then all meta data in a two column table in a <blockquote> with non-zero margins. Each data produces a row in the table (for instance, <lieuthese> gives two cells, one with `Lieu´, and one with the value of the element. The <jury> command produces two cells, the second one being a table; each <membre> produces a row of this table. The code is obvious, the result is given here.
<html xmlns="http://www.w3.org/1999/xhtml">
<head>
 <meta http-equiv="Content-Type" content="text/html; charset=iso-8859-1" />
 <meta name="author" content="Céline Roméro" />
 <title>L'évolution syntaxique des verbes modaux dans l'histoire
  de l'anglais</title>
 <link rel="stylesheet" href="tralics.css" />
<meta name="keywords" content="verbe anglais histoire" />
</head>
<body>
<h1>L'évolution syntaxique des verbes modaux dans l'histoire
  de l'anglais</h1>
<blockquote  class="thesis-heading">
 <table>
  <tr><td>Lieu</td><td>Université Paris III - La Sorbonne Nouvelle</td></tr>
  <tr><td></td><td>U.F.R. d'Anglais</td></tr>
  <tr><td>Doctorat en</td><td>Linguistique</td></tr>
  <tr><td>Doctorant</td><td>Céline Roméro</td></tr>
  <tr><td>Thèse dirigée par</td><td>Jacqueline Guéron</td></tr>
  <tr><td>Date de soutenance</td><td>18 novembre 2005</td></tr>
  <tr><td>Jury</td><td>
    <table>
      <tr><td>M.</td><td>Claude</td><td>Delmas</td>
            <td>Président du Jury</td></tr>
     <tr><td>Mme</td><td>Jacqueline</td><td>Guéron</td>
            <td>Directrice de Recherche</td></tr>
     <tr><td>Mme</td><td>Annie</td><td>Lancri</td><td></td></tr>
     <tr><td>Mme</td><td>Jacqueline</td><td>Lecarme</td><td></td></tr>
     <tr><td>Mme</td><td>Susan</td><td>Pintzuk</td><td></td></tr>
  </table></td></tr>
 </table></blockquote>
<hr />
The style sheet TF that converts the thesis contains a variable for each name used above; the style sheet TE contains the same variable, with English names.
41 <xsl:variable name="Bibliographyname">Bibliographie</xsl:variable>
42 <xsl:variable name="Lieuname">Lieu</xsl:variable>
43 <xsl:variable name="Frenchtitlename">Titre Français</xsl:variable>
44 <xsl:variable name="Typethesename">Doctorat en</xsl:variable>
45 <xsl:variable name="Directorname">Thèse dirigée par</xsl:variable>
46 <xsl:variable name="Doctorantname">Doctorant</xsl:variable>
47 <xsl:variable name="Datesoumissionname">Date de soutenance</xsl:variable>
48 <xsl:variable name="Juryname">Jury</xsl:variable>
In the case of the report, the template header selects 14 items, whose translation is otherwise empty. The code is obvious, if you compare the XML shown above and the HTML translation given here.
<html xmlns="http://www.w3.org/1999/xhtml"> <head><meta http-equiv="Content-Type" content="text/html; charset=iso-8859-1" /> <meta name="author" content="José Grimm" /> <title>Tralics, a LaTeX to XML translator Part II</title> <link rel="stylesheet" href="tralics.css" /> <meta name="keywords" content="xyz" /> </head> <body> <h1>Tralics, a LaTeX to XML translator Part II</h1> <p>French title: Tralics, un traducteur de LaTeX vers XML Partie II</p> <p> Author: José Grimm<a id="uid1" href="#note1" title="Email: Jose.Grimm@sophia.inria.fr"><small>(note: </small>➳<small>)</small></a></p> <p> Location: Sophia Antipolis</p> <p>Inria Research Theme: THnum</p> <p>Inria Research Report Number: 310</p> <p>Revision: 2</p> <p>Team: Apics</p> <p>Date: September 2005</p> <p>Revised Date: January 2007</p> <p>Keywords: xyz.</p> <p>rench keywords: xyz.</p> <h2>Abstract</h2><p>bla bla</p> <h2>French Abstract</h2><p>bla bla</p>
The style sheets we use for the two examples are modifications of those explained in previous chapters; we shall explain only the differences.
The default translation consists in generating a single page from the text. However, since the thesis and our reports are very long, we allow the possibility to generate a HTML page for each main division. Since the report uses the report class, a main division is associated to a \chapter. In the case of the thesis, the book class is used, and by default, the main division is \part; since there are no chapters, we have to use \toplevelsection {\chapter} in order to say that the chapter is a main division. The technical report describing Tralics has a huge index (30 LaTeX pages in two-column mode); for this reason, we allow the possibility of a separate index. Finally, you can also ask for a separate page for the bibliography and the footnotes.
Assume that A is the main file, B, C, D, etc., the files associated to the first, second, third, chapter, etc. We shall make the following assumption: the whole document consists in an front section A1, a main part A2, and a back section A3, where the main part is essentially a sequence of chapters. More precisely, we assume that the translation of A2 is a sequence of links to pages B, C, D, and some HTML elements (like rules), but no text. Said otherwise, if the reader reads A1, B, C, D, A3, then he reads everything. This implies that there should be no text between chapters (because there is no end-of-chapter command in LaTeX, this is true in general). In order to complete our notations: if a separate page is used, we shall denote it by I (for the index), F (for the footnotes) and H (for the bibliography).
We also assume that the table of contents and the bibliography appear in A (not hidden in a chapter), or use a separate page. Putting the TOC between chapter 1 and chapter 2 is strange but valid. Normally, it is at the start, after the introduction or at the end of the document. The easy case is when the document contains a <mainmatter> (with the chapters B, C, D, etc), and is followed by a <backmatter> (containing A3). We can assume that everything before the mainmatter is in a <frontmatter>, but this is not needed. In this case the TOC is either in the front matter or in the back matter. In the case where the document looks like a report, some care has to be taken, because, by default, the bibliography is appended to the last chapter. Our thesis ends like this:
\backmatter
\include{Conclusion}
\printindex
\nocite{*} \bibliographystyle{these} \bibliography{these}
Our technical report does not use \printindex, but \inputs the index; however the commands produced by makeindex are not understood by Tralics, so that the file is conditionally included. The important point here is that \endsec terminates the current chapter. The is the end of the report:
\cleardoublepage
\iftralics
  \endsec{\chapter}
\else
  \input tralics-rr2.ind
\fi
\bibliography{tralics}
\tableofcontents
The pages mentioned above are linked in the following way
There is a link from A to B, C, and D (in fact, part A2 of A contains only these links).
There is a link from B, C, and D to A (in fact, we point to the table of contents).
There is a link from B to C to D to A3 (the last link is to the start of A3, the start of the <backmatter> if possible).
There is a link from D to C to B to A1 (the last link is to the end of the front matter, this is the start of the <mainmatter> if possible).
There is a link from A to I, H, and F (the table of contents points to the index, bibliography and footnotes in the case where these are on separate pages).
There are links from I, H and F to A (of the form “back to main page”).
There may be links from any of these pages to any other page (internal links).
We assume that the value $Main contains the name A (without extension); a link to this file will be of the form A#foo, but we use the simple form #foo in the case where the file is not split (this allows you to rename the file at your leisure).
49 <xsl:template name="mainfile">
50   <xsl:if test="not($split='false') ">
51     <xsl:value-of select="concat($Main,'.html')" />
52   </xsl:if>
53 </xsl:template>
The names B, C, D, etc are computed as follows: we use a prefix, followed by the id of the chapter. This prefix is defined in the style sheet for the thesis, or in the TeX source, via the \htmlprefix command.
54 <xsl:template match="div0" mode="fileprefix">
55   <xsl:value-of select="concat($prefix,@id,'.html')" />
56 </xsl:template>
This is how we compute the names I, H and F. There are three similar templates, they depend on the variables $separate-index, for the index, $separate-footnote, for footnotes, and $separate-biblio for the bibliography. The names are obtained by concatenation of the prefix and `uidI´, `uidF´ and `uidH´.
57 <xsl:template name="indexfile">
58   <xsl:choose>
59     <xsl:when test="not ($split='false') and $separate-index='true' ">
60       <xsl:value-of select="concat($prefix,'uidI','.html')" />
61     </xsl:when>
62     <xsl:otherwise>
63       <xsl:call-template name="mainfile" />
64     </xsl:otherwise>
65   </xsl:choose>
66 </xsl:template>
67
68 <xsl:template name="footnotefile"> ...
69 <xsl:template name="bibliofile"> ...
What precedes the first chapter is the main file; if we have a main matter, then the first chapter is the start of the main matter, so that we link to the rule that separates front and main matter.
70 <xsl:template name="first.page" >
71   <xsl:call-template name="mainfile" />
72   <xsl:choose>
73     <xsl:when test="//mainmatter">
74       <xsl:text>#mainmatter</xsl:text>
75     </xsl:when>
76   </xsl:choose>
77 </xsl:template>
What follows the last chapter is the main file; if we have a back matter, we use its anchor; if there is a non-separate bibliography we use it otherwise.
78 <xsl:template name="last.page" >
79   <xsl:call-template name="mainfile" />
80   <xsl:choose>
81     <xsl:when test="//backmatter">
82       <xsl:text>#backmatter</xsl:text>
83     </xsl:when>
84     <xsl:when test="//biblio and not($separate-biblio='false')">
85       <xsl:text>#bibliography</xsl:text>
86     </xsl:when>
87   </xsl:choose>
88 </xsl:template>
The variable $split can be `true´, `false´ or `all´. If this quantity is false, a single page is generated, if true, a HTML page is generated only for chapter in the main matter (child of <mainmatter>), otherwise for each chapter. This is controlled by the following template rule:
89 <xsl:template match="div0">
90   <xsl:choose>
91     <xsl:when test="$split='false'">
92       <xsl:apply-templates select='.' mode="normal"/>
93     </xsl:when>
94     <xsl:when test="$split='all'">
95       <xsl:apply-templates select='.' mode="split"/>
96     </xsl:when>
97     <xsl:when test="ancestor::mainmatter">
98       <xsl:apply-templates select='.' mode="split"/>
99     </xsl:when>
100     <xsl:otherwise>
101       <xsl:apply-templates select='.' mode="normal"/>
102     </xsl:otherwise>
103   </xsl:choose>
104 </xsl:template>
This template returns the filename in which a current element is located. This assumes that <div0> is the only element that generates a page, is defined as shown above, and the name of the page matches the previous template. Note: if we replace `ancestor-or-self´ by `ancestor´, then the link to a <div0> will be an anchor in the main file, this means that you have to click twice in order to see the text.
105 <xsl:template match="*" mode="targetfile">
106   <xsl:choose>
107     <xsl:when test="$split='false'" />
108     <xsl:when test="not(ancestor-or-self::div0)">
109       <xsl:call-template name="mainfile" />
110     </xsl:when>
111     <xsl:when test="(ancestor::mainmatter) or $split='all'">
112       <xsl:apply-templates select="ancestor-or-self::div0" mode="fileprefix" />
113     </xsl:when>
114    <xsl:otherwise>
115       <xsl:call-template name="mainfile" />
116     </xsl:otherwise>
117   </xsl:choose>
118 </xsl:template>
This returns the name of the previous file. The algorithm is simpler than the case of the Raweb. In particular, since this does not apply to the main page, there is a previous and a following link.
119 <xsl:template match="div0" mode="file-prev-prefix">
120   <xsl:choose>
121     <xsl:when test="preceding-sibling::div0">
122       <xsl:apply-templates select="preceding-sibling::div0[1]" mode="fileprefix"/>
123     </xsl:when>
124     <xsl:otherwise>
125       <xsl:call-template name="first.page" />
126     </xsl:otherwise>
127   </xsl:choose>
128 </xsl:template>
In the case of the last chapter, we put the link to the backmatter or the bibliography if available.
129 <xsl:template match="div0" mode="file-next-prefix">
130   <xsl:choose>
131     <xsl:when test="following-sibling::div0">
132       <xsl:apply-templates select="following-sibling::div0[1]" mode="fileprefix"/>
133     </xsl:when>
134     <xsl:otherwise>
135       <xsl:call-template name="last.page" />
136     </xsl:otherwise>
137   </xsl:choose>
138 </xsl:template>
This creates a link with a button to the previous page. The access key is P.
139 <xsl:template match="div0" mode="button-prev-prefix">
140   <a accesskey='P' title="previous page">
141     <xsl:attribute name='href'>
142       <xsl:apply-templates select="." mode ="file-prev-prefix" />
143     </xsl:attribute>
144     <img style="border:0" alt="previous" src="previous_motif.gif" />
145   </a>
146 </xsl:template>
Same for the preceding page. The access key is N.
147 <xsl:template match="div0" mode="button-next-prefix">
148   <a accesskey='N' title="next page">
149     <xsl:attribute name='href'>
150       <xsl:apply-templates select="." mode ="file-next-prefix" />
151     </xsl:attribute>
152     <img style="border:0" alt="next" src="next_motif.gif" />
153   </a>
154 </xsl:template>
This creates three buttons, that point to the previous, top, and next pages. They float to the left and right (as defined by the raweb.css file).
155 <xsl:template match="div0" mode="button">
156   <div class="float-left">
157     <xsl:apply-templates select="." mode ="button-prev-prefix" />
158   </div>
159   <div class="float-left">
160     <a accesskey='T' title="table of contents" >
161       <xsl:attribute name='href'>
162         <xsl:call-template name ="mainfile" />
163         <xsl:text>#tableofcontents</xsl:text>
164       </xsl:attribute>
165       <img style="border:0" alt="TOC" src="contents_motif.gif" />
166     </a>
167   </div>
168   <div class="float-right">
169     <xsl:apply-templates select="." mode ="button-next-prefix" />
170   </div>
171 </xsl:template>
If we have a separate page for the index, bibliography or footnotes, the previous and next buttons do not depend on the page. This creates three buttons, to the first page, the last page and the TOC.
172 <xsl:template name="std.buttons">
173   <div class="float-left">
174     <a accesskey='P' title="previous page">
175       <xsl:attribute name='href'>
176         <xsl:call-template name="first.page" />
177       </xsl:attribute>
178       <img  style="border:0"  alt="previous" src="previous_motif.gif" />
179     </a>
180   </div>
181   <div class="float-left">
182     <a accesskey='T' title="table of contents" >
183       <xsl:attribute name='href'>
184         <xsl:call-template name ="mainfile" />
185         <xsl:text>#tableofcontents</xsl:text>
186       </xsl:attribute>
187       <img style="border:0"  alt="TOC" src="contents_motif.gif" />
188     </a>
189   </div>
190   <div class="float-right">
191     <a accesskey='N' title="next page">
192       <xsl:attribute name='href'>
193         <xsl:call-template name="last.page" />
194       </xsl:attribute>
195       <img  style="border:0" alt="next" src="next_motif.gif" />
196     </a>
197   </div>
198 </xsl:template>
The following template creates the page for a chapter. Note that xsl:document is not a XSLT1.0 command, but an extension accepted by many XSLT processors.
199 <xsl:template match="div0" mode ="xsplit">
200   <xsl:variable name="filename">
201     <xsl:apply-templates select="." mode="fileprefix" />
202   </xsl:variable>
203   <xsl:document href="{$filename}"
204       encoding='iso-8859-1' doctype-public='-//W3C//DTD XHTML 1.0 Strict//EN'
205      doctype-system='http://www.w3.org/TR/xhtml1/DTD/xhtml1-strict.dtd'>
206       method="xml" >
The HTML page created here contains the same meta data as the main page. It has the navigation buttons shown above on the top and bottom. On the top, between the navigation button, there is the title of the document, on the back, there is a link to the main file.
207     <html>
208       <xsl:call-template name="html-meta" />
209       <body>
210         <xsl:apply-templates select="." mode="button" />
211         <div class="float-center"><xsl:call-template name="title" /></div>
212         <h1>
213           <xsl:call-template name="id"/>
214           <xsl:call-template name="calculateNumberSpace"/>
215           <xsl:apply-templates select="head" mode="caption"/>
216         </h1>
217         <xsl:apply-templates/>
218         <xsl:apply-templates select="." mode="button" />
219         <xsl:call-template name="back.to.main.buttons" />
220       </body>
221     </html>
222   </xsl:document>
223 </xsl:template>
This is for the index. We use the same attributes for the xsl:document element, but different navigation buttons. The same rule is used for the bibliography, but bibliofile is used instead of indexfile for the name of the HTML file.
224 <xsl:template match="theindex" mode ="xsplit">
225   <xsl:variable name="filename">
226     <xsl:call-template name="indexfile" />
227   </xsl:variable>
228   <xsl:document ... >
229     <html>
230       <xsl:call-template name="html-meta" />
231       <body>
232         <xsl:call-template name="title.buttons" />
233         <xsl:apply-templates select="." mode="ysplit" />
234         <xsl:call-template name="back.to.main.buttons" />
235       </body>
236     </html>
237   </xsl:document>
238 </xsl:template>
239
240 <xsl:template match="biblio" mode ="xsplit"> ...
This is for the footnotes. The idea is the same, but we have a named template, so that we cannot use modes.
241 <xsl:template name="footnotes-xsplit">
242   <xsl:variable name="filename">
243     <xsl:call-template name="footnotefile" />
244   </xsl:variable>
245   <xsl:document ... >
246     <html>
247       <xsl:call-template name="html-meta" />
248       <body>
249         <xsl:call-template name="title.buttons" />
250         <xsl:call-template name="footnotes-ysplit" />
251         <xsl:call-template name="back.to.main.buttons" />
252       </body>
253     </html>
254   </xsl:document>
255 </xsl:template>
This prints `Back to main page´ on the bottom of a page.
256 <xsl:template name="back.to.main">
257   <xsl:variable name="mainpage">
258     <xsl:call-template name ="mainfile" />
259   </xsl:variable>
260   <div class="float-center">
261     <a href="{$mainpage}">Back to main page</a>
262   </div>
263 </xsl:template>
This creates the buttons at the end of a separated page.
264 <xsl:template name="back.to.main.buttons">
265   <hr/>
266   <xsl:call-template name="std.buttons" />
267   <xsl:call-template name="back.to.main" />
268 </xsl:template>
This creates the buttons at the start of a separated page. Same buttons, but we use the title of the document.
269 <xsl:template name="title.buttons">
270   <xsl:call-template name="std.buttons" />
271   <div class="float-center"><xsl:call-template name="title" /></div>
272 </xsl:template>
This piece of code translates id = `foo´ into href = `bar#foo´, the non trivial point being how to compute the file name `bar´. This works only if the DTD declares the id attribute of the current element to be of type `ID´.
273 <xsl:template name="id-to-href">
274   <xsl:attribute name="href">
275     <xsl:apply-templates mode="targetfile" select="id(@id)" />
276     <xsl:text>#</xsl:text><xsl:value-of select="./@id"/>
277   </xsl:attribute>
278 </xsl:template>
This piece of code translates target = `foo´ into href = `bar#foo´, using the same method as above.
279 <xsl:template name="target-to-href">
280   <xsl:attribute name="href">
281     <xsl:apply-templates mode="targetfile" select="id(@target)" />
282     <xsl:text>#</xsl:text><xsl:value-of select="@target"/>
283   </xsl:attribute>
284 </xsl:template>
Footnotes in the Raweb are inlined, on the contrary, here, we gather them at the end of the main page, or on a separate page, using the following rule. The non-obvious point is that, if we denote by A the code created here, and by B the translation of a footnote, we have a link from A to B, and a backlink from B to A (this could be omitted, just use then `back´ button of your browser). Assume that this is note 25, with uid33 as ID; in this case element B will have uid33 as unique id, and element A will have note25 as identifier (this means that a link to a footnote refers to its text). In fact, A contains a rule (separating it from the previous note) and a <p> that serves as anchor, containing and a header, like `Note 25.´, and the text of the note; the backlink is activated by clicking on the header.
There is a non trivial question here: Are paragraphs allowed in a footnote? They are (by default) removed by Tralics; but we have to take both cases into account.
285 <xsl:template match='note' mode="footnote">
286     <hr/>
287     <p class='nofirst noindent'>
288       <xsl:attribute name="id">
289         <xsl:text>note</xsl:text>
290         <xsl:call-template name="calculateFootnoteNumber"/>
291       </xsl:attribute>
292       <a title="back to text">
293         <xsl:call-template name="id-to-href"/>
294         <xsl:text>Note </xsl:text>
295         <xsl:call-template name="calculateFootnoteNumber"/>
296         <xsl:text>. </xsl:text>
297       </a>
298       <xsl:if test="not(p)">
299         <xsl:apply-templates />
300       </xsl:if>
301     </p>
302     <xsl:if test="p">
303        <xsl:apply-templates />
304     </xsl:if>
305 </xsl:template>
Element B is an anchor, whose text is `(note: A)´, where A is the character U+27B3, a kind of arrow. There is also a title, formed of the start of the text.
306 <xsl:template match='note'> 307 <a id="{@id}"> 308 <xsl:call-template name="note-to-href"/> 309 <xsl:apply-templates mode="xreftitle" select="."/> 310 <small>(note: </small> 311 <xsl:text>➳</xsl:text> 312 <small>)</small> 313 </a> 314 </xsl:template>
This removes footnotes in the meta data.
315 <xsl:template match='note' mode="text" />
This returns a unique ID for a footnote, namely its number.
316 <xsl:template match='note' mode="xref">
317    <xsl:call-template name="calculateFootnoteNumber"/>
318 </xsl:template>
In the case of a footnote, say note 25, we create a link from the current page to the page that contains the notes, with attribute href = `foo#note25´; the non trivial point being how to compute the file name `foo´.
319 <xsl:template name="note-to-href">
320   <xsl:attribute name="href">
321     <xsl:call-template name="footnotefile" />
322     <xsl:text>#note</xsl:text>
323     <xsl:apply-templates mode="xref" select ="."/>
324   </xsl:attribute>
325 </xsl:template>
This completes the translation of a footnote. The non-trivial point here is the title: we convert the note in a string, and if the string is small enough, it will be the title. Otherwise, we consider only the first one hundred characters.
326 <xsl:template mode="xreftitle" match="note"> 327 <xsl:variable name="text" select="string(normalize-space(.))" /> 328 <xsl:attribute name="title"> 329 <xsl:choose> 330 <xsl:when test="string-length($text) > 110"> 331 <xsl:value-of select="substring($text,1,100)"/> 332 <xsl:text>...</xsl:text> 333 </xsl:when> 334 <xsl:otherwise> 335 <xsl:value-of select="$text"/> 336 </xsl:otherwise> 337 </xsl:choose> 338 </xsl:attribute> 339 </xsl:template>
Dispatcher template. The action depends on whether a separate page is needed.
340 <xsl:template name="footnotes">
341  <xsl:choose>
342    <xsl:when test="not($split='false') and $separate-footnote='true' ">
343      <xsl:call-template name="footnotes-xsplit" />
344    </xsl:when>
345    <xsl:otherwise>
346      <xsl:call-template name="footnotes-ysplit" />
347    </xsl:otherwise>
348  </xsl:choose>
349 </xsl:template>
This is obvious. we output a title, followed by all the notes.
350 <xsl:template name="footnotes-ysplit">
351   <h1>Notes</h1>
352   <xsl:for-each select="//note">
353     <xsl:apply-templates select="." mode="footnote"/>
354   </xsl:for-each>
355 </xsl:template>
The index is created by the following trivial rule.
356 <xsl:template match="theindex" mode="ysplit">
357   <h1 id="index">Index</h1>
358   <xsl:apply-templates/>
359 </xsl:template>
The situation becomes complicated when we try to use a separate page for the index. Hence the real rule is the following.
360 <xsl:template match="theindex">
361  <xsl:choose>
362    <xsl:when test="not($split='false') and $separate-index='true' ">
363      <xsl:apply-templates select="." mode="xsplit" />
364    </xsl:when>
365    <xsl:otherwise>
366      <xsl:apply-templates select="." mode="ysplit" />
367    </xsl:otherwise>
368  </xsl:choose>
369 </xsl:template>
We use the same method for the bibliography, but a different variable is used.
370 <xsl:template match="biblio">
371  <xsl:choose>
372    <xsl:when test="not($split='false') and $separate-biblio='true' ">
373      <xsl:apply-templates select="." mode="xsplit" />
374    </xsl:when>
375    <xsl:otherwise>
376      <xsl:apply-templates select="." mode="ysplit" />
377    </xsl:otherwise>
378  </xsl:choose>
379 </xsl:template>
This is how we insert the index in the TOC.
380 <xsl:template match="theindex" mode="xtoc"> 381 <xsl:variable name="link"> 382 <xsl:call-template name="indexfile" /> 383 <xsl:text>#index</xsl:text> 384 </xsl:variable> 385 <xsl:text>
</xsl:text> <br/> 386 <a href="{$link}"> <b>Index</b></a> 387 </xsl:template>
If the source contains \index{foo!bar}, Tralics will add an anchor at the current location (unless there is already an anchor there); let´s denote it by A. Moreover, an <index> element with value `foo´ (at level one) and a second <index> with value `bar´ (at level two) will be added at the end of the document, sorted in alphabetic order; let´s denote these elements by B and C. Element A has an id, say D, and element C has a target attribute, which is a list of ids, and D is added to it.
The HTML translation of elements like B and C is a <div> element, with a class attribute, with value `idx1´, `idx2´, or `idx3´, depending on the level; each D in the attribute target is translated as a link to A.
388 <xsl:template match="index"> 389 <xsl:text>
</xsl:text> 390 <div class="idx{@level}"> 391 <xsl:apply-templates/> 392 <xsl:for-each select="id(@target)"> 393 <xsl:if test="position()=1">: </xsl:if> 394 <a> 395 <xsl:call-template name="id-to-href"/> 396 <xsl:apply-templates mode="xref" select="."/> 397 </a> 398 <xsl:call-template name="separateur.objet"/> 399 </xsl:for-each> 400 </div> 401 </xsl:template>
This what an <anchor> produces in the index; a character that looks like a star.
402 <xsl:template match="anchor" mode ='xref'> 403 <xsl:text>✻</xsl:text> 404 </xsl:template>
The following lines come from the raweb.css style sheet and explain how to indent the lines of the index.
.idx1 { text-indent:0em; margin-top:2px}
.idx2 { text-indent:2em;}
.idx3 { text-indent:4em;}
We have a template calculateNumber that returns the number of a section. In the case of a thesis, we restrict attention to the mainmatter (front matter and back matter contain only unnumbered chapters). The code shown here must be changed in the case of the report. There is also calculateNumberSpace that adds a dot and a space after the number.
405 <xsl:template name="calculateNumber">
406  <xsl:if test= "ancestor::mainmatter">
407    <xsl:number level="multiple" from="/mainmatter" grouping-separator="."
408                count="div0|div1|div2|div3|div4|div5"/>
409  </xsl:if>
410 </xsl:template>
This is how we output a section of level three. Note that the default translation of <head> is empty. If the head appears in the TOC, it will be translated in mode `caption´, in which case anchors, footnotes, etc., are removed. Here we use full mode.
411 <xsl:template match="div3">
412   <h4>
413     <xsl:call-template name="id"/>
414     <xsl:call-template name="calculateNumberSpace"/>
415     <xsl:apply-templates select="head" mode="full"/>
416   </h4>
417   <xsl:apply-templates/>
418 </xsl:template>
The translation of <tableofcontents> is the TOC, it is a <h1> element (named `Table des Matières´ in the French thesis, `Table of contents´ in the English report) containing all divisions (the short TOC has only chapters), plus bibliography, index, and TOC (for the short TOC only), evaluated in `xtoc´ mode. Translation is formed of a newline character, a <br> element, some space, and a anchor to the section (with the number and title of the section).
419 <xsl:template match="div3" mode="xtoc"> 420 <xsl:text>
</xsl:text> 421 <br/> 422 <xsl:apply-templates mode="prefix" select="."/> 423 <xsl:call-template name="calculateNumberSpace"/> 424 <a> 425 <xsl:call-template name="id-to-href"/> 426 <xsl:apply-templates select="head" mode="caption"/> 427 </a> 428 </xsl:template>
This is how we indent the section. A <div2> has less <spaces> and a <div4> has more. Each template creates 5 non-break space characters.
429 <xsl:template match="div3" mode="prefix">
430   <xsl:call-template name="spaces"/>
431   <xsl:call-template name="spaces"/>
432   <xsl:call-template name="spaces"/>
433 </xsl:template>
All elements that can be referenced to have a rule in mode `xreftitle´, the action is generally empty; in the case of <citation>, we select the authors in mode `xref-fullauthor´; in the case of a note, we select the text of the note (see above); in the case of a division, we select the title. In all cases, the text becomes the value of the attribute title of the anchor. We show here only the case of a division of level 3.
434 <xsl:template mode="xreftitle" match="div3">
435   <xsl:attribute name="title">
436      <xsl:apply-templates select="head" mode="caption"/>
437   </xsl:attribute>
438 </xsl:template>
When a reference is made to an item, we evaluate it in mode `xref´; the result is, for instance, a section number computed by the rule given here. The case of a figure, a footnote, a table, a citation, is similar.
439 <xsl:template mode="xref" match="div3">
440   <xsl:call-template name="calculateNumber"/>
441 </xsl:template>
In the case of an <item>, we use the label if there is any (this is important, in the case where Tralics has calculated the number, and we do not want the style sheet to computed something different).
442 <xsl:template match="item" mode="xref">
443   <xsl:choose>
444     <xsl:when test="@label">
445       <xsl:value-of select="@label" />
446     </xsl:when>
447     <xsl:otherwise>
448       <xsl:call-template name="calculateItemNumber"/>
449     </xsl:otherwise>
450   </xsl:choose>
451 </xsl:template>
This is how we translate a <p> element; the result is a <p>, unless we are in a verbatim section, case where new lines are obeyed. If the paragraph should be centered, we add a style attribute, if it should not be indented, we add a class attribute.
452 <xsl:template match="p">
453   <xsl:choose>
454     <xsl:when test="parent::pre">
455       <xsl:apply-templates/>
456     </xsl:when>
457     <xsl:otherwise>
458       <p>
459         <xsl:if test="@noindent = 'true'">
460           <xsl:attribute name="class">nofirst noindent</xsl:attribute>
461         </xsl:if>
462         <xsl:if test="@rend = 'center'">
463           <xsl:attribute name="style">text-align:center</xsl:attribute>
464         </xsl:if>
465         <xsl:apply-templates/>
466       </p>
467     </xsl:otherwise>
468   </xsl:choose>
469 </xsl:template>
470 <xsl:template match="dedicace">
471   <blockquote><p><i><xsl:apply-templates/></i></p></blockquote>
472 </xsl:template>
This piece of code is used for inserting a non-floating image, without caption (in the case where we want to show in the HTML file the LaTeX output, for instance).
473 <xsl:template match="rawimage">
474   <img>
475     <xsl:attribute name="src">
476       <xsl:apply-templates/>
477     </xsl:attribute>
478     <xsl:attribute name="alt">
479       <xsl:apply-templates/>
480     </xsl:attribute>
481   </img>
482 </xsl:template>