| Prev | Part II. Guided Tour and Tutorial Chapter 5. Introduction to ProActive Features |  | Next |
| Prev | Part II. Guided Tour and Tutorial Chapter 5. Introduction to ProActive Features | | Next |
This chapter will present some of the features offered by ProActive, namely:
parallel processing: how you can run several tasks in parallel.
synchronization: how you can synchronize tasks.
migration: how you can migrate Active Objects.
Distribution is often used for CPU-intensive applications, where parallelism is a key for performance.
A typical application is C3D.
Note that parallelisation of programs can be facilitated with ProActive, thanks to asynchronous method calls (see Section 13.8, “Asynchronous calls and futures”), as well as group communications (see Chapter 14, Typed Group Communication).
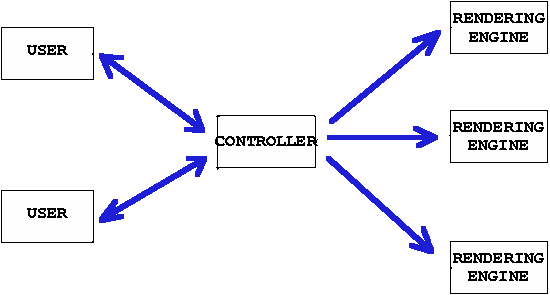
C3D is a Java benchmark application that measures the performance of a 3D raytracer renderer distributed over several Java virtual machines using Java RMI. It showcases some of the benefits of ProActive, notably the ease of distributed programming, and the speedup through parallel calculation.
Several users can collaboratively view and manipulate a 3D scene. The image of the scene is calculated by a dynamic set of rendering engines using a raytracing algorithm, everything being controlled by a central dispatcher.
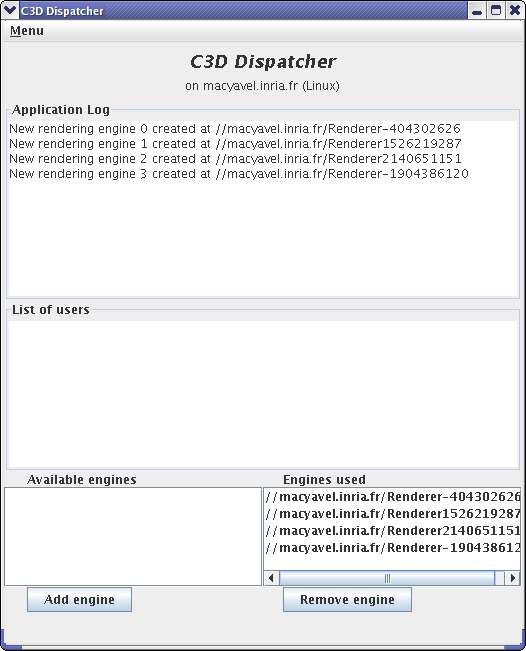
Using the script c3d_no_user, a "Dispatcher"
object is launched (ie a centralized server) as well as 4 "Renderer"
objects, which are active objects to be used for parallel
rendering.
The bottom part of the window allows to choose which renderers should participate in the rendering. You may want to stop using a given machine (because for instance it is overloaded), and thus remove it from the renderers used in the current computation.
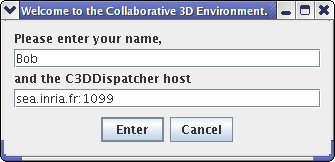
Using c3d_add_user,
Connect on the current host (proposed by default) by just giving your name.

For example, the user 'alice'
Spin the scene, add a random sphere, and observe how the action takes place immediately
Add and remove renderers, and observe the effect on the 'speed up' indication from the user window.
Which configuration is the fastest for the rendering?
Are you on a multi-processor machine?
![[Note]](images/note.png) | Note |
|---|---|
You might not perceive the difference of the performance. The difference is better seen with more distributed nodes and objects (for example on a cluster) . |
Using the c3d_add_user script, and
specifying the host (set to local host
bydefault)
If you use rlogin, make sure the DISPLAY is properly set. You must use the same version of ProActive on both machines!
Test the collaborative behavior of the application when several users are connected.
Notice that a collaborative consensus must be reached before starting some actions (or that a timeout occured).
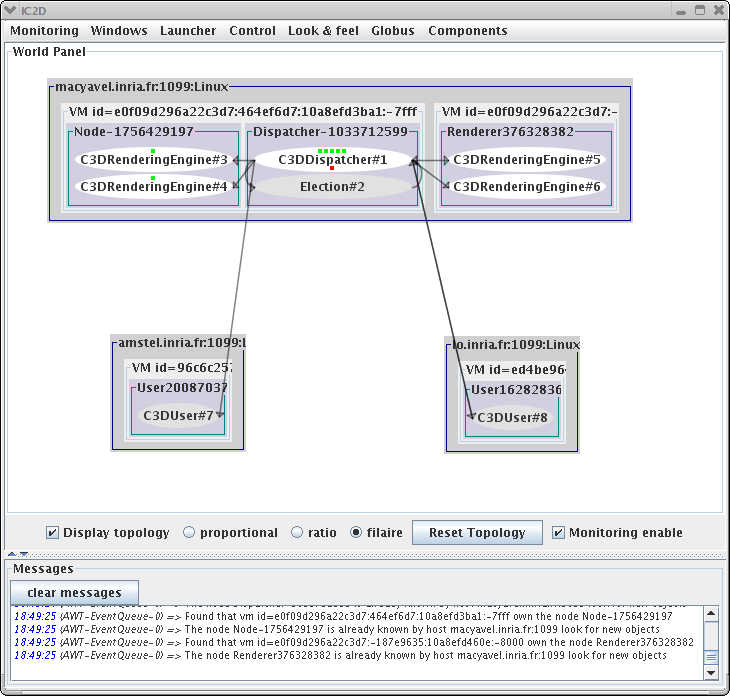
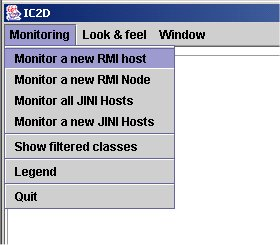
You will need at first to start IC2D using either ProActive/scripts/unix/ic2d.sh or ProActive/scripts/windows/ic2d.bat depending on your environment.
In order to visualize all Active objects, you need to acquire ('Monitoring/Monitor a new RMI host' menu):
The machine on which you started the 'Dispatcher'
The machine on which you started the second user
You'll need to type in the edit field asking it the name of each machine and the RMI port being used separated by a colon.
Add random spheres for instance, and observe messages (Requests) between Active Objects.
Add and remove renderers, and check graphically whether the corresponding Active Objects are contacted or not, in order to achieve the rendering.
You can textually visualize this information by activating 'add event timeline for this WorldObject' on the World panel with the right mouse button, and then 'show the event list window' on the top menu window
From IC2D, you can drag-and-drop active objects from one JVM to another. Click the right button on a C3DRenderingEngine, and drag and drop it in another JVM. Observe the migration taking place.
Add a new sphere, using all rendering engines, and check that the messages are still sent to the active object that was asked to migrate.
As migration and communications are implemented in a fully compatible manner, you can even migrate with IC2D an active object while it is communicating (for instance when a rendering action is in progress). Give it a try!
| Note |
|---|---|
You can also migrate Active Objects which create a GUI. If you do that for the User, you will see the graphical window beiung destroyed, and rebuilt once more. |
Manually you can start a new JVM - a 'Node' in the ProActive terminology - that will be used in a running system.
On a different machine, or by remote login on another host, start another Node, named for instance NodeZ
linux> startNode.sh rmi://mymachine/NodeZ &
windows> startNode.bat rmi://mymachine/NodeZ
The node should appear in IC2D when you request the monitoring of the new machine involved (Monitoring menu, then 'monitor new RMI host'.
The node just started has no active object running in it. Drag and drop one of the renderers, and check that the node is now taking place in the computation
Spin the scene to trigger a new rendering
See the topology
| Note |
|---|---|
If you feel uncomfortable with the automatic layout, switch to manual using the 'manual layout' option (right click on the World panel). You can then reorganize the layout of the machines. |
To fully distribute the computation, start several nodes (you need 2 more) and drag-and drop renderers in them.
Depending on the machines you have, the complexity of the image, look for the most efficient configuration.
You can also write components with the Fractive API, which is an implementation of Fractal in ProActive. You should check the section on components for more information (Part V, “Composing”). There is a long explanation of the C3D component version (Chapter 10, C3D - from Active Objects to Components). The visual aspect is very similar to the standard Active Object C3D version. That's on purpose, to show how easy it is to transform code into components. If you want to run a components version of c3d, try this:
scripts/unix/components$ ./c3d.sh
scripts/windows/components$ c3d.bat
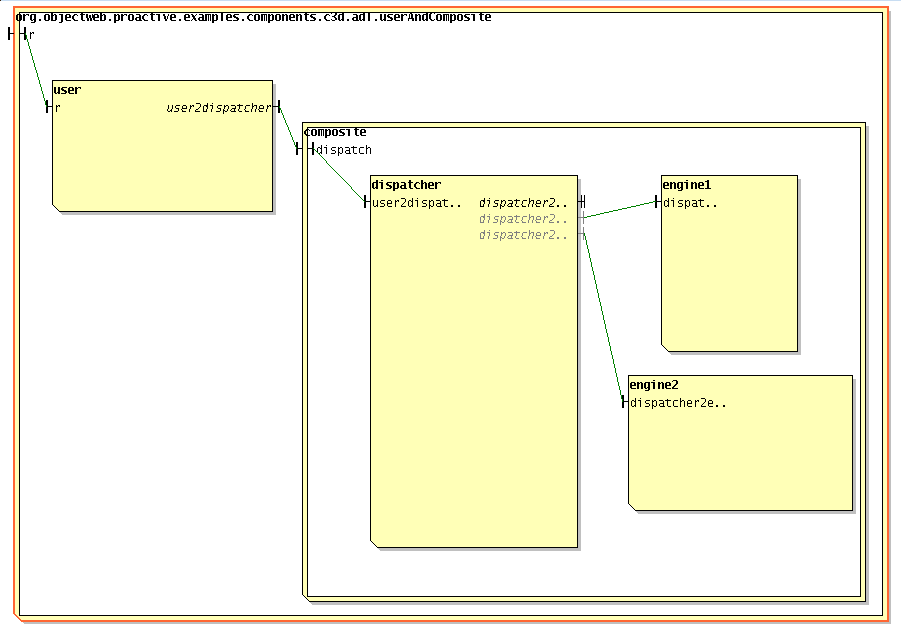
The component binding is done through the Fractal ADL, which is a standard way of writing components through an xml file. You can have a visual representation with IC2D (start IC2D, menu->Components->Start the components GUI). You should specify how to read the file. You have to enter:
File->Storage: ProActive/src.
File->Open:ProActive/src/org/objectweb/proactive/examples/components/c3d/adl/userAndComposite.fractal.
The main classes of this application are:
org.objectweb.proactive.examples.c3d.C3DUser.java
org.objectweb.proactive.examples.c3d.C3DRenderingEngine.java
org.objectweb.proactive.examples.c3d.C3DDispatcher.java
In the Dispatcher, look at the method public void
rotateScene(int i_user, String i_user_name, Vec angle) that
handles election of the next action to undertake.
ProActive provides an advanced synchronization mechanism that allows an easy and safe implementation of potentially complex synchronization policies.
This is illustrated by two examples:
The readers and the writers
The dining philosophers
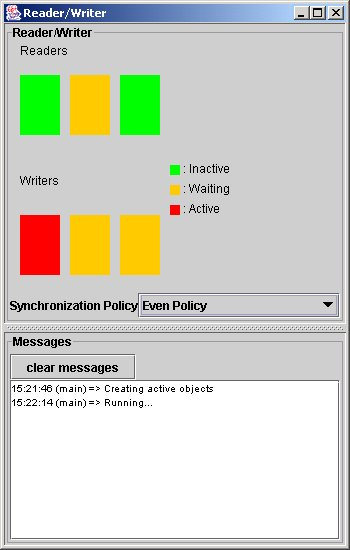
The readers and the writers want to access the same data. In order to allow concurrency while ensuring the consistency of the readings, accesses to the data have to be synchronized upon a specified policy. Thanks to ProActive, the accesses are guaranteed to be allowed sequentially.
The implementation with ProActive uses 3 active objects: Reader, Writer, and the controller class (ReaderWriter).
ProActive starts a node (i.e. a JVM) on the current machine, and creates 3 Writer, 3 Reader, a ReaderWriter (the controller of the application) and a ReaderDisplay, that are active objects.
What happens when priority is set to 'reader priority'?
in
org.objectweb.proactive.examples.readers.ReaderWriter.java.
More specifically, look at the routines in:
public void evenPolicy(org.objectweb.proactive.Service service)
public void readerPolicy(org.objectweb.proactive.Service service)
public void writerPolicy(org.objectweb.proactive.Service service)
Look at the inner class MyRequestFilterm that
implements
org.objectweb.proactive.core.body.request.RequestFilter.
How does it work?
For instance, let several writers go through at the same time.
Observe the Writer Policy policy before recompiling
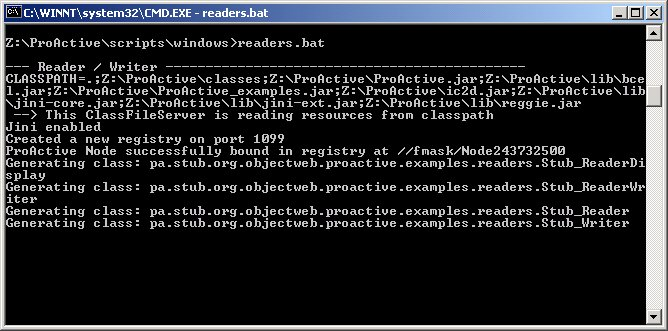
Recompile (using compile.sh readers or compile.bat readers)
Observe that stub classes are regenerated and recompiled
Observe the difference due to the new synchronization policy: what happens now?
Correct the bug and recompile again ; check that everything is back to normal
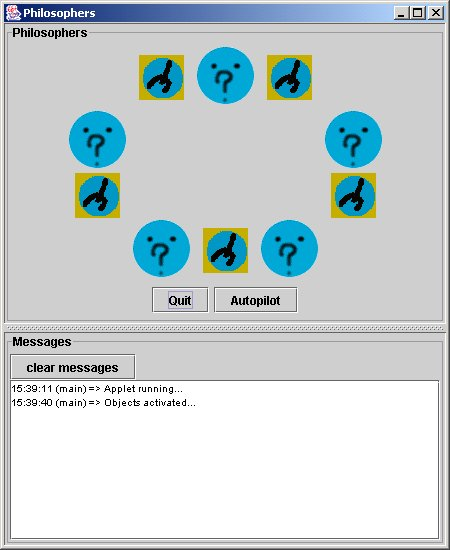
The 'dining philosophers' problem is a classic exercise in concurrent programming. The goal is to avoid deadlocks.
We have provided an illustration of the solution using ProActive, where all the philosophers are active objects, as well as the table (controller) and the dinner frame (user interface).
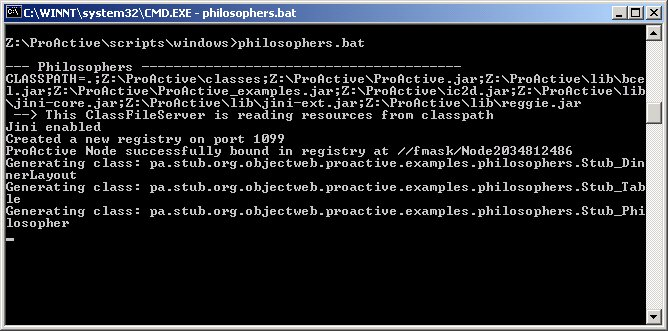
ProActive creates a new node and instantiates the active objects of the application: DinnerLayout, Table, and Philosopher
The pictures represent the state of the philosophers. They can be:
 philosophing
 hungry, wants the
fork!
hungry, wants the
fork!
 eating
The forks can have two states:
 taken
taken
 free
free
Click on the philosophers' heads to switch their modes
Test that there are no deadlocks!
Test that you can starve one of the philosophers (i.e. the others alternate eating and thinking while one never eats!)
IC2D is a graphical environment for monitoring and steering of distributed and Grid Computing applications.
Being in the autopilot mode, start the IC2D visualization application (using ic2d.sh or ic2d.bat)


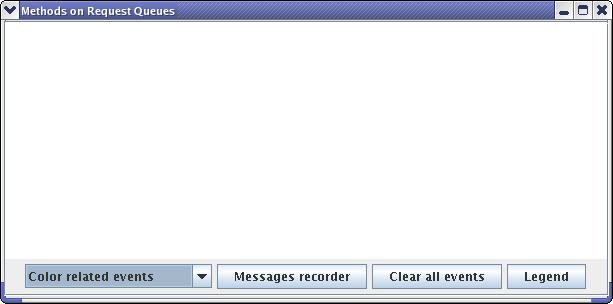
The ic2d GUI is started. It is composed of 2 panels: the main panel and the request queue panel
Acquire your current machine
It is possible to visualize the status of each active object (processing, waiting etc...), the communications between active objects, and the topology of the system (here all active objects are in the same node):


ProActive allows the transparent migration of objects between virtual machines.
A nice visual example is the penguin's one.
This example shows a set of mobile agents moving around while still communicating with their base and with each other. It also features the capability to move a swing window between screens while moving an agent from one JVM to the other.
Using the ic2d script
Acquire the machines you have started nodes on
On the Advanced Penguin Controller window: button 'add agent'
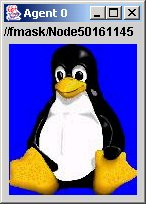
An agent is materialized by a picture in a java window.
Select it, and press button 'start'
Observe that the active object is moving between the machines, and that the penguin window disappears and reappears on the screen associated with the new JVM.
After selecting them, use the buttons to:
Communicate with them ('chained calls')
Start, stop, resume them
Trigger a communication between them ('call another agent')
Start the same script on a different computer, using another screen and keyboard
Monitor the corresponding JVM with IC2D
Drag-and-drop the active object 'AdvancedPenguinController' with IC2D into the newly created JVM: the control window will appear on the other computer
And its user can now control the penguins application.
Still with IC2D, doing a drag-and-drop back to the original JVM, you will be able to get back the window, and control yourself the application.
© 2001-2007 INRIA Sophia Antipolis All Rights Reserved