The DCE ns-3 module provides facilities to execute within ns-3 existing implementations of userspace and kernelspace network protocols.
As of today, the Quagga routing protocol implementation, the CCNx CCN implementation, and recent versions of the Linux kernel network stack are known to run within DCE, hence allowing network protocol experimenters and researchers to use the unmodified implementation of their protocols for real-world deployments and simulations.
DCE has been tested only on some systems see: Ns-3-dce portability.
First you need to download Bake using Mercurial and set some variables:
$ hg clone http://code.nsnam.org/bake bake
$ export BAKE_HOME=`pwd`/bake
$ export PATH=$PATH:$BAKE_HOME
$ export PYTHONPATH=$PYTHONPATH:$BAKE_HOME
then you must to create a directory for DCE and install it using bake:
$ mkdir dce
$ cd dce
$ bake.py configure -e dce-ns3
$ bake.py install
the output should look likes this:
Installing selected module and dependencies.
Please, be patient, this may take a while!
>> Downloading ccnx
>> Download ccnx - OK
>> Downloading iperf
>> Download iperf - OK
>> Downloading ns-3-dev-dce
>> Download ns-3-dev-dce - OK
>> Downloading dce-ns3
>> Download dce-ns3 - OK
>> Building ccnx
>> Built ccnx - OK
>> Building iperf
>> Built iperf - OK
>> Building ns-3-dev-dce
>> Built ns-3-dev-dce - OK
>> Building dce-ns3
>> Built dce-ns3 - OK
Call the bakeSetEnv.sh script to correctly setup the environment variables (i.e., PATH, LD_LIBRARY_PATH and PKG_CONFIG_PATH)
$ source bakeSetEnv.sh
Under example directory there is the sources files of DCE examples simulations.
This example execute the binaries named udp-client and udp-server under NS3 using DCE.
These 2 binaries are writen using libc api in order to send and receive udp packets.
Please take time to look at the source dce-udp-simple.cc which is our NS3 simulation “script”:
int main (int argc, char *argv[])
{
  CommandLine cmd;
  cmd.Parse (argc, argv);

  NodeContainer nodes;
  nodes.Create (1);

  InternetStackHelper stack;
  stack.Install (nodes);

  DceManagerHelper dceManager;
  dceManager.Install (nodes);

  DceApplicationHelper dce;
  ApplicationContainer apps;

  dce.SetStackSize (1<<20);

  dce.SetBinary ("udp-server");
  dce.ResetArguments();
  apps = dce.Install (nodes.Get (0));
  apps.Start (Seconds (4.0));

  dce.SetBinary ("udp-client");
  dce.ResetArguments();
  dce.AddArgument ("127.0.0.1");
  apps = dce.Install (nodes.Get (0));
  apps.Start (Seconds (4.5));

  Simulator::Stop (Seconds(1000100.0));
  Simulator::Run ();
  Simulator::Destroy ();

  return 0;
}
You can notice that we create a NS-3 Node with an Internet Stack (please refer to NS-3 doc. for more info), and we can also see 2 new Helpers:
- DceManagerHelper which is used to Manage DCE loading system in each node where DCE will be used.
- DceApplicationHelper which is used to describe real application to be lauched by DCE within NS-3 simulation environnement.
As you have already set the environnement variables you can launch this simulation from anywhere:
$ cd /tmp
$ mkdir my_test
$ cd my_test
$ dce-udp-simple
$ ls
  elf-cache  files-0 exitprocs
$ ls -lR files-0
  files-0:
  total 4
  drwxr-x--- 3 furbani planete 4096 Sep  2 17:02 var

  files-0/var:
  total 4
  drwxr-x--- 4 furbani planete 4096 Sep  2 17:02 log

  files-0/var/log:
  total 8
  drwxr-x--- 2 furbani planete 4096 Sep  2 17:02 53512
  drwxr-x--- 2 furbani planete 4096 Sep  2 17:02 53513

  files-0/var/log/53512:
  total 12
  -rw------- 1 furbani planete  12 Sep  2 17:02 cmdline
  -rw------- 1 furbani planete 185 Sep  2 17:02 status
  -rw------- 1 furbani planete   0 Sep  2 17:02 stderr
  -rw------- 1 furbani planete  21 Sep  2 17:02 stdout

  files-0/var/log/53513:
  total 12
  -rw------- 1 furbani planete  22 Sep  2 17:02 cmdline
  -rw------- 1 furbani planete 185 Sep  2 17:02 status
  -rw------- 1 furbani planete   0 Sep  2 17:02 stderr
  -rw------- 1 furbani planete  22 Sep  2 17:02 stdout
This simulation produces two directories, the content of elf-cache is not important now for us, but files-0 is. files-0 contains first node’s file system, it also contains the output files of the dce applications launched on this node. In the /var/log directory there is some directories named with the virtual pid of corresponding DCE applications. Under these directories there is always 4 files:
Before launching a simulation, you may also create files-xx directories and provide files required by the applications to be executed correctly.
This example show the usage of iperf with DCE. Bake has already installed for you iperf. You can find the excutable under build/bin directory:
$ ls -l build/bin/iperf
-rwxr-xr-x 1 furbani planete 233746 Nov 23 12:21 build/bin/iperf
the scenario is here:
$ cat source/dce/example/dce-iperf.cc
#include "ns3/network-module.h"
#include "ns3/core-module.h"
#include "ns3/internet-module.h"
#include "ns3/dce-module.h"
#include "ns3/point-to-point-module.h"
#include "ns3/applications-module.h"
#include "ns3/netanim-module.h"
#include "ns3/constant-position-mobility-model.h"
#include "ccnx/misc-tools.h"

using namespace ns3;
// ===========================================================================
//
//         node 0                 node 1
//   +----------------+    +----------------+
//   |                |    |                |
//   +----------------+    +----------------+
//   |    10.1.1.1    |    |    10.1.1.2    |
//   +----------------+    +----------------+
//   | point-to-point |    | point-to-point |
//   +----------------+    +----------------+
//           |                     |
//           +---------------------+
//                5 Mbps, 2 ms
//
// 2 nodes : iperf client en iperf server ....
//
// Note : Tested with iperf 2.0.5, you need to modify iperf source in order to
//        allow DCE to have a chance to end an endless loop in iperf as follow:
//        in source named Thread.c at line 412 in method named thread_rest
//        you must add a sleep (1); to break the infinite loop....
// ===========================================================================
int main (int argc, char *argv[])
{
  bool useKernel = 0;
  bool useUdp = 0;
  std::string bandWidth = "1m";
  CommandLine cmd;
  cmd.AddValue ("kernel", "Use kernel linux IP stack.", useKernel);
  cmd.AddValue ("udp", "Use UDP. Default false (0)", useUdp);
  cmd.AddValue ("bw", "BandWidth. Default 1m.", bandWidth);
  cmd.Parse (argc, argv);

  NodeContainer nodes;
  nodes.Create (2);

  PointToPointHelper pointToPoint;
  pointToPoint.SetDeviceAttribute ("DataRate", StringValue ("5Mbps"));
  pointToPoint.SetChannelAttribute ("Delay", StringValue ("1ms"));

  NetDeviceContainer devices;
  devices = pointToPoint.Install (nodes);

  DceManagerHelper dceManager;
  dceManager.SetTaskManagerAttribute( "FiberManagerType", StringValue ( "UcontextFiberManager" ) );

  if (!useKernel)
    {
      InternetStackHelper stack;
      stack.Install (nodes);
    }
  else
    {
      dceManager.SetNetworkStack ("ns3::LinuxSocketFdFactory", "Library", StringValue ("liblinux.so"));
      LinuxStackHelper stack;
      stack.Install (nodes);
    }

  Ipv4AddressHelper address;
  address.SetBase ("10.1.1.0", "255.255.255.252");
  Ipv4InterfaceContainer interfaces = address.Assign (devices);

  // setup ip routes
  Ipv4GlobalRoutingHelper::PopulateRoutingTables ();

  dceManager.Install (nodes);

  DceApplicationHelper dce;
  ApplicationContainer apps;

  dce.SetStackSize (1<<20);

  // Launch iperf client on node 0
  dce.SetBinary ("iperf");
  dce.ResetArguments();
  dce.ResetEnvironment();
  dce.AddArgument ("-c");
  dce.AddArgument ("10.1.1.2");
  dce.AddArgument ("-i");
  dce.AddArgument ("1");
  dce.AddArgument ("--time");
  dce.AddArgument ("10");
  if (useUdp)
    {
      dce.AddArgument ("-u");
      dce.AddArgument ("-b");
      dce.AddArgument (bandWidth);
    }

  apps = dce.Install (nodes.Get (0));
  apps.Start (Seconds (0.7));
  apps.Stop (Seconds (20));

  // Launch iperf server on node 1
  dce.SetBinary ("iperf");
  dce.ResetArguments();
  dce.ResetEnvironment();
  dce.AddArgument ("-s");
  dce.AddArgument ("-P");
  dce.AddArgument ("1");
  if (useUdp)
    {
      dce.AddArgument ("-u");
    }

  apps = dce.Install (nodes.Get (1));

  pointToPoint.EnablePcapAll (useKernel?"iperf-kernel":"iperf-ns3", false);

  apps.Start (Seconds (0.6));

  setPos (nodes.Get (0), 1, 10, 0);
  setPos (nodes.Get (1), 50,10, 0);

  Simulator::Stop (Seconds(40.0));
  Simulator::Run ();
  Simulator::Destroy ();

  return 0;
}
This scenario is simple there is 2 nodes linked by a point 2 point link, the node 0 launch iperf as a client via the command iperf -c 10.1.1.2 -i 1 –time 10 and the node 1 launch iperf as a server via the command iperf -s -P 1. You can follow this to launch the experiement:
$ mkdir myiperftest
$ cd myiperftest
$ dce-iperf
$ ls
As we saw in the previous example the experience creates directories containing the outputs of different executables, take a look at the server (node 1) output:
$ cat files-1/var/log/*/stdout
------------------------------------------------------------
Server listening on TCP port 5001
TCP window size:  124 KByte (default)
------------------------------------------------------------
[  4] local 10.1.1.2 port 5001 connected with 10.1.1.1 port 49153
[ ID] Interval       Transfer     Bandwidth
[  4]  0.0-11.2 sec  5.75 MBytes  4.30 Mbits/sec
the client output bellow:
$ cat files-0/var/log/*/stdout
------------------------------------------------------------
Client connecting to 10.1.1.2, TCP port 5001
TCP window size:  124 KByte (default)
------------------------------------------------------------
[  3] local 10.1.1.1 port 49153 connected with 10.1.1.2 port 5001
[ ID] Interval       Transfer     Bandwidth
[  3]  0.0- 1.0 sec   640 KBytes  5.24 Mbits/sec
[  3]  1.0- 2.0 sec   512 KBytes  4.19 Mbits/sec
[  3]  2.0- 3.0 sec   640 KBytes  5.24 Mbits/sec
[  3]  3.0- 4.0 sec   512 KBytes  4.19 Mbits/sec
[  3]  4.0- 5.0 sec   512 KBytes  4.19 Mbits/sec
[  3]  5.0- 6.0 sec   640 KBytes  5.24 Mbits/sec
[  3]  6.0- 7.0 sec   512 KBytes  4.19 Mbits/sec
[  3]  7.0- 8.0 sec   640 KBytes  5.24 Mbits/sec
[  3]  8.0- 9.0 sec   512 KBytes  4.19 Mbits/sec
[  3]  9.0-10.0 sec   640 KBytes  5.24 Mbits/sec
[  3]  0.0-10.2 sec  5.75 MBytes  4.72 Mbits/sec
Quagga is a routing software suite, providing implementations of OSPFv2, OSPFv3, RIP v1 and v2, RIPng and BGP-4 for Unix platforms, particularly FreeBSD, Linux, Solaris and NetBSD.
For more information, see the latest support document.
Under example/ccnx there is more realistics examples using the implementation of an experimental protocol named CCN. In this examples we use the PARC implementation named CCNx (c) in its early version 0.6.2. Bake has already installed for you Ccnx.
This simulation launches a ccnd daemon, publishes a file using ccnput and retrieves this data using ccnget command, all commands are on a single node:
$ source bakeSetEnv.sh
$ dce-ccnd-simple
Verify the status of execution:
$ cat files-0/var/log/*/status
Start Time: NS3 Time:          0s (                   +0.0ns) , REAL Time: 1328707904
      Time: NS3 Time:          0s (                   +0.0ns) , REAL Time: 1328707904 --> Starting: /tmp/ccn/build/bin/ccnd
      Time: NS3 Time:         59s (         +59001000000.0ns) , REAL Time: 1328707905 --> Exit (0)
Start Time: NS3 Time:          1s (          +1000000000.0ns) , REAL Time: 1328707904
      Time: NS3 Time:          1s (          +1000000000.0ns) , REAL Time: 1328707904 --> Starting: /tmp/ccn/build/bin/ccnput
      Time: NS3 Time:          2s (          +2001000000.0ns) , REAL Time: 1328707905 --> Exit (0)
Start Time: NS3 Time:          2s (          +2000000000.0ns) , REAL Time: 1328707905
      Time: NS3 Time:          2s (          +2000000000.0ns) , REAL Time: 1328707905 --> Starting: /tmp/ccn/build/bin/ccnget
      Time: NS3 Time:          2s (          +2002000000.0ns) , REAL Time: 1328707905 --> Exit (0)
Start Time: NS3 Time:         59s (         +59000000000.0ns) , REAL Time: 1328707905
      Time: NS3 Time:         59s (         +59000000000.0ns) , REAL Time: 1328707905 --> Starting: /tmp/ccn/build/bin/ccndsmoketest
      Time: NS3 Time:         59s (         +59001000000.0ns) , REAL Time: 1328707905 --> Exit (0)
Verify the output of the command ccnget:
$ cat files-0/var/log/53514/stdout
The wanted data is here :)
This simulation uses multiple nodes placed in a line, each node are linked 2 by 2 by a point to point link, each node holds a ccnd daemon, the first node put a file (with ccnput), and the last node fetch this file (with ccnget). Also each node minus the first one forward interrests starting with /NODE0 to its predecessor.
The launch script dce-ccnd-linear-multiple offer 3 options:
 $ dce-ccnd-linear-multiple --PrintHelp
 --PrintHelp: Print this help message.
 --PrintGroups: Print the list of groups.
 --PrintTypeIds: Print all TypeIds.
 --PrintGroup=[group]: Print all TypeIds of group.
 --PrintAttributes=[typeid]: Print all attributes of typeid.
 --PrintGlobals: Print the list of globals.
 User Arguments:
     --nNodes: Number of nodes to place in the line
     --tcp: Use TCP to link ccnd daemons.
     --kernel: Use kernel linux IP stack.


1. nNodes allows to choose the Number of Nodes,
2. tcp allows to use TCP or if not UDP to connect the ccnd deamons (via forwarding interrest).
3. kernel allows to use Linux IP Stack (only working in advanced mode) instead of NS3 one.
for example with 200 nodes and TCP transport you should see this in the first ccnget output command:
$ dce-ccnd-linear-multiple --nNodes=200 --tcp=1 --kernel=0
$ cat files-199/var/log/30916/status
Start Time: NS3 Time:          2s (          +2700000000.0ns) , REAL Time: 1328710217
      Time: NS3 Time:          2s (          +2700000000.0ns) , REAL Time: 1328710217 --> Starting: build/bin/ccnget
      Time: NS3 Time:          4s (          +4399711801.0ns) , REAL Time: 1328710218 --> Exit (0)
$ cat files-199/var/log/30916/stdout
The wanted data is here :)[
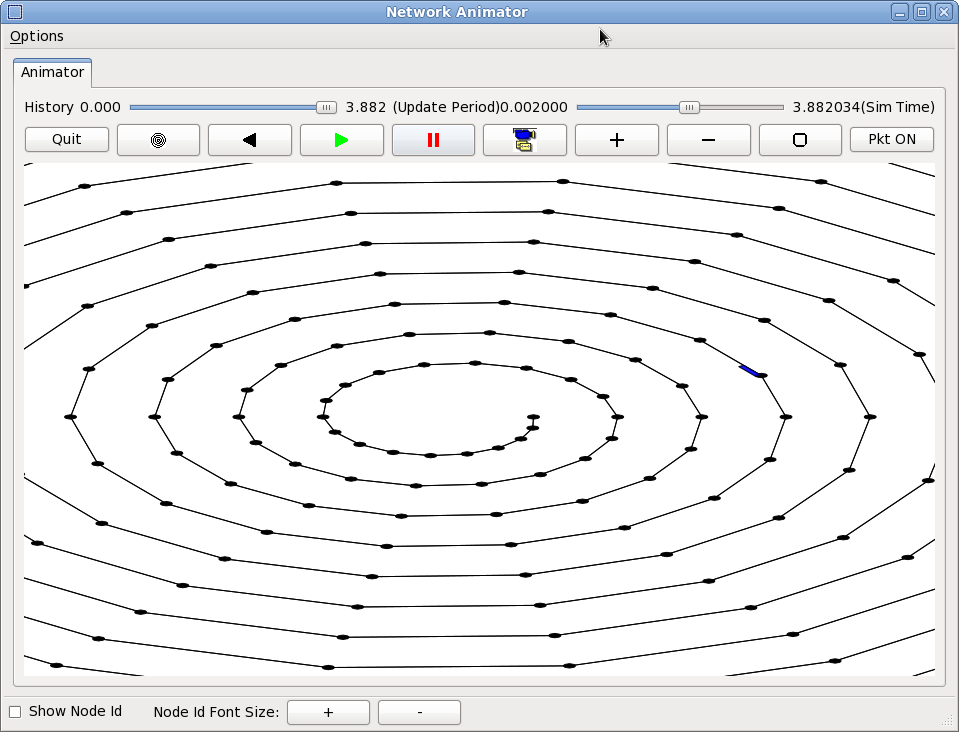
You can see that the first get take about 1.6 seconds. This example produce also a netanim file named NetAnimLinear.xml that you can use with the NetAnim tool in order to visualize packets moving through the Network: